Growing Potatoes in Containers Tips for a Bountiful Harvest
Welcome to the rewarding world of home gardening. You do not need a massive backyard or a sprawling farm to enjoy the taste of fresh, homegrown vegetables. Many people find that starting a small garden brings immense joy and satisfaction to their daily lives.
One of the most accessible ways to begin this journey is by growing potatoes in containers. This simple method allows you to cultivate a delicious crop right on your sunny patio or apartment balcony. Even if you have very limited outdoor space, you can still enjoy the process of watching your plants thrive from seed to harvest.
Success starts with choosing the right soil and ensuring your plants receive plenty of sunlight. By following these expert tips, both beginners and seasoned gardeners will learn the foundational steps required for a healthy yield. Get ready to transform your small space into a productive garden that provides fresh food throughout the entire season.
Why Container Gardening is Perfect for Potatoes
Container gardening has revolutionized how urban dwellers approach home food production. You no longer need a sprawling backyard or acres of land to enjoy a fresh, homegrown harvest. By utilizing pots and fabric bags, you can easily integrate potato cultivation into your daily life.
Space Efficiency for Urban Gardeners
The primary advantage of this method is its incredible versatility in tight spots. Urban gardening often involves working with balconies, patios, or small concrete courtyards where traditional planting is impossible. Pots allow you to maximize vertical space and keep your garden footprint minimal.
- Fits perfectly on small apartment balconies.
- Allows for easy relocation to follow sunlight.
- Eliminates the need for heavy tilling or digging.
Controlled Growing Environments
When you grow in containers, you gain total control over the root zone. Unlike in-ground beds, where soil quality can vary wildly, pots allow you to use premium, nutrient-dense potting mixes. This level of precision ensures that your potatoes receive the exact moisture and aeration they need to thrive.
Consistent moisture management is much simpler when you are not battling the drainage issues of native clay or sandy soils. By choosing the right container gardening setup, you create a stable environment that promotes faster growth and higher yields.
Reduced Risk of Soil-Borne Pests
One of the most frustrating aspects of traditional gardening is dealing with soil-borne diseases and pests. Because your plants are elevated in containers, they are naturally isolated from many common ground-dwelling threats. This physical barrier significantly lowers the risk of blight and other pathogens that often linger in the earth.
This method provides a cleaner, more manageable way to protect your crop throughout the season. By keeping your plants off the ground, you spend less time fighting infestations and more time enjoying the process of growing your own food.
Selecting the Best Potato Varieties for Pots
Selecting the right potato varieties is the foundation of a successful container garden. Because pots have limited space, choosing a cultivar that fits your container size and growing season is vital for a healthy yield.
Determining Maturity Dates
Potatoes are categorized by how long they take to reach maturity. Early-season varieties typically mature in 70 to 90 days, making them excellent for gardeners with shorter summers.
Mid-season and late-season varieties require 100 to 130 days or more. You should check your local frost dates to ensure your chosen variety has enough time to finish growing before the first hard freeze of autumn.
Choosing Between Determinate and Indeterminate Varieties
Understanding growth habits is key to managing your container space. Determinate potatoes grow to a specific height and produce a single, concentrated harvest of tubers.
In contrast, indeterminate potatoes continue to grow and produce tubers along their stems as long as the weather remains favorable. While indeterminate potatoes can yield more, they often require larger containers and more vertical support to thrive.
Recommended Cultivars for Container Success
For beginners, compact varieties are usually the safest bet. These plants are bred to stay small while still providing a generous amount of potatoes.
| Variety Name | Type | Maturity | Best Use |
|---|---|---|---|
| Yukon Gold | Determinate | Early | General Cooking |
| Red Pontiac | Determinate | Mid-Season | Boiling/Salads |
| Fingerling | Indeterminate | Late | Roasting |
| Purple Majesty | Determinate | Early | Baking |
Always look for seed potatoes labeled as disease-free to ensure your crop starts strong. By matching the variety to your container size and local climate, you set yourself up for a productive season.
Essential Supplies for Growing Potatoes in Containers

A bountiful harvest starts with gathering high-quality tools and materials. When you prepare your supplies before the season begins, you create a strong foundation for your plants. This proactive approach ensures that your journey of growing potatoes in containers remains organized and productive.
Selecting the Right Potting Materials
The success of your garden depends heavily on the quality of your base materials. You need a medium that provides excellent drainage while holding enough moisture for the tubers to thrive. Avoid heavy garden soil, as it often compacts and prevents roots from expanding properly.
Instead, look for high-quality potting mixes designed for vegetables. These blends typically contain peat moss, coconut coir, or perlite to improve aeration. Proper airflow is vital for preventing rot and encouraging healthy root development.
Tools for Maintenance and Harvesting
Having the right hand tools makes daily care much easier. You do not need expensive equipment, but a few basics will save you time and effort throughout the growing season. Consider keeping these items in your garden shed:
- A sturdy hand trowel for adjusting soil levels.
- Durable gardening gloves to protect your hands.
- A watering can with a gentle rose attachment.
- A small garden fork for checking soil moisture.
Organic Fertilizers and Soil Amendments
Feeding your plants the right nutrients is a key part of organic potato growing. Potatoes are heavy feeders that require consistent access to nitrogen, phosphorus, and potassium. Using organic options helps maintain soil health without the use of harsh synthetic chemicals.
Consider incorporating these natural amendments into your routine:
| Amendment Type | Primary Benefit | Application Timing |
|---|---|---|
| Compost | Improves soil structure | At planting |
| Bone Meal | Boosts phosphorus | Mid-season |
| Fish Emulsion | Provides nitrogen | Early growth |
By selecting these natural inputs, you ensure that your crop receives balanced nutrition. This commitment to quality materials will ultimately lead to a more robust and flavorful harvest.
Preparing Your Seed Potatoes for Planting
Successful container gardening begins with the careful selection and treatment of your planting material. Proper preparation of your seed potatoes is a vital precursor to planting that significantly influences the speed and health of initial sprout growth. By taking these steps, you ensure your plants have the best possible start in their new environment.
Sourcing Certified Disease-Free Seed Potatoes
Always start with high-quality stock from a reputable garden center or nursery. You should look for certified disease-free seed potatoes to prevent common soil-borne illnesses from entering your containers. Using grocery store potatoes is risky because they are often treated with sprout inhibitors that prevent growth.
The Chitting Process Explained
The practice of chitting potatoes involves pre-sprouting them in a cool, bright location before they hit the soil. This process gives your crop a head start, leading to earlier harvests and more robust plants. Simply place your tubers in an egg carton or shallow tray with the “rose end”—the side with the most eyes—facing upward.
Keep them in a spot with indirect sunlight for about two to four weeks. You will notice short, sturdy green or purple sprouts beginning to emerge. This stage of chitting potatoes is essential for maximizing your yield in a limited container space.
Cutting Larger Potatoes for Propagation
If you have larger tubers, you can cut them into smaller pieces to increase your total plant count. Each piece must contain at least two healthy eyes to ensure successful growth. After cutting, let the pieces sit in a dry, airy place for a day or two until the cut surface forms a protective callous.
This healing step is crucial to prevent rot once the pieces are buried in moist soil. Once the surface feels dry and leathery, your seed potatoes are ready for planting. This simple technique allows you to stretch your supply while maintaining high productivity.
Choosing and Preparing the Right Container
Finding the perfect home for your potatoes involves more than just picking a pretty pot. The physical vessel you select plays a major role in the health of the root system and the final size of your tubers. Successful container gardening relies on matching your equipment to the specific needs of the plant.
Evaluating Material Options
Different materials offer unique benefits for your plants. Fabric grow bags are popular because they provide excellent aeration, which prevents roots from circling and becoming pot-bound. Plastic pots are lightweight and retain moisture well, making them a reliable choice for warmer climates.
Terracotta pots offer a classic look but can dry out very quickly. You should choose a material that balances your local climate with your ability to monitor moisture levels. Consider the following comparison to help you decide:
| Material | Moisture Retention | Aeration Quality | Best Use Case |
|---|---|---|---|
| Fabric Bags | Low | Excellent | Preventing root rot |
| Plastic Pots | High | Moderate | Hot, dry summers |
| Terracotta | Low | High | Cool, humid regions |
Ensuring Proper Drainage
Potatoes hate sitting in soggy soil, which leads to rot and stunted growth. Regardless of the material you choose, you must ensure there are plenty of holes at the bottom of the vessel. If your container lacks drainage, you can easily drill extra holes to allow excess water to escape.
Adding a layer of gravel at the bottom is often unnecessary and can actually reduce the available space for roots. Instead, focus on using a high-quality potting mix that drains freely. This simple step keeps the environment healthy for your developing crop.
Calculating Container Size Requirements
The correct potato container size is vital for a bountiful harvest. Each plant generally requires at least 2.5 to 5 gallons of soil volume to produce a decent yield. If you are using a large tub, you can plant multiple seed potatoes as long as you provide about 10 inches of space between each one.
Always aim for a container that is at least 12 to 15 inches deep. This depth allows the tubers enough room to expand and develop fully. By planning your space carefully, you ensure that every plant has the resources it needs to thrive.
The Ideal Soil Mix for Container Potatoes
The secret to healthy, large potatoes lies in the quality of your potting mix. Choosing the right potting soil for potatoes ensures that your plants have the space they need to expand and develop tubers properly.
Why Garden Soil is Not Recommended
Many beginners make the mistake of using standard garden soil in their containers. This type of dirt is often too heavy and dense for pots.
When garden soil is placed in a container, it tends to compact quickly. This compaction restricts root growth and prevents the developing tubers from expanding, which leads to smaller yields.
Furthermore, garden soil may contain hidden pests or fungal spores. These pathogens thrive in the confined environment of a pot and can easily destroy your crop.

Creating a Nutrient-Rich Potting Blend
A high-quality potting soil for potatoes should be light, fluffy, and full of organic matter. You can create an ideal environment by mixing peat moss or coconut coir with high-quality compost.
Adding organic compost provides the essential nutrients your plants need throughout the growing season. This blend mimics the loose, friable soil conditions that potatoes naturally prefer in the wild.
Balancing Aeration and Moisture Retention
Potatoes require a delicate balance of moisture and air to thrive. If the soil stays too wet, the tubers will rot before they reach maturity.
To improve drainage, incorporate perlite or vermiculite into your mix. These materials create tiny air pockets that allow roots to breathe while still holding enough moisture for the plant.
By using a specialized potting soil for potatoes, you ensure that your container garden remains productive. This simple step is the foundation for a successful and bountiful harvest.
Planting Your Potatoes Step by Step
Once your containers are ready, it is time to focus on the actual planting process. Following these essential potato planting tips will help you establish a strong foundation for your crop. Proper placement ensures that your plants have enough room to develop healthy tubers throughout the season.
Timing Your Planting Based on Frost Dates
Timing is everything when it comes to starting your garden. You should wait until the danger of hard frost has passed in your local area. Planting too early can expose tender shoots to freezing temperatures, which often stunts growth or kills the plant entirely.
Most gardeners in the United States aim to plant once the soil has warmed slightly in the spring. Check your local extension office website for the average last frost date in your zip code. This simple step prevents unnecessary damage to your young plants.
Layering Soil and Seed Potatoes
Start by filling the bottom of your container with about four to six inches of high-quality potting mix. Place your prepared seed potatoes on top of this layer, ensuring the sprouts are facing upward. Space them evenly to give each plant enough room to thrive without competing for nutrients.
Cover the tubers with another few inches of soil. As the green stems begin to emerge and grow several inches tall, you will add more soil to the container. This technique, often called hilling, encourages the plant to produce more tubers along the buried stem sections.
Managing Initial Sprout Growth
Keep a close eye on your containers during the first few weeks after planting. Once the sprouts break the surface, they need plenty of sunlight to grow strong and sturdy. If the stems look thin or pale, they are likely reaching for more light.
Ensure the soil remains consistently moist but never waterlogged during this early stage. Following these basic potato planting tips will set your garden up for a productive and healthy harvest later in the year.
Watering and Fertilizing for Maximum Yield
Achieving a high potato yield requires careful attention to your plants’ hydration and nutrient needs. Because potatoes are heavy feeders, they demand a steady supply of resources to develop healthy tubers. By maintaining a balanced care routine, you ensure your plants remain productive from planting until harvest.
Establishing a Consistent Watering Schedule
Consistent moisture is the foundation of successful container gardening. You should aim to keep the soil evenly damp, similar to the texture of a wrung-out sponge. During hot summer days, you may need to check the soil daily, as containers dry out much faster than traditional garden beds.
When watering potatoes, always apply water directly to the soil rather than the foliage. This practice helps prevent fungal diseases that thrive in damp conditions. Using a drip irrigation system or a simple watering can with a narrow spout makes this task much easier.

Recognizing Signs of Under or Over-Watering
Monitoring your plants closely allows you to adjust your routine before stress impacts your crop. Both extremes can lead to poor development and reduced quality. Keep an eye out for these common indicators:
- Wilting leaves during the morning hours often suggest the soil is too dry.
- Yellowing or browning leaf edges can indicate inconsistent moisture levels.
- Stunted growth or a foul smell from the container may signal waterlogged roots.
- Soft, mushy stems are a clear sign of over-watering and potential root rot.
Feeding Schedules for Heavy Feeders
Properly fertilizing potatoes is the second pillar of a bountiful harvest. Since nutrients leach out of containers quickly through drainage holes, you must replenish them regularly. Start with a balanced, slow-release organic fertilizer at the time of planting to provide a steady base.
As the plants begin to flower, they enter a critical growth phase that requires extra potassium. You can supplement with a liquid seaweed or fish emulsion every two weeks to boost tuber development. Always follow the manufacturer’s instructions to avoid burning the roots, as over-fertilizing can lead to excessive foliage growth at the expense of the tubers.
Managing Pests and Diseases in Small Spaces
Maintaining a thriving potato harvest in a small space means staying ahead of potential threats. Even when you grow plants in containers, you must remain alert to keep your crop healthy and productive throughout the season.
Identifying Common Potato Pests
Several insects find potato plants quite tasty, and they can quickly multiply if you do not catch them early. Regularly inspecting the undersides of leaves helps you spot these intruders before they cause significant damage.
- Aphids: These tiny, soft-bodied insects cluster on new growth and suck sap from the plant.
- Colorado Potato Beetles: Both the striped adults and their larvae can strip foliage rapidly.
- Flea Beetles: These small jumpers leave tiny, shot-hole patterns on the leaves.
Monitoring for these potato pests is much easier in a container setup than in a large field. By checking your pots every few days, you can manually remove insects before they become a major infestation.
Preventative Measures for Fungal Issues
High humidity and poor airflow are the primary drivers of potato diseases in home gardens. Fungal spores thrive in damp conditions, so managing the environment around your containers is essential for success.
Ensure your pots are spaced far enough apart to allow air to circulate freely between the foliage. Always water at the base of the plant rather than overhead to keep the leaves dry, which significantly reduces the risk of blight.
Natural Remedies for Garden Protection
You do not need harsh chemicals to keep your plants safe from common potato diseases. Many effective, organic solutions are available that are perfectly safe for home food production.
- Neem Oil: A natural horticultural oil that helps deter a wide range of insects.
- Garden Hygiene: Removing dead or yellowing leaves promptly prevents the spread of pathogens.
- Companion Planting: Growing herbs like basil or marigolds nearby can help mask the scent of your potatoes from hungry pests.
By combining these simple habits, you create a resilient growing environment. Consistent care ensures that your container garden remains a healthy space for your potatoes to flourish until harvest time.
Troubleshooting Common Container Potato Problems
Successful potato plant care involves recognizing early warning signs of trouble in your pots. Every gardener encounters challenges, and knowing how to troubleshoot common issues is essential for maintaining a healthy crop throughout its life cycle. By diagnosing problems early, you can take corrective action to save your harvest before damage becomes irreversible.
Addressing Yellowing Leaves
Yellowing leaves often serve as the first indicator that your plants need attention. This discoloration frequently points to nitrogen deficiency, which can be corrected by applying a balanced organic liquid fertilizer. However, it may also signal improper watering habits, such as waterlogged soil that prevents roots from breathing.
Check the moisture level of your potting mix before adding more water. If the soil feels soggy, allow it to dry out slightly to improve aeration. Consistent potato plant care requires balancing moisture levels to keep the foliage vibrant and green.
Dealing with Stunted Growth
When your plants appear smaller than expected, they may be struggling with limited root space or poor soil quality. Ensure your container size is adequate for the specific variety you have chosen. If the roots become pot-bound, the plant will stop growing and focus its energy on survival rather than tuber production.
Additionally, verify that your plants are receiving enough sunlight. Potatoes generally require at least six to eight hours of direct sun daily to thrive. Proper potato plant care involves moving containers to a brighter location if growth remains sluggish.
Managing Environmental Stressors
Extreme weather conditions can significantly impact your container garden. High temperatures often cause heat stress, leading to wilted leaves and reduced tuber development. During heatwaves, move your pots to a shaded area during the hottest part of the afternoon.
Strong winds can also dry out containers quickly or damage delicate stems. Providing a windbreak or securing your plants can prevent physical stress. By staying observant, you can mitigate these environmental factors and maintain excellent potato plant care throughout the season.
Harvesting and Storing Your Homegrown Crop
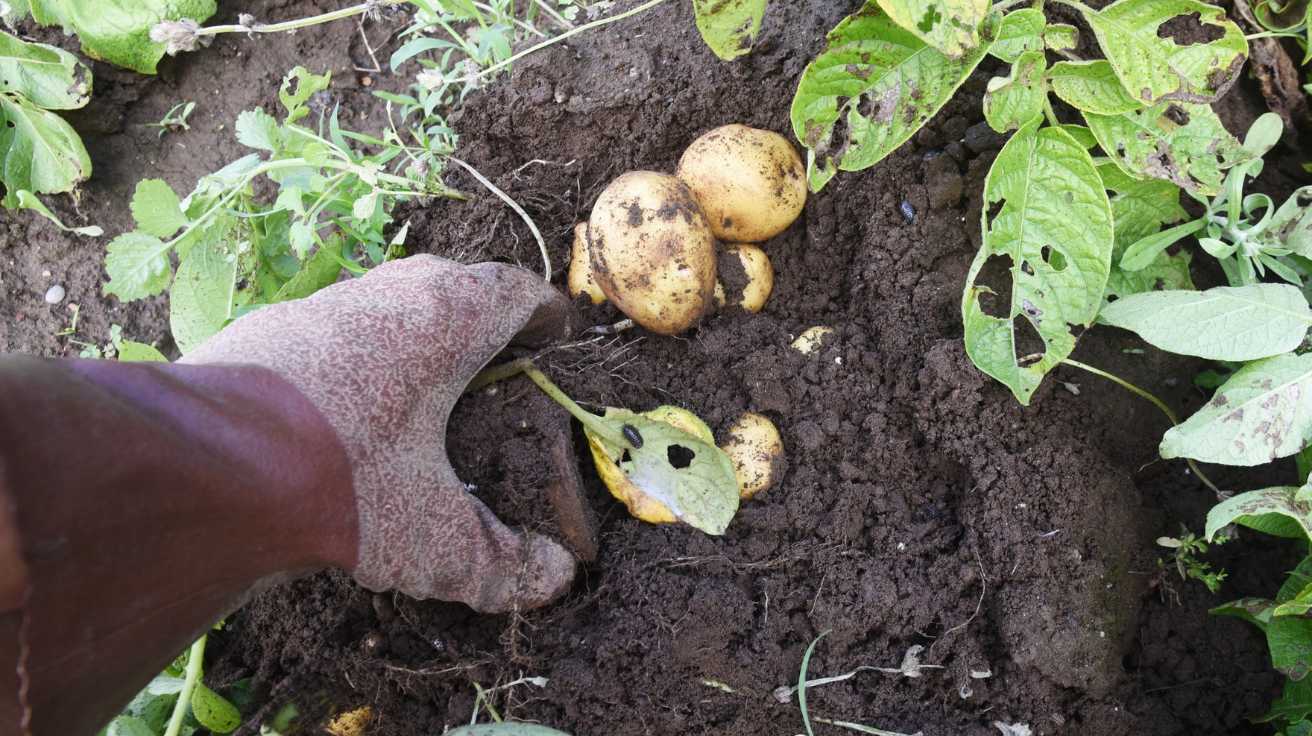
Reaching the end of your growing season means it is time to enjoy the fruits of your labor. You will know the time for harvesting potatoes has arrived when the foliage turns yellow and begins to wither. This natural die-back indicates that the tubers have reached their full size and are ready for collection.
Gently lift the potatoes from your containers using a garden fork to avoid damaging the skins. Once you gather your crop, let them sit in a cool, dark, and well-ventilated area for about two weeks. This curing process toughens the skin and heals minor nicks, which is vital for long-term preservation.
Properly storing homegrown potatoes requires a dark, dry environment with good airflow. Use burlap sacks or wooden crates to keep them cool and prevent rot. By following these simple steps, you ensure your harvest remains fresh and flavorful for months. Share your gardening success with friends and enjoy the superior taste of your own organic produce.
FAQ
Is it really possible to get a big harvest of potatoes on a small balcony or patio?
Absolutely! Growing potatoes in containers is a game-changer for urban gardeners with limited space. By using high-quality fabric grow bags, like those from Smart Pots, you can maximize your square footage and produce a bountiful crop of fresh spuds right outside your door. The key is providing a controlled growing environment where you can manage soil quality and moisture much more effectively than in a traditional garden bed.
What is the difference between determinate and indeterminate potato varieties?
Choosing the right cultivar is essential for container success. Determinate varieties, such as the classic Yukon Gold or Red Pontiac, grow in a single layer and reach maturity quickly, making them ideal for smaller pots. Indeterminate varieties, like the Russet Burbank or Kennebec, continue to grow upward and produce tubers along their stems over a longer period. For indeterminate types, you’ll want to use the layering or hilling technique to encourage more growth as the plant climbs.
What is “chitting” and why should I do it before planting?
Chitting is simply a fancy word for pre-sprouting your seed potatoes! By placing your certified disease-free seed potatoes in a cool, bright spot for a few weeks before planting, you encourage sturdy green shoots to develop. This gives your plants a head start once they hit the soil, leading to faster growth and a more successful harvest during the peak growing season.
Can I just use regular garden soil in my potato containers?
It is best to avoid standard garden soil as it is often too heavy and prone to compaction, which can suffocate your developing tubers. Instead, use a nutrient-rich potting blend like FoxFarm Ocean Forest or a high-quality organic mix. These blends are designed to balance aeration and moisture retention, providing the loose, fluffy structure potatoes need to expand and thrive without the risk of root rot or soil-borne pests.
How do I know what size container I need for my potatoes?
Most potato plants need plenty of room for their root systems to flourish. A good rule of thumb is to use a container that holds at least 5 to 10 gallons of soil. Ensure your chosen vessel, whether it’s a plastic tub or a terracotta pot, has excellent drainage holes to prevent waterlogging. Fabric grow bags are a fantastic option because they naturally “air-prune” the roots and prevent the plants from becoming root-bound.
When is the best time to plant potatoes in containers?
Timing is everything! You should aim to plant your potatoes based on your local frost dates, typically a few weeks before the last expected spring frost. Since containers warm up faster than the ground, you can often get a head start. Just be prepared to move your pots into a garage or cover them if a late-season cold snap hits to protect those tender young sprouts.
How often should I fertilize my container potatoes?
Potatoes are known as “heavy feeders,” meaning they require plenty of nutrients to produce those delicious tubers. Start by mixing organic fertilizers or soil amendments into your initial potting blend. As the plants grow, follow a consistent feeding schedule using a balanced liquid fertilizer, like Neptune’s Harvest, every few weeks to support vigorous development and maximize your overall yield.
What should I do if my potato leaves start turning yellow?
Yellowing leaves can be a sign of a few different things, so it’s important to troubleshoot early. It might indicate a simple nutrient deficiency or environmental stressors like over-watering. However, keep an eye out for more serious issues like blight or aphids. Using natural remedies like Neem oil can help protect your crop from pests without the need for harsh chemicals, keeping your homegrown food healthy and safe.
How do I know when it’s finally time to harvest and store my potatoes?
Your plants will tell you when they’re ready! Look for the foliage to begin yellowing and eventually die back. Once the vines have withered, the potatoes are mature. After harvesting, it is vital to “cure” your potatoes by letting them sit in a cool, dark, well-ventilated area for a week or two. This toughens the skins, which helps them stay fresh and delicious for much longer in storage.