Growing Garlic at Home A Friendly Beginner’s Guide
Starting a vegetable patch in your backyard offers a unique sense of accomplishment. Many people find that growing garlic at home is the perfect way to begin their journey into urban farming. It is a simple, rewarding hobby that fits well into any busy lifestyle.

This plant is famous for being a low-maintenance crop. You do not need a green thumb to see great results. Once you tuck the cloves into the soil, they require very little attention throughout the season. This makes it an ideal choice for those new to gardening.
Beyond the ease of care, the culinary benefits are truly unmatched. Fresh bulbs provide a bold, pungent flavor that store-bought versions simply cannot match. By cultivating your own supply, you ensure that your kitchen is always stocked with high-quality ingredients for your favorite recipes. It is a small effort that yields a massive harvest for your table.
Getting Started with Growing Garlic at Home
Embarking on your journey to growing garlic at home is a rewarding experience for any gardener. Whether you have a sprawling backyard or a small balcony, this versatile plant adapts well to various environments. By understanding the basics, you can enjoy a bountiful harvest of flavorful bulbs right from your own soil.
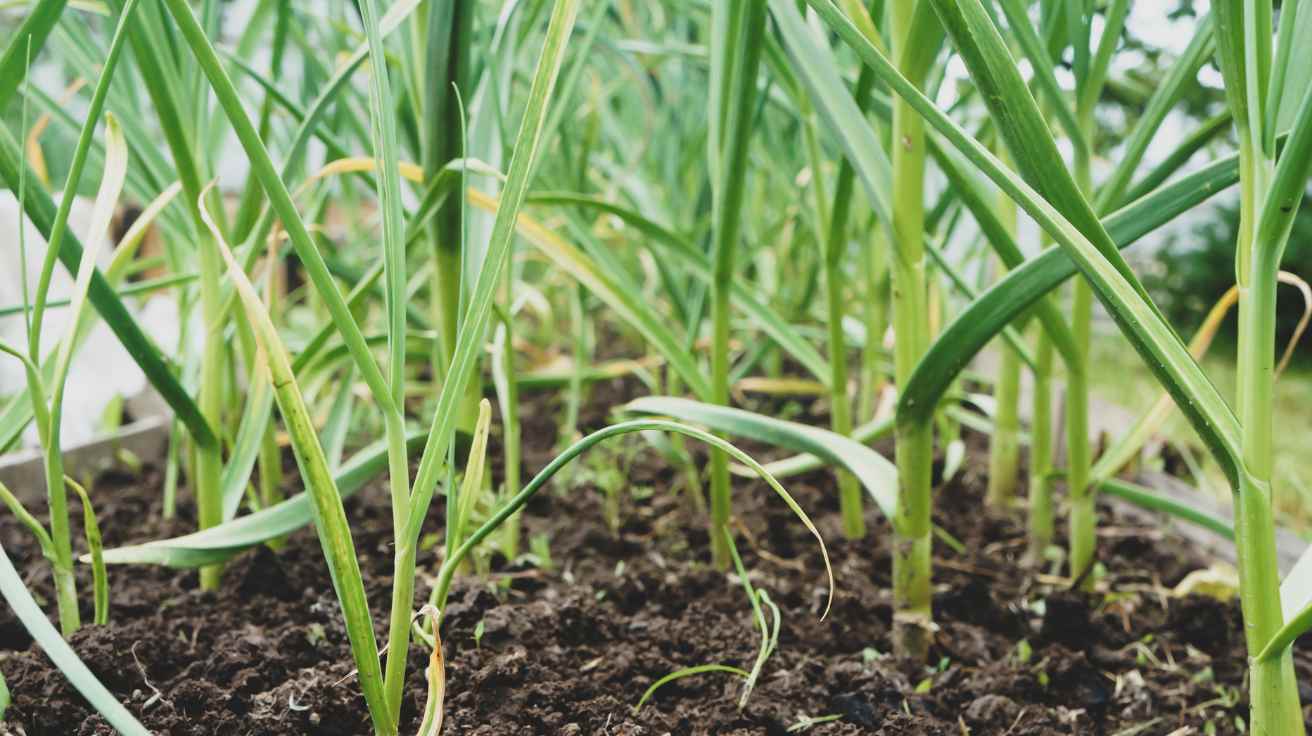
Understanding the Garlic Growth Cycle
Garlic follows a predictable biological rhythm that begins when you tuck individual cloves into the ground. During the initial phase, the plant focuses on establishing a strong root system before the foliage emerges. As the weather warms, the green shoots grow vigorously, drawing energy from the soil to fuel the development of the bulb underground.
The final stage of the cycle involves the maturation of the bulb, where the plant stops producing new leaves and directs all its remaining energy into the cloves. You will notice the lower leaves beginning to brown, which is a clear signal that your garlic is nearing the end of its growth phase. This natural progression makes the plant easy to monitor throughout the season.
Why Garlic is Perfect for Beginners
Garlic is widely considered one of the most resilient crops for novice gardeners. It requires very little intervention compared to more delicate vegetables, as it is naturally resistant to many common garden pests. This low-maintenance nature allows you to focus on the joy of gardening without feeling overwhelmed by complex care routines.
For those who lack traditional outdoor garden space, you might be surprised to learn that it is possible to explore how to grow garlic indoors. While indoor bulbs may not reach the same size as those grown in a garden bed, using containers with proper drainage and bright light can still yield tasty results. This flexibility ensures that anyone, regardless of their living situation, can enjoy the satisfaction of harvesting their own fresh garlic.
Selecting the Best Garlic Varieties for Your Garden
Your journey to a successful harvest begins with selecting the best garlic varieties for home gardening. Because different types thrive in specific climate zones, matching your choice to your local environment is essential for a healthy crop.
Hardneck Garlic Varieties for Cold Climates
Hardneck garlic is the top choice for gardeners in regions with cold winters. These varieties produce a central woody stalk, which is where they get their name. They are exceptionally cold-hardy and often develop a more complex, robust flavor profile compared to other types.
Because they thrive in freezing temperatures, they are among the best garlic varieties for home gardening in the northern United States. Keep in mind that they typically have a shorter shelf life, so plan to use them within a few months of harvest.
Softneck Garlic Varieties for Warmer Regions
If you live in a climate with mild winters, softneck garlic is likely your best option. These varieties do not produce a hard central stalk, making them flexible and easy to braid after curing. They are highly adaptable and generally perform better in warmer, southern regions.
Softneck garlic is well-known for its impressive storage capabilities. You can often keep these bulbs in your pantry for several months longer than hardneck types. Their mild flavor makes them a versatile staple for everyday cooking.
Elephant Garlic Explained
Despite its name, elephant garlic is not a true garlic but is actually a member of the leek family. It produces massive cloves that are much larger than standard varieties, making it a fun addition to any garden patch.
The flavor of elephant garlic is very mild and subtle, which is perfect for those who prefer a less pungent taste. While it is easy to grow, it requires a longer growing season to reach its full size. Consider adding this unique plant to your garden if you enjoy experimenting with different culinary ingredients.
Preparing the Soil for Optimal Growth
Creating the right environment for your plants begins long before you put a single clove in the ground. Healthy soil serves as the foundation for successful organic garlic cultivation, providing the necessary nutrients for robust bulb expansion.
Testing and Amending Your Garden Soil
Before planting, you should test your soil pH to ensure it falls between 6.0 and 7.0. You can easily purchase a home testing kit from a local garden center to check these levels.
If your soil is too acidic or alkaline, add organic amendments like compost or aged manure to balance it. These additions improve the texture of the earth, allowing roots to spread easily and grow larger.
Ensuring Proper Drainage and Sun Exposure
Garlic bulbs are sensitive to moisture, so understanding garlic soil and watering requirements is vital for preventing rot. Choose a location in your garden that receives at least six to eight hours of direct sunlight daily.
Avoid areas where water tends to pool after a heavy rain. If your garden has heavy clay soil, consider building raised beds to improve drainage and keep the bulbs healthy throughout the winter.
Organic Fertilization Techniques
Feeding your soil naturally helps your plants thrive without the need for harsh chemicals. Incorporating well-rotted compost into the top few inches of your garden bed provides a slow-release source of nitrogen.
By focusing on these garlic soil and watering requirements, you create a nutrient-rich space that supports strong growth. Consistent attention to your soil quality is the secret to a bountiful harvest.
Planting Your Garlic Cloves
Getting your garlic into the ground at the right moment is the secret to a successful harvest. Following specific garlic planting tips ensures that your cloves have the best possible start before the winter chill sets in.
Timing Your Planting Based on Your Zone
Timing is everything when it comes to gardening success. In most parts of the United States, you should aim to plant your cloves about four to six weeks before the ground freezes solid.
This window allows the cloves to establish a strong root system without sending up too much green top growth. If you live in a colder northern climate, aim for mid-to-late October. Gardeners in warmer southern regions may wait until November or even December to get their cloves in the soil.
“The best time to plant is when the soil temperature has dropped below 60 degrees Fahrenheit, ensuring the garlic focuses on roots rather than leaves.”
Proper Spacing and Depth Requirements
To ensure each bulb reaches its full potential, you must provide enough room for growth. Proper spacing is one of the most essential garlic planting tips for any home gardener.
Place each clove about 6 inches apart in rows that are at least 12 inches wide. You should plant the cloves with the pointed end facing up at a depth of 2 to 3 inches. This depth protects the cloves from extreme temperature fluctuations while giving them enough space to expand.
Mulching for Winter Protection
Once your cloves are tucked into the soil, applying a layer of mulch is a smart move. A 3-to-4-inch layer of straw or shredded leaves acts as a protective blanket for your garden.
This layer helps maintain a consistent soil temperature throughout the winter months. It also prevents the ground from heaving during freeze-thaw cycles, which can damage delicate roots. Consistent moisture and temperature are the keys to healthy, robust bulbs come springtime.
Essential Garlic Care and Maintenance
Maintaining a healthy garlic patch requires a bit of attention throughout the growing season. Consistent garlic care and maintenance are vital for producing large, flavorful bulbs during the spring and summer months. By following a few simple steps, you can ensure your plants stay strong and productive.
Watering Requirements Throughout the Season
Understanding the specific garlic soil and watering requirements is the first step toward success. Garlic needs consistent moisture to develop properly, especially during the spring growth spurt. However, you must avoid overwatering, as soggy conditions can lead to bulb rot.
Aim to keep the soil evenly moist but never waterlogged. If your area experiences a dry spell, provide a deep soaking once a week rather than frequent light sprinkles. This encourages the roots to grow deeper into the soil, which creates a more resilient plant.
Managing Weeds in the Garlic Patch
Weeds are the primary enemy of a thriving garlic crop. They compete directly with your garlic for essential nutrients, water, and sunlight. Because garlic has shallow roots, it struggles to outcompete aggressive weeds.
Make it a habit to hand-weed your patch regularly. Keeping the area clear allows your garlic to focus all its energy on bulb formation. Using a layer of organic mulch can also help suppress weed growth while keeping the soil temperature stable.
Removing Garlic Scapes for Better Bulb Development
As the season progresses, you may notice curly, green shoots emerging from the center of your hardneck garlic plants. These are known as scapes, which are the plant’s flower stalks. While they are delicious in the kitchen, they can hinder your harvest if left alone.
Removing these scapes is a crucial part of your garlic care and maintenance routine. By snapping or cutting them off, you redirect the plant’s energy away from flower production and back into the bulb. This simple action ensures that your final harvest consists of larger, more robust bulbs.
Troubleshooting Common Pests and Diseases
Mastering effective garlic growing techniques is the best way to ensure a thriving garden. Even the most careful gardeners may encounter challenges, so learning how to spot early warning signs is crucial for a successful harvest.

Identifying Signs of Fungal Issues
Fungal diseases often appear as yellowing leaves or stunted growth during the spring. If you notice white, fuzzy mold at the base of the bulb, you might be dealing with white rot, a common soil-borne fungus.
Rust is another frequent visitor, appearing as small, orange-red spots on the foliage. Early detection allows you to remove affected plants quickly, which helps prevent the spread of spores to the rest of your patch.
Managing Common Garden Pests
Garden pests like onion maggots can be particularly troublesome for young garlic shoots. These larvae feed on the roots, causing the plant to wilt suddenly and collapse.
Aphids may also gather on the undersides of leaves, sucking the sap and weakening the plant. Using natural barriers or introducing beneficial insects like ladybugs can keep these populations under control without harsh chemicals.
Preventing Rot Through Proper Moisture Control
Excessive moisture is the primary enemy of healthy bulbs. By utilizing proper garlic growing techniques, you can ensure your soil drains well and does not stay waterlogged for long periods.
Always check the soil moisture before watering your garden beds. If the top two inches of soil feel damp, it is best to wait a few days before adding more water to avoid bulb rot.
Harvesting Your Garlic Bulbs
Successfully harvesting garlic bulbs requires a keen eye and a gentle touch to ensure your hard work pays off. Timing is everything when it comes to gathering your crop at the peak of its flavor and size. By paying close attention to the physical changes in your plants, you can ensure a successful end to your gardening season.
Recognizing When Garlic is Ready to Pull
The most reliable indicator that your crop is ready is the appearance of the foliage. You should look for the lower leaves to turn brown and dry out, while the upper leaves remain green. A good rule of thumb is to wait until about one-third to one-half of the leaves have yellowed or browned.
If you wait too long, the outer papery skins of the bulb may begin to disintegrate. This can expose the cloves to soil moisture and reduce their shelf life significantly. Keep a close watch on your garden as the summer heat intensifies to catch this perfect window.
Tools and Techniques for Gentle Harvesting
When you are ready to begin harvesting garlic bulbs, avoid pulling them directly by the stems. This can cause the stems to snap off, leaving the bulbs stuck deep in the soil. Instead, use a garden fork or a spade to loosen the earth around the base of the plant.
Insert your tool several inches away from the stem to avoid piercing the bulbs. Gently lift the soil upward to break the roots’ hold on the ground. Once the soil is loosened, you can carefully lift the entire plant out by hand.
Avoiding Damage to the Bulbs
Garlic bulbs are surprisingly delicate and can bruise easily if handled roughly. Always treat your harvest with care, as nicks or cuts can lead to rot during the curing process. Never bang the bulbs against each other to remove excess dirt, as this can damage the protective outer layers.
Instead, use your fingers to gently brush away loose soil from the roots and the bulb. If the soil is particularly heavy or wet, leave it to dry slightly before cleaning. By taking these extra precautions, you ensure that your harvesting garlic bulbs efforts result in high-quality produce that lasts for months.
Curing and Storing Your Homegrown Harvest
Proper post-harvest handling is the secret to enjoying your homegrown garlic for months to come. Taking the time to prepare your bulbs correctly prevents spoilage and locks in that signature flavor you worked so hard to grow.
The Importance of Proper Curing
Curing is the essential process of drying out the outer layers of the garlic skin and the neck. This step creates a protective barrier that prevents moisture from reaching the bulb, which is vital for long-term preservation.
To cure your garlic, place the bulbs in a single layer in a cool, dry, and well-ventilated area. It is crucial to keep them away from direct sunlight, as UV rays can degrade the quality of the cloves.

Allow the garlic to cure for two to four weeks until the roots are brittle and the outer skins are papery. You will know they are ready when the neck feels completely dry and firm to the touch.
Best Practices for Long-Term Storage
Once your garlic is fully cured, trim the roots and cut the stems back to about an inch if you are not braiding them. Store your bulbs in a cool, dark place with excellent air circulation to maintain their freshness.
Avoid storing your garlic in plastic bags or sealed containers, as these trap moisture and encourage rot. Instead, use mesh bags, woven baskets, or open crates that allow the bulbs to breathe.
Keep your storage area at a consistent temperature, ideally between 55 and 65 degrees Fahrenheit. If you keep your garlic in a pantry, ensure it stays away from heat sources like ovens or direct sunlight.
Creating Braids and Bundles
If you grew softneck varieties, you can take advantage of their flexible stems to create beautiful braids. Braiding is a functional storage method that keeps your garlic organized while adding a rustic, decorative touch to your kitchen.
To create a bundle, simply tie the stems of several bulbs together with twine and hang them from a ceiling hook or a wall rack. This method keeps the bulbs off the counter and ensures they receive constant airflow from all sides.
Whether you choose to braid or bundle, these techniques make it easy to grab a fresh bulb whenever you need one. Proper storage ensures that your harvest remains a delicious part of your cooking routine throughout the entire year.
Enjoying the Fruits of Your Labor
Your journey from planting a single clove to holding a basket of cured bulbs represents a rewarding transformation. You now possess the skills to produce high-quality ingredients right in your own backyard.
Fresh, organic garlic offers a depth of flavor that store-bought varieties simply cannot match. The pungent aroma and complex taste profile will elevate your favorite recipes to a professional level.
Try roasting whole bulbs with olive oil from brands like California Olive Ranch to bring out a natural sweetness. You might also mince raw cloves into fresh salsas or stir-fries to experience the sharp, bold kick that defines homegrown produce.
Share your bounty with friends or neighbors to spread the joy of gardening. Every meal prepared with your own harvest serves as a reminder of the patience and care you invested throughout the growing season.
Keep a journal of your planting dates and variety performance for next year. This practice helps you refine your methods and ensures even better results in future seasons. Happy cooking as you explore the endless culinary possibilities of your successful harvest.
FAQ
How to grow garlic indoors if I don’t have a backyard?
While garlic loves the great outdoors, how to grow garlic indoors is a common question for apartment dwellers. You can grow garlic in deep pots (at least 6-10 inches) placed on a south-facing windowsill or under a high-quality grow light system from Mars Hydro. While indoor bulbs may stay smaller than those from growing garlic at home in a garden, you can successfully harvest flavorful “garlic greens” or small bulbs by maintaining consistent moisture and light.
What are the best garlic varieties for home gardening for beginners?
Selecting the best garlic varieties for home gardening depends on your climate. For gardeners in the Southern United States, Softneck varieties like ‘California Early’ are ideal because they don’t require a long cold period. If you live in a northern state, Hardneck varieties such as ‘Music’ or ‘German White’ from Keene Garlic are incredibly hardy and produce the sought-after gourmet scapes in the spring.
Do you have any essential garlic planting tips for first-timers?
One of the most important garlic planting tips is to ensure you plant in the fall, roughly 4 to 6 weeks before the ground freezes. Always separate your bulbs into individual cloves just before planting, and place them in the soil with the pointy end facing up. Using a Fiskars trowel, bury them about 2 inches deep and space them 4 to 6 inches apart to allow for maximum bulb expansion.
What are the specific garlic soil and watering requirements?
To master garlic soil and watering requirements, you need loose, well-draining soil rich in organic matter. Garlic hates “wet feet,” which can lead to bulb rot, so ensure your garden bed isn’t in a low-lying area. During the active growing season in spring, provide about an inch of water per week, but stop watering entirely two weeks before you plan on harvesting garlic bulbs to allow the outer skins to dry.
How can I ensure success with organic garlic cultivation?
Successful organic garlic cultivation starts with the soil. Use a high-quality organic fertilizer like Dr. Earth Life or organic compost to provide a slow release of nutrients. Mulching with clean straw or shredded leaves is another organic secret; it suppresses weeds, retains moisture, and protects the cloves from extreme temperature fluctuations during the winter dormancy period.
Why is garlic care and maintenance so important in late spring?
Ongoing garlic care and maintenance is the difference between a mediocre harvest and a great one. For hardneck varieties, you must remove the garlic scapes (the curly green stalks) as they appear in June. This prevents the plant from putting energy into seed production and instead redirects that energy back down into the bulb, resulting in much larger garlic heads.
What are some advanced garlic growing techniques for pest control?
Effective garlic growing techniques for managing pests include crop rotation—never plant garlic where onions or leeks grew the previous year. If you notice signs of aphids or mites, an application of Monterey Neem Oil can help. Additionally, ensuring proper spacing between plants improves airflow, which is the best defense against fungal diseases like white rot or downy mildew.
How do I know when I should start harvesting garlic bulbs?
You’ll know it’s time for harvesting garlic bulbs when the lower two or three leaves turn brown and die back, while the top leaves remain green. Don’t wait for the entire plant to turn brown, or the bulbs may begin to split open. Use a garden fork, such as a sturdy Ames digging fork, to gently lift the soil from underneath rather than pulling the plants by their stems, which can cause damage.
What is the best way to cure and store my garlic after harvest?
After harvesting, move your garlic to a shaded, well-ventilated area—like a porch or a garage—away from direct sunlight. Let them “cure” for two to four weeks until the outer wrappers feel papery and the roots are brittle. Once cured, you can trim the roots and stems or create beautiful decorative braids for long-term storage in a cool, dry pantry.