Crochet Scarf Pattern Free – Easy, Cozy, and Textured Scarf for Beginners
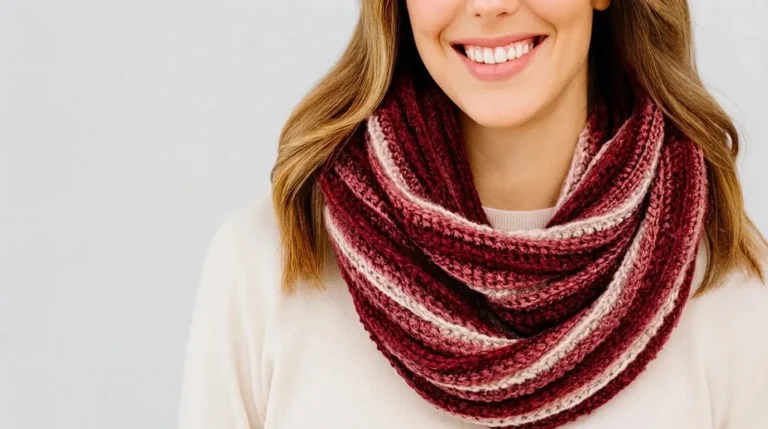
This crochet scarf pattern free tutorial will help you make a warm, soft, and stylish scarf with a beautiful textured stitch. It has a simple rectangular shape, a rich handmade look, and a cozy finish that is perfect for everyday winter wear.
About This Crochet Scarf Pattern
A handmade crochet scarf is one of the nicest accessories to make when the weather gets cold. It is useful, comfortable, and makes a lovely handmade gift for family and friends.
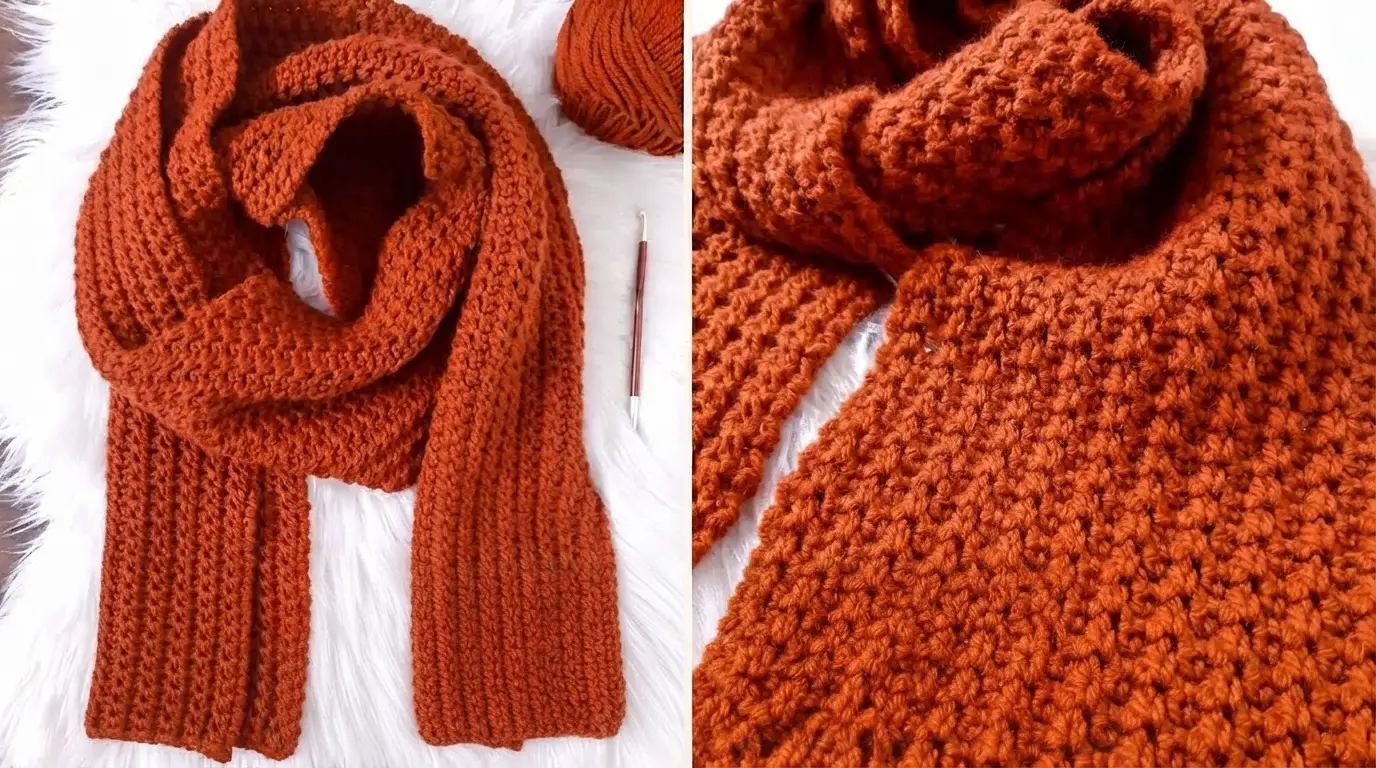
This scarf features a beautiful burnt-orange color and a thick, textured stitch pattern. Its long rectangular shape makes it easy to wrap around your neck or let both ends hang naturally. The dense crochet fabric gives it a warm feel, while the simple design keeps it suitable for beginners who want to try something a little more interesting than basic stitches.
The scarf is worked in rows, so you do not need to worry about complicated shaping or joining pieces together. You can also change the yarn color, length, and width to create a version that matches your personal style.
Materials Needed
Yarn: Choose a soft, warm yarn in a medium-heavy or bulky weight. A burnt-orange, rust, brown, cream, or mustard shade will look beautiful. Make sure your yarn works comfortably with your chosen hook.
Crochet hook: Use the hook size recommended on your yarn label. A 5.5 mm or 6 mm crochet hook is a good starting point for a thicker scarf.
Scissors: You will need scissors to cut the yarn after finishing the scarf.
Yarn needle: A yarn needle helps you weave in the loose ends neatly.
Measuring tape: Use a measuring tape to check the width and length as you work.
Crochet Skills You Need
This pattern is beginner-friendly, and you only need a few basic crochet skills to complete it.
You should know how to make a slip knot, crochet a foundation chain, work a single crochet, make a double crochet, and turn your work at the end of each row.
The main stitch used in this tutorial is the Suzette stitch. It creates a lovely raised texture by combining single crochet and double crochet stitches in the same stitch.
If you have never tried this stitch before, do not worry. It is easy to learn once you understand the simple repeat.
Finished Scarf Size
The finished scarf can be approximately 7–8 inches wide and 65–75 inches long.
These measurements are suggestions rather than fixed requirements. You can make your scarf shorter for a simple neck accessory or longer if you enjoy wrapping it around your neck more than once.
The width can also be adjusted depending on how thick you want your scarf to look. A wider scarf gives you more fabric to wrap around your shoulders, while a narrower scarf creates a lighter everyday accessory.
Crochet Abbreviations
This pattern uses standard US crochet terms.
- ch – Chain
- sc – Single crochet
- dc – Double crochet
- st – Stitch
- sk – Skip
- sl st – Slip stitch
- BLO – Back loop only
- rep – Repeat
Special stitch: Suzette stitch
To make one Suzette stitch, work one single crochet and one double crochet into the same stitch. Skip the next stitch and repeat the combination in the following stitch.
This combination creates a small raised cluster that gives the scarf its textured appearance.
Step-by-Step Crochet Scarf Pattern
Before starting, choose a comfortable place to crochet and prepare your yarn, hook, and other supplies. Keep your stitches relaxed because tight stitches can make the scarf stiff and less comfortable to wear.
Step 1: Make the Foundation Chain
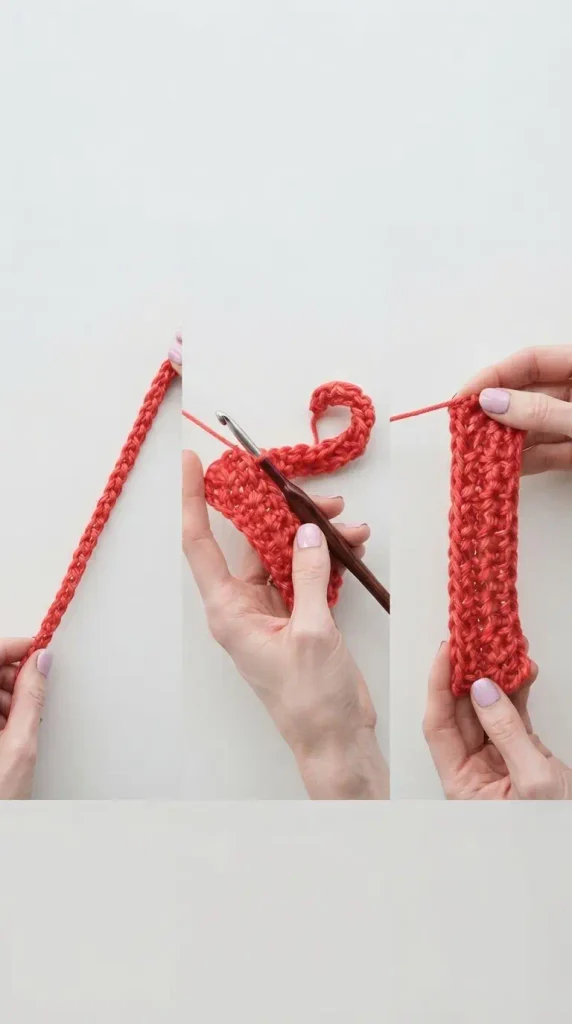
Start by making a slip knot and placing it on your crochet hook.
Chain 26 stitches for a scarf that is approximately 7–8 inches wide. This is a starting number, so you can add or remove chains depending on your yarn thickness and preferred width.
For the Suzette stitch, your starting chain should have an even number of chains.
Once you finish the foundation chain, check that it is not too tight. The chain should be flexible enough to allow your hook to move easily through the stitches.
If you want a wider scarf, add more chains in even numbers. If you prefer a narrower scarf, use fewer chains.
Step 2: Work the First Row
Insert your hook into the second chain from the hook.
Make one single crochet stitch. Without moving to another chain, make one double crochet stitch into the same chain.
Skip the next chain and work one single crochet and one double crochet into the following chain.
Continue this pattern across the foundation chain.
You will keep making one single crochet and one double crochet in the same stitch, then skipping the next stitch.
When you reach the end, finish with one single crochet in the final available chain.
Turn your work to prepare for the next row.
Step 3: Start the Second Row
Chain one to bring your yarn to the correct height.
Work one single crochet and one double crochet into the first single crochet stitch from the previous row.
Skip the next stitch, which is the double crochet from the previous cluster.
Now work one single crochet and one double crochet into the next single crochet stitch.
Continue repeating this pattern across the row.
When you reach the last stitch, work one single crochet into the final stitch or turning-chain space, keeping the edge neat and consistent.
Turn your work again.
Step 4: Continue the Textured Stitch Pattern
Repeat the second row until your scarf reaches the length you want.
The repeated single crochet and double crochet combinations create a beautiful raised texture. As the rows build up, the fabric becomes thicker and develops a lovely handmade appearance.
Keep checking your stitch placement as you work. The most important part of this pattern is making your two stitches in the correct single crochet stitch and skipping the double crochet beside it.
Continue crocheting until the scarf measures approximately 65–75 inches long, or your preferred length.
Do not worry if the scarf looks slightly shorter while it is lying flat compared with how it looks when worn. The yarn may relax a little after finishing.
Step 5: Create a Neat Ribbed Finish
For a more finished look, you can add a small ribbed section at both short ends of your scarf.
The ribbed sections give the ends a little extra structure and create a nice difference in texture.
After completing the main scarf, attach the yarn to one short end. Work a row of half double crochet stitches evenly across the edge.
Chain one and turn. Work half double crochet stitches in the back loop only across the next row.
Repeat this row for another two or three rows, depending on how wide you want the ribbed finish to be.
Fasten off and repeat the same process on the opposite short end.
Try to keep the number of rows and the tension the same on both ends. This helps the scarf look balanced and professionally finished.
Step 6: Finish the Scarf
Once you have completed the crochet work, cut the yarn and leave a tail of a few inches.
Pull the yarn through the final loop and tighten it gently.
Use a yarn needle to weave the loose ends into the stitches on the wrong side of the scarf. Move the needle through several stitches so the yarn stays secure.
Trim any extra yarn carefully without cutting into the crochet fabric.
Look over the scarf and check for missed stitches, loose loops, or uneven edges. Make small adjustments if needed.
Your cozy textured crochet scarf is now ready to wear!
How to Get the Best Texture
The texture is one of the most attractive parts of this scarf. To get a beautiful result, try to keep your tension even throughout the project.
Avoid pulling the yarn too tightly after every stitch. Tight stitches can make the fabric hard and reduce its natural softness.
Using a yarn with a little bounce and softness will also help the raised stitches stand out. Acrylic, wool, and wool-blend yarns are all possible choices, depending on the warmth and care instructions you prefer.
If you want a more relaxed scarf, try a slightly larger hook. If you prefer a denser fabric, use a smaller hook, but make sure you can still insert the hook comfortably into every stitch.
Tips for Making a Beautiful Crochet Scarf
Choose a yarn color that you enjoy wearing. Rust orange is a lovely choice because it gives the scarf a warm autumn and winter feeling. Neutral shades such as beige, cream, grey, and brown are also easy to match with different outfits.
Always make a small test swatch before starting the full scarf. This helps you understand how the yarn and hook work together and gives you a better idea of the finished width.
Count your stitches occasionally, especially during the first few rows. It is much easier to fix a small mistake early than to discover that your scarf has become wider or narrower near the end.
Try to keep the edges straight. Working the first and last stitches carefully will make the finished scarf look much neater.
If you are using a dark-colored yarn, make sure you have enough light around your workspace. It can be difficult to see individual stitches when working with dark brown, navy, or deep orange yarn.
Take breaks when needed. A scarf requires many repeated rows, and holding your crochet hook for a long time can make your hands tired.
How to Customize Your Crochet Scarf
One of the best things about this free crochet scarf pattern is that you can easily change it to suit your needs.
Change the scarf length: If you like wearing your scarf loosely around your neck, make it longer. For a simple scarf that hangs down in front, a shorter length may be enough. Keep measuring as you crochet so you can stop at the right size.
Make it wider: Add more foundation chains to create a wider scarf. Remember to maintain an even number of chains so the Suzette stitch pattern works properly.
Try different colors: You can use one solid color for a classic look or change colors every few rows to create stripes. A combination of cream and rust orange would look especially beautiful.
Use different yarn textures: Smooth yarn gives the stitches a clean appearance, while soft wool-blend yarn creates a warm and cozy finish. Avoid yarn that is too rough or uncomfortable against your neck.
Add fringe: If you enjoy decorative details, you can add fringe to both short ends. Cut several equal lengths of yarn, fold each piece in half, and pull the folded loop through the edge stitches. Bring the loose ends through the loop and tighten gently. Repeat across both ends.
How to Choose the Right Yarn
Yarn choice makes a big difference when making a winter scarf. Since this design has a thick and textured appearance, choose yarn that feels soft and comfortable against your skin.
Medium-weight yarn can create a flexible scarf with clearly defined stitches. Bulky yarn is another good choice if you want a thicker and warmer accessory.
If you are making this scarf for everyday use, acrylic yarn is a practical option because it is generally affordable and available in many colors. Wool yarn is a lovely choice for extra warmth, while cotton yarn can create a more breathable fabric.
Before purchasing yarn, check the recommended hook size and care instructions on the yarn label.
The amount of yarn needed will depend on its weight, the hook size, your stitch tension, and the finished scarf dimensions. It is always a good idea to buy enough yarn from the same dye lot so the color stays consistent throughout the project.
How to Keep Your Scarf Looking Beautiful
Taking care of your handmade scarf will help it stay in good condition for a long time.
Always check the yarn label before washing. Some yarns can be machine washed, while others need gentle hand washing.
If hand washing is recommended, use cool or lukewarm water with a mild detergent. Gently move the scarf through the water without rubbing or twisting it.
Remove extra water carefully by pressing the scarf between clean towels. Lay it flat on a dry towel and reshape it to its original measurements.
Avoid hanging a wet crochet scarf because the weight of the water can stretch the stitches and change its shape.
Store your scarf in a clean, dry place when you are not using it. Folding it neatly will help prevent unnecessary stretching.
Common Mistakes to Avoid
One common mistake is making the foundation chain too tight. This can cause the bottom edge to pull inward and make the scarf look uneven. Use a relaxed hand when chaining, and try a slightly larger hook for the foundation chain if necessary.
Another mistake is placing the single crochet and double crochet stitches in the wrong spaces. Remember that both stitches belong in the same single crochet stitch, and you must skip the double crochet from the previous cluster.
Uneven tension can also affect the final appearance. If some rows are very tight and others are loose, the scarf may look wavy or uneven. Try to maintain a comfortable and steady rhythm.
Do not forget to check the length before fastening off. A scarf can take several hours to complete, so measuring occasionally helps you avoid making it too short or too long.
Is This Crochet Scarf Pattern Good for Beginners?
Yes! This is a lovely project for beginners who already know a few basic crochet stitches.
The scarf does not require complicated shaping, difficult increases, or decreases. You simply work the same textured stitch pattern repeatedly until you reach your desired length.
It is also a good project for practicing stitch consistency. As you work through the rows, you will become more comfortable with placing your hook, controlling your yarn tension, and recognizing the stitches from the previous row.
If you are completely new to crochet, practice single crochet and double crochet separately before trying the Suzette stitch. Once you understand these two stitches, the pattern becomes much easier to follow.