Crochet Bonnet Pattern Free – A Beautiful and Easy Handmade Bonnet
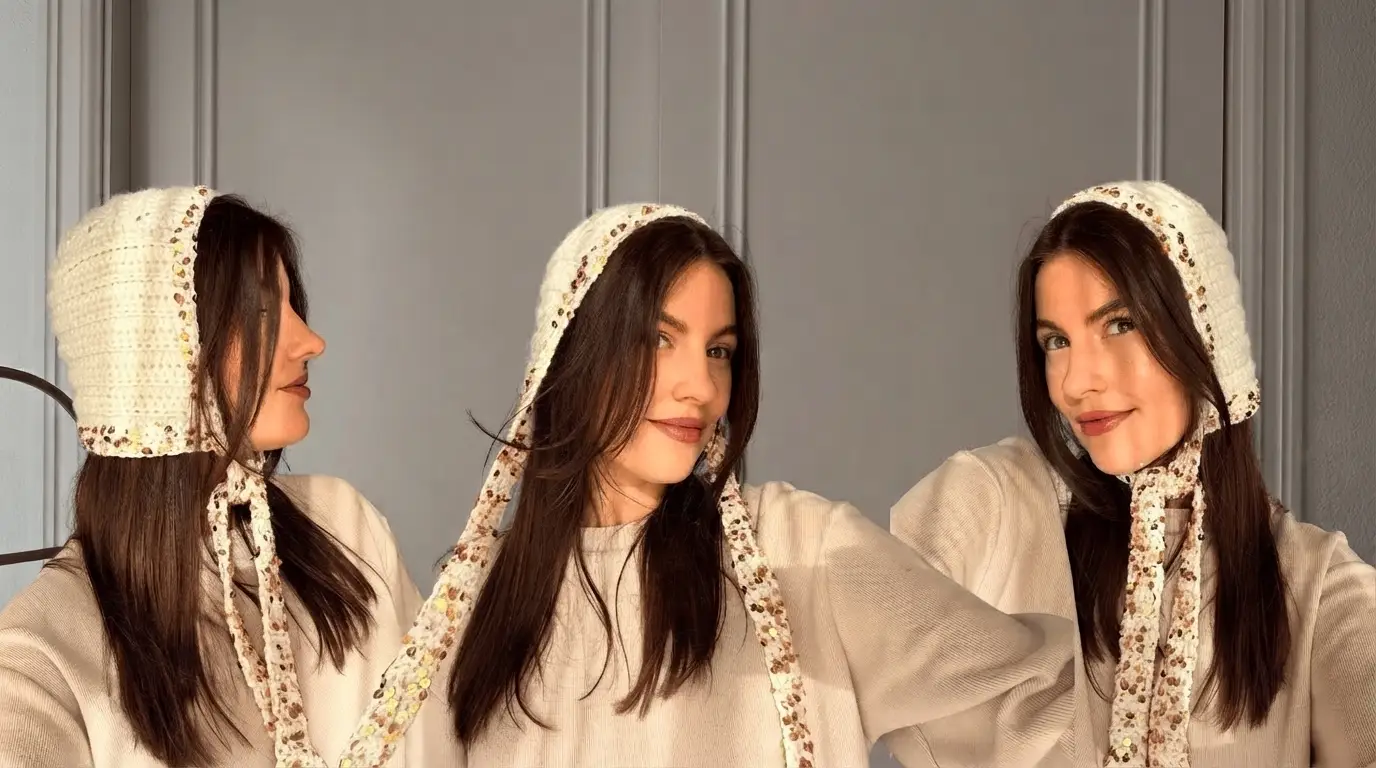
A crochet bonnet is a lovely handmade accessory that combines warmth, comfort, and a timeless look. This simple crochet bonnet pattern features a soft cream-colored design, delicate decorative edging, and long ties that create a charming finish.
Why Make a Crochet Bonnet?
Crochet bonnets are beautiful accessories that never seem to go out of style. They have a soft, classic appearance and can be worn with casual outfits, dresses, sweaters, and winter clothing. Their simple shape also makes them a fun project for crocheters who want to create something useful and stylish.
This crochet bonnet pattern free design uses basic stitches and simple shaping techniques. The finished bonnet has a comfortable head-covering section, a neat edge around the face, and long ties that can be fastened under the chin.
The cream color gives the bonnet a clean and delicate appearance. You can also add a decorative border using a second color or a slightly textured yarn to make it more interesting.
Materials Needed for Your Crochet Bonnet
Before starting, gather all your crochet supplies. Choosing comfortable yarn is important because a bonnet sits close to the head and face.
Yarn: Choose a soft, lightweight yarn in a color you love. DK or light worsted-weight yarn works well for this project. Cream, ivory, beige, and pastel shades are lovely choices.
Crochet hook: Use a hook size recommended on your yarn label. A 4 mm or 4.5 mm hook is a good starting point for many DK-weight yarns.
Scissors: Keep a small pair of scissors nearby for cutting the yarn.
Yarn needle: You will need a yarn needle to sew the bonnet sections together and weave in loose ends.
Stitch markers: These are helpful for marking corners and keeping track of shaping.
Measuring tape: Use a measuring tape to check the bonnet size as you work.
Decorative yarn: A small amount of contrasting or speckled yarn can be used for the edging if you want a decorative finish.
Crochet Stitches and Techniques You Should Know
This pattern is suitable for beginners who already know a few basic crochet stitches. If you are new to crochet, practice the stitches on a small sample before making the bonnet.
Chain stitch (ch): This stitch creates the foundation chain and is also used to begin new rows.
Single crochet (sc): Insert your hook into the stitch, yarn over, pull up a loop, yarn over again, and pull through both loops.
Half double crochet (hdc): Yarn over, insert your hook into the stitch, yarn over and pull up a loop. Yarn over again and pull through all three loops.
Slip stitch (sl st): Insert your hook into the stitch, yarn over, and pull through both the stitch and the loop on your hook.
Increasing: Work two stitches into the same stitch to make your crochet fabric wider.
Decreasing: Combine two stitches into one to make your fabric narrower.
You should also know how to work into the back loop only. This technique creates subtle horizontal ridges and gives the bonnet a lovely textured appearance.
Understanding the Crochet Bonnet Pattern
This bonnet is made using simple crochet panels that are joined together to create a comfortable hood shape. The design includes a back section, a crown section, a face opening, and two long ties.
The pattern is written using US crochet terms. The measurements are approximate and can be adjusted to suit the person who will wear the bonnet.
For a starting adult size, aim for a finished head circumference of approximately 21–23 inches. Always measure the intended wearer rather than relying only on age or standard sizing.
Step 1: Make a Small Crochet Gauge Swatch
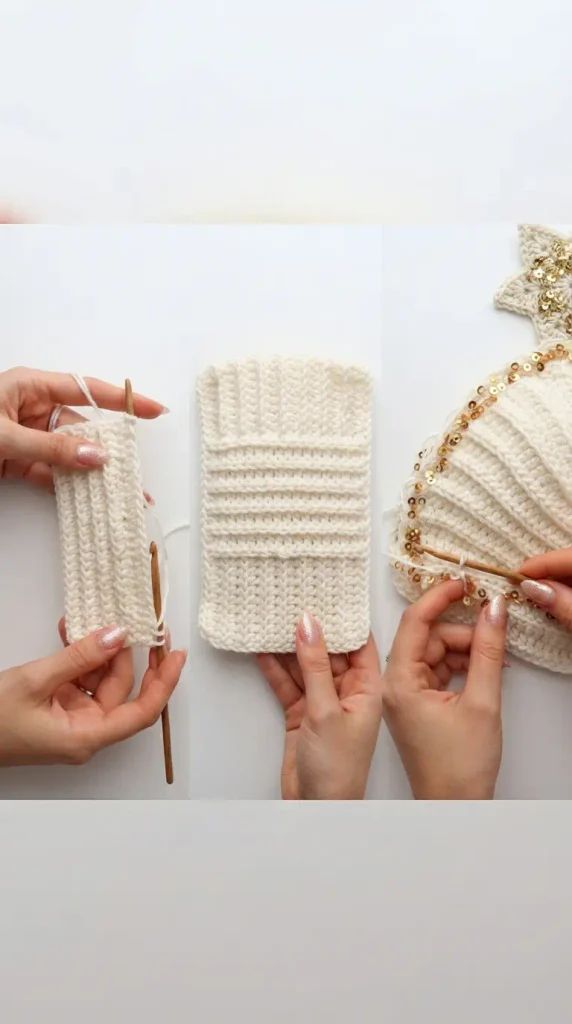
Start by making a small sample using your chosen yarn and crochet hook.
Chain 16 stitches and work several rows of half double crochet. Measure a section of your fabric to see how many stitches and rows fit into four inches.
Your gauge does not need to match an exact number for this flexible design, but it should help you understand how large your stitches are.
If your stitches are too loose, try a smaller hook. If they are too tight, use a larger hook.
A soft, flexible fabric is ideal because it allows the bonnet to sit comfortably without feeling stiff.
Step 2: Crochet the Back Panel
The back panel forms the part of the bonnet that covers the back of the head.
Begin with a foundation chain that measures approximately 7–8 inches. Adjust the chain length according to the desired bonnet size.
Work one half double crochet into the third chain from your hook. Continue working one half double crochet into each chain across the row.
At the end of the row, chain two and turn your work. Continue making rows of half double crochet until the panel measures approximately 7–8 inches tall.
For a more textured finish, work your stitches through the back loop only on each row. This creates neat horizontal ridges across the fabric.
Keep the sides straight and count your stitches regularly. The panel should have a neat rectangular shape.
Step 3: Crochet the Crown Section
The crown section extends from the back of the head toward the forehead.
Make a foundation chain that matches the width of the back panel. Work half double crochet stitches across the chain to create the first row.
Continue working rows until the crown section reaches approximately 10–11 inches in length.
The exact length depends on the size of the head and how much coverage you want. Check the measurements as you work so the bonnet does not become too short or too loose.
You can use back-loop-only stitches for the same ribbed texture as the back panel. Keeping the stitch pattern consistent gives the finished bonnet a clean appearance.
Step 4: Join the Back and Crown Sections
Now it is time to bring the two main sections together.
Place the back panel and crown section on a flat surface. Position the back panel at the back of the bonnet and align one edge of the crown section with its top edge.
Use a yarn needle or slip stitches to join the pieces neatly.
Try to keep the joining stitches even. Avoid pulling the yarn too tightly because this can make the seam uncomfortable and cause the fabric to lose its shape.
Once joined, gently shape the bonnet to check how the crown sits. The fabric should cover the head comfortably without pulling at the forehead.
Step 5: Shape the Sides of the Bonnet
The sides help the bonnet sit around the head and frame the face.
Attach your yarn along one side of the bonnet opening. Work single crochet stitches evenly along the edge to create a neat foundation.
Repeat on the opposite side.
If you want a closer fit around the face, add a few decreases where necessary. Work decreases gradually and check the shape as you go.
The sides should feel comfortable rather than tight. Leave enough space around the face so the bonnet can be worn easily.
Step 6: Create the Decorative Face Border
A pretty border makes a simple crochet bonnet look more finished.
Join your chosen border yarn at one side of the face opening. Work a row of single crochet stitches around the opening, keeping the spacing as even as possible.
For a delicate appearance, use a cream or ivory yarn. If you prefer a more decorative style, choose a speckled yarn with small brown, tan, or golden details.
You can also add a second row of slip stitches or single crochet stitches to create a slightly thicker edge.
Do not make the border too tight. A tight border can pull the fabric inward and make the face opening uncomfortable.
Step 7: Crochet the Long Bonnet Ties
The long ties are one of the prettiest parts of this bonnet design. They hang down from the sides and can be tied into a soft bow under the chin.
To make a tie, attach your yarn to the lower corner of one side of the bonnet.
Chain approximately 35–45 stitches, depending on the length you prefer. Work one slip stitch into each chain to make the tie stronger and more stable.
You can also work a row of single crochet stitches along the chain if you prefer a slightly thicker tie.
Fasten off and weave in the loose end securely.
Repeat the same process on the opposite side. Try to make both ties the same length so the bonnet looks balanced.
Step 8: Add the Finishing Details
Once the main bonnet is complete, take a few minutes to check all the edges and seams.
Weave in every loose yarn end using a yarn needle. Pay special attention to the areas where the ties are attached because these parts may experience more pulling.
If you want a decorative appearance, add small crochet details along the border using a contrasting yarn. Keep the details small and evenly spaced.
You can also add a few embroidered dots using a yarn needle and a different color. This creates a delicate dotted effect without making the bonnet too heavy.
Check that all decorative details are securely attached before wearing the bonnet.
Tips for Making a Beautiful Crochet Bonnet
Choose soft yarn. Since the bonnet touches the forehead, cheeks, and neck, a comfortable yarn makes a big difference. Cotton, acrylic, and suitable soft-blend yarns can all work well.
Keep your tension even. Uneven stitches can make one side of the bonnet larger than the other. Try to maintain the same tension throughout the project.
Measure before joining. Checking the measurements before sewing the sections together can help prevent sizing problems.
Make matching ties. Unequal ties can make the finished bonnet look unbalanced. Measure the first tie before making the second.
Use a contrasting border carefully. A small amount of decorative yarn can make the bonnet stand out without taking attention away from its simple design.
Avoid tight seams. A flexible seam allows the bonnet to sit naturally around the head.
How to Adjust the Bonnet Size
One of the best things about making your own crochet bonnet is that you can change the measurements to suit different head sizes.
For a smaller bonnet, reduce the width and length of the panels. For a larger bonnet, add a few stitches to the foundation chain and work additional rows.
Always check the head circumference and the distance from the forehead to the back of the head before deciding on the final measurements.
If you are making a bonnet for a child, take the actual measurements whenever possible. Do not assume that all children of the same age have the same head size.
Remember that crochet fabric can stretch, especially when made with soft yarn. Leave enough room for comfortable movement without making the bonnet too loose.
How to Wash and Care for Your Crochet Bonnet
Proper care will help your handmade bonnet stay beautiful for a long time.
Always check the yarn label before washing. Some yarns can be machine washed, while others need gentle hand washing.
For hand washing, use cool or lukewarm water and a mild detergent. Gently move the bonnet through the water without rubbing or twisting it.
Rinse carefully and press out excess water using a clean towel. Do not wring the fabric because this can stretch the stitches and change the shape.
Lay the bonnet flat on a dry towel and gently arrange it into its original shape. Allow it to dry completely before storing or wearing it.
Keep the bonnet in a clean, dry place away from sharp objects that could catch the yarn.
Creative Ways to Customize Your Crochet Bonnet
You do not have to use cream yarn for every bonnet. This pattern can be made in many different colors to suit your personal style.
Soft pink, beige, light brown, lavender, and pale yellow are lovely choices for a delicate look. Darker shades such as chocolate brown, charcoal, and navy can create a more classic appearance.
You can also experiment with different stitch patterns. Half double crochet creates a simple, slightly textured fabric, while single crochet makes a denser fabric.
For a more decorative finish, try adding a scalloped border or small embroidered flowers. You can even use a slightly different color for the ties to create a pretty contrast.
Another lovely idea is to use a soft variegated yarn for the border. This creates little color changes along the edge without needing to switch yarn manually.
Common Mistakes to Avoid
One common mistake is choosing a hook that is too small. This can make the fabric stiff and uncomfortable. Always check your gauge and adjust your hook when necessary.
Another mistake is forgetting to measure the bonnet while working. Even a few extra rows can change the fit, so check the dimensions regularly.
Uneven borders can also affect the finished appearance. When adding single crochet stitches around the opening, space them carefully and avoid adding too many stitches in one area.
Finally, make sure the ties are attached securely. Loose attachments can become weak with repeated use.