Crochet Phone Bag: Easy Step-by-Step Pattern for Beginners
A crochet phone bag is a cute and practical little accessory that keeps a phone safe while leaving your hands free. With soft yarn, simple stitches, and a comfortable long strap, this beginner-friendly project is perfect for everyday use.
What Is a Crochet Phone Bag?
A crochet phone bag is a small handmade pouch designed to carry a mobile phone and a few other essentials. It usually has a simple rectangular shape, an open top, and a long shoulder strap that makes it easy to wear across the body.
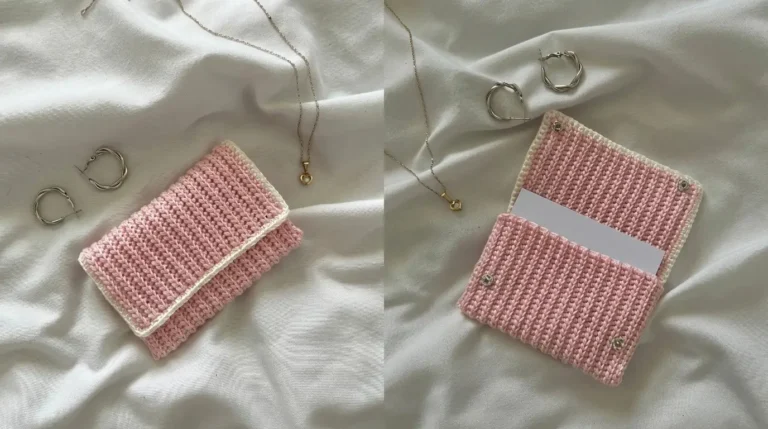
This design features a lovely pink crochet phone bag with a neat rectangular body and a slim, matching strap. Its simple texture gives it a clean and handmade appearance without needing complicated stitches or decorations.
The bag is especially useful when going shopping, walking, travelling, or running quick errands. It can hold a smartphone, a few cards, keys, and other small items. Since it is lightweight and compact, it is also a lovely handmade gift for friends, family members, or anyone who enjoys cute crochet accessories.
Materials Needed for a Crochet Phone Bag
You do not need many materials to make this crochet phone bag. A few basic crochet supplies are enough to create a beautiful and useful finished piece.
Yarn: Choose cotton yarn or a cotton-blend yarn in your favorite color. Pink gives the bag a soft and pretty appearance, but you can also use cream, lavender, beige, white, or any color you like. Medium-weight yarn works well for a sturdy everyday pouch.
Crochet hook: A 3.5 mm or 4 mm crochet hook is a good starting point. The correct hook size depends on your yarn and how tightly you crochet.
Scissors: Use sharp scissors to cut the yarn when finishing the project.
Yarn needle: A yarn needle is useful for sewing the sides together and hiding loose yarn ends.
Stitch markers: These are helpful for marking the edges and keeping track of your rows.
Measuring tape: Measure your phone before starting so the finished bag has enough room.
Crochet Stitches and Techniques You Need to Know
This crochet phone bag uses basic stitches, making it suitable for beginners who already know how to make a foundation chain.
Chain stitch (ch): This stitch creates the foundation of the bag and is also used when making the strap.
Single crochet (sc): Single crochet creates a firm, closely packed fabric. It is a great choice for phone bags because it helps prevent small objects from slipping through the stitches.
Slip stitch (sl st): This stitch is useful for joining yarn and finishing edges neatly.
Working in rows: The main bag is made by crocheting back and forth in rows to create a long rectangular piece.
Seaming: The finished rectangle is folded and its two side edges are joined to create the pouch shape.
You should also know how to count stitches and maintain even tension. These small details help the finished bag look neat and balanced.
Crochet Phone Bag Size and Measurements
Before starting, measure your mobile phone. Different phones have different dimensions, so adjusting the bag size is important.
For this beginner pattern, the approximate finished measurements are:
- Width: 10–12 cm (4–4.7 inches)
- Height: 17–19 cm (6.7–7.5 inches)
- Strap length: 100–120 cm (39–47 inches)
These measurements are suggestions rather than fixed sizes. You can make the pouch wider or taller depending on your phone.
The finished bag should be slightly wider and taller than your phone so that it slides inside comfortably. Remember that crochet fabric can stretch slightly with use, so avoid making the pouch too loose.
Step-by-Step Guide to Make a Crochet Phone Bag
Follow these simple steps to create a beautiful rectangular crochet phone bag with a long shoulder strap. The pattern uses US crochet terminology and single crochet stitches throughout.
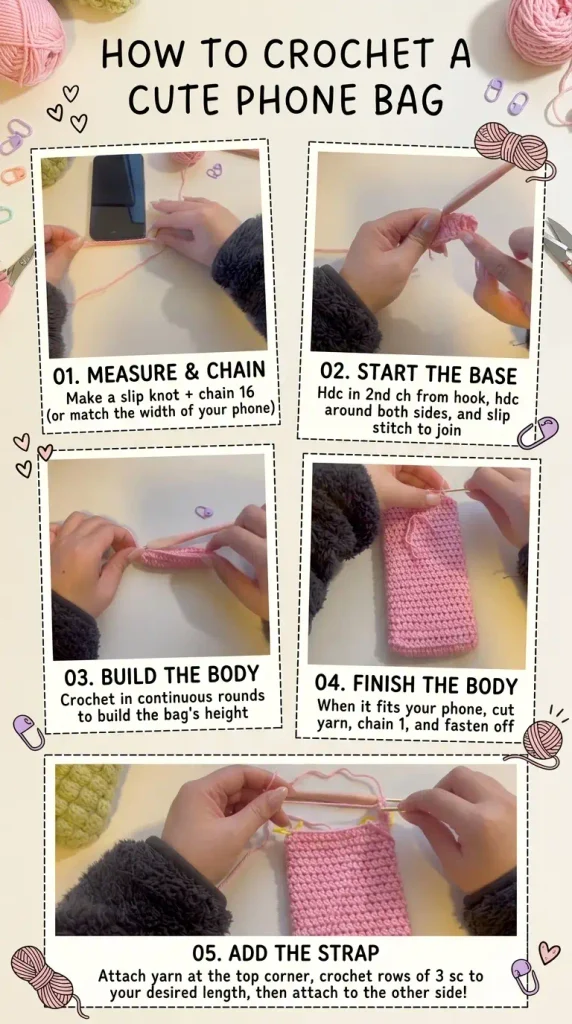
Step 1: Make the Foundation Chain
Start by choosing your yarn and crochet hook. Make a slip knot and place it on your hook.
Create a foundation chain of 19 stitches. This chain will determine the width of your phone bag.
If your phone is wider than the suggested size, add a few extra chains. If it is smaller, you can reduce the number of chains.
Make sure your chain is not too tight. A tight foundation chain can cause the bottom edge of the bag to curl or become narrower than the rest of the fabric.
Step 2: Crochet the First Row
Insert your hook into the second chain from the hook.
Make one single crochet stitch in each chain across the row. You should have 18 single crochet stitches.
At the end of the row, chain one and turn your work.
This creates the first row of the rectangular pouch. Keep your stitches even so that the edges remain straight.
Step 3: Continue Making the Bag Body
For the second row, make one single crochet in every stitch across.
Chain one and turn your work again.
Repeat this process for every row. Continue crocheting until the rectangle measures approximately 34–38 cm (13.4–15 inches) in length.
The exact length depends on how tall you want your finished bag to be. You can place your phone against the crochet fabric to check the size as you work.
The fabric should look like a long rectangular piece with closely packed horizontal rows. This creates the simple, textured appearance of the finished pink phone pouch.
Step 4: Check the Shape and Size
Before finishing the main body, measure the rectangle.
For this design, the rectangle should be approximately 10–12 cm wide and 34–38 cm long.
Fold the rectangle in half from the bottom, leaving the top edge open. The folded section becomes the front and back of the phone bag.
Place your phone inside the folded section to check whether it fits comfortably.
If the pouch feels too narrow, you may need to start again with a wider foundation chain. If it is too short, continue adding rows before fastening off.
Step 5: Fold and Join the Bag Sides
Once the body is the correct size, fasten off the yarn and leave a long tail for sewing.
Fold the rectangular piece in half, bringing the two shorter ends together at the top.
The fold should form the bottom of the bag, while the two open sides will become the side seams.
Use a yarn needle and the leftover yarn to sew both side edges together. You can use a mattress stitch or a simple whip stitch to join the edges.
Keep the stitches close enough to make the sides secure. Avoid pulling the yarn too tightly because this can make the pouch look uneven.
When both sides are joined, turn the bag right side out if necessary. You should now have a simple rectangular pouch with an open top.
Step 6: Create a Neat Top Edge
The top edge is where the phone will enter and leave the bag, so it should look clean and even.
Attach your yarn to one corner of the opening.
Work one single crochet stitch into each stitch along the top edge. Continue around the opening if you want a slightly more finished border.
Join the round with a slip stitch and fasten off.
This simple border gives the bag a tidy appearance and helps the opening keep its shape.
Step 7: Crochet the Long Shoulder Strap
A long crochet strap is one of the most useful parts of this design. It allows the bag to hang comfortably across your body.
To make the strap, begin with a slip knot and create a foundation chain long enough to reach your preferred strap length.
For a narrow strap, you can start with 5 or 6 chains.
Make one single crochet in the second chain from the hook and continue across the chain. You should have 4 or 5 stitches, depending on your starting chain.
Chain one, turn, and make one single crochet in every stitch across.
Repeat these rows until the strap reaches approximately 100–120 cm (39–47 inches), or your preferred length.
The strap should be firm but not overly tight. A slightly wider strap can be more comfortable because it distributes the weight across a larger area.
Step 8: Attach the Strap to the Bag
Place the strap ends on the inside of the bag near the two upper side edges.
Make sure the strap is not twisted before attaching it.
Use a yarn needle to sew each end securely to the bag. Stitch through several rows of the bag fabric rather than attaching the strap to just one small stitch.
You can sew around the edges of each strap end several times to make the connection stronger.
Check that both sides are attached at approximately the same height. This helps the bag hang straight when worn over the shoulder or across the body.
Step 9: Finish the Crochet Phone Bag
Weave in all loose yarn ends using your yarn needle.
Check the side seams, strap attachments, and top opening to make sure everything is secure.
Gently shape the pouch with your hands and place your phone inside to check the fit.
Your crochet phone bag is now ready to use!
Tips for Making a Beautiful Crochet Phone Bag
Choosing the right yarn makes a big difference in the final result. Cotton yarn is a good option because it creates a firm fabric and usually holds its shape better than very soft, stretchy yarn. If you prefer a softer feel, a cotton blend can also work nicely.
Pay attention to your tension while crocheting. If some rows are tighter than others, the bag may look uneven. Try to keep the same amount of pressure on your yarn throughout the project.
Do not make the pouch exactly the same size as your phone. Leave a little extra room so that your device can slide in and out without stretching the stitches too much.
The strap also deserves extra attention. Since it carries the weight of the phone, make sure both ends are firmly attached. A narrow strap can stretch over time, so a slightly thicker strap may be a better choice for regular use.
If you want your phone to have extra protection, you can add a simple fabric lining inside the pouch. A lining also helps prevent small items from catching on the crochet stitches.
Crochet Phone Bag Color and Design Ideas
One of the best things about making your own crochet phone bag is the freedom to choose your favorite colors.
A soft pink pouch creates a sweet and feminine look, especially when paired with a matching shoulder strap. You can also try pastel shades such as baby blue, mint green, lilac, or peach for a fresh everyday accessory.
Neutral colors like beige, cream, gray, and brown are perfect for people who prefer simple accessories that match different outfits.
For a more colorful design, try using two shades of yarn. You can make the main body in one color and the strap or top border in another. This small change can make a simple crochet pouch look more interesting.
You can also add a small crochet flower, a decorative button, or a simple bow. Keep decorations lightweight so they do not make the bag uncomfortable to carry.
How to Care for Your Crochet Phone Bag
Proper care helps your handmade accessory stay attractive for a long time.
Check the washing instructions on your yarn label before cleaning the bag. Many cotton crochet items can be gently hand-washed in cool water with mild detergent.
Avoid twisting or squeezing the pouch too hard after washing. Instead, press out extra water using a clean towel and leave it flat to air-dry.
Do not hang the bag while it is wet because the weight of the water can stretch the strap and body.
When you are not using it, store the pouch in a clean, dry place. Keeping it away from sharp objects also helps prevent the yarn from snagging.
Frequently Asked Questions About Crochet Phone Bags
Is a Crochet Phone Bag Easy for Beginners?
Yes! This design is beginner-friendly because it uses basic stitches such as chain stitch, single crochet, and slip stitch. You mainly need to crochet a rectangle, join the sides, and make a long strap.
What Is the Best Yarn for a Crochet Phone Bag?
Cotton yarn is a popular choice because it creates a firm fabric and offers good stitch definition. Cotton-blend yarn is another option if you prefer a slightly softer finish.
How Long Does It Take to Crochet a Phone Bag?
The time depends on your crochet experience, yarn thickness, and the size of the bag. A simple design like this may take a few hours for someone familiar with basic stitches. Beginners may need more time to complete the body, strap, and finishing.
Can I Make the Crochet Phone Bag Bigger?
Yes. Simply increase the number of foundation chains to make the bag wider and crochet additional rows to make it taller. Always measure your phone before deciding on the final dimensions.
Can I Add a Button to the Phone Bag?
Yes! You can add a button and crochet a small loop at the top to create a simple closure. This helps keep the phone from slipping out when you are moving around.
Final Thoughts
A crochet phone bag is a lovely little project that combines creativity and everyday usefulness. Its simple rectangular shape, pretty crochet texture, and long shoulder strap make it a practical accessory for daily activities. With basic materials and easy stitches, even a beginner can create a beautiful handmade pouch. Choose a favorite yarn color, adjust the measurements to fit your phone, and enjoy making an accessory that is both personal and useful.