Aloe Vera Plant Care Tips for Healthy and Thriving Plants
Bringing nature inside your home offers a refreshing way to brighten any room. Many people find that cultivating succulents provides a rewarding experience that transforms their living space into a peaceful sanctuary. These resilient greens are perfect for those who want beauty without constant effort.
Mastering basic indoor plant maintenance ensures your collection stays vibrant throughout the year. Understanding the foundational needs of your greenery is the secret to success. By following these expert-backed aloe vera plant care tips, you can easily cultivate a lush environment.
Focusing on the right light and water balance promotes healthy aloe vera growth for years to come. Whether you are a beginner or a seasoned gardener, these simple methods help your succulents flourish. Let us explore how to keep your home garden looking its absolute best.
Understanding the Nature of Aloe Vera
Every successful succulent care guide begins with a deep dive into the plant’s natural history and physical design. By learning how these plants function, you can better replicate their needs in your own home.
The Succulent Anatomy
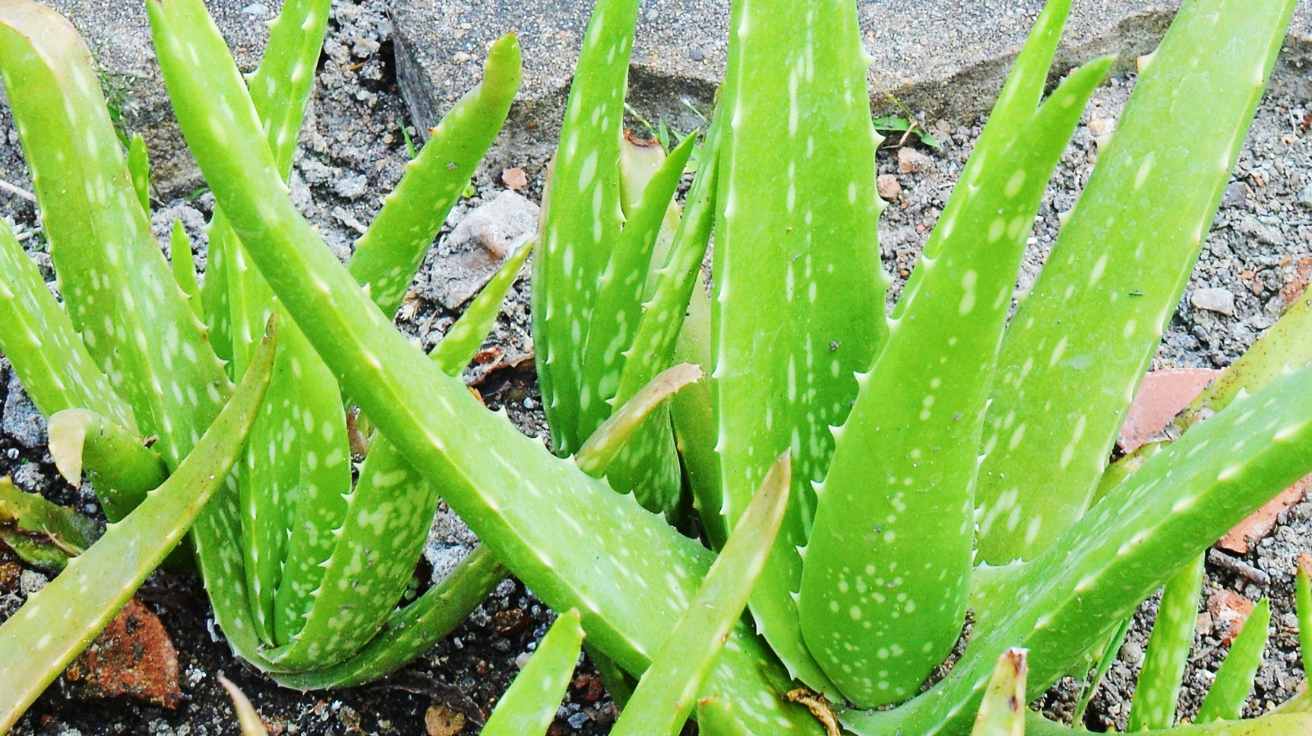
Aloe Vera is a master of survival, specifically adapted to store moisture within its thick, fleshy leaves. This internal reservoir allows the plant to endure long periods of drought without suffering damage.
The outer skin of the leaf is waxy and tough, which helps prevent water loss through evaporation. Inside, the clear gel acts as a vital hydration bank for the plant during dry spells.
Natural Habitat and Growth Patterns
In their native desert environments, these plants grow in rocky, well-draining soil under intense sunlight. They have evolved to utilize every drop of occasional rainfall, making them perfect subjects for a reliable succulent care guide.
These plants typically grow in a rosette pattern, which helps funnel water toward the root system. Understanding these biological traits allows you to provide the right environment for your indoor specimens to thrive.
Essential Aloe Vera Plant Care Tips for Beginners
Many new plant owners find that the secret to a happy succulent lies in a steady, predictable rhythm. Beginners often struggle with the balance between providing too much attention and not enough. By following a reliable succulent care guide, you can keep your plant thriving without needing to hover over it every single day.
Creating a Consistent Routine
Establishing a simple schedule is the most effective way to ensure long-term success. You should aim to check your plant’s soil moisture once a week rather than watering on a rigid calendar date. This allows you to adapt to changes in your home environment, such as shifts in humidity or temperature.
Keep a small notebook or use a phone app to track when you last watered your plant. Consistency helps you notice subtle changes in leaf color or texture before they become major issues. These basic aloe vera plant care tips will help you build confidence as you learn the unique needs of your greenery.
Common Mistakes to Avoid
One of the most frequent errors is placing the plant in a spot that does not receive enough natural light. While these plants are hardy, they still require bright, indirect sunlight to maintain their structural integrity. Avoid dark corners or rooms with heavy curtains that block essential rays.
Another common pitfall involves inconsistent watering habits that lead to root stress. Many beginners accidentally drown their plants by watering too frequently, which prevents the soil from drying out properly. Following a proper succulent care guide will help you avoid these traps and keep your plant healthy for years to come.
Selecting the Right Potting Mix and Container
Choosing the perfect container and soil is the secret to a happy aloe. When you focus on these succulent potting tips, you create a stable environment that encourages steady growth. A well-prepared home prevents common issues like root rot and keeps your plant vibrant.
Importance of Drainage Holes
The most critical feature of any pot for an aloe plant is the presence of drainage holes. Without these openings, excess water gathers at the bottom of the container. This trapped moisture quickly leads to decaying roots and plant stress.
Always ensure your chosen pot allows water to escape freely after every watering session. If you fall in love with a decorative pot that lacks holes, use it as a cachepot. Simply place your plant in a plastic nursery pot inside the decorative one to maintain proper drainage.
Choosing the Best Soil Amendments
Aloe plants require a medium that does not hold onto too much moisture. Standard potting soil is often too dense and retains water for long periods, which can suffocate the roots. Adding amendments like perlite, pumice, or coarse sand improves aeration significantly.
These materials create tiny air pockets within the soil structure. This prevents compaction and allows the roots to breathe easily. A loose, gritty texture is exactly what your plant needs to stay healthy.
Why Cactus Mix Works Best
If you want the best soil for aloe, a high-quality cactus or succulent mix is the ideal choice. These commercial blends are specifically formulated to mimic the arid, rocky conditions of the plant’s natural habitat. They provide the perfect balance of drainage and nutrient retention.
When you are repotting aloe vera, always start with a fresh bag of this specialized mix. It takes the guesswork out of soil preparation and ensures your plant has the support it needs to thrive. Proper soil management is the most effective way to protect your plant from environmental stress.
Mastering the Watering Schedule
Learning how to water aloe vera effectively will transform your gardening experience. Because these plants store moisture in their thick leaves, they do not require frequent attention. Finding the right balance is the key to keeping your succulent happy and vibrant throughout the year.
The Soak and Dry Method
The most reliable technique for hydration is known as the soak and dry method. You should water your plant thoroughly until liquid begins to drain from the bottom of the pot. This ensures that the entire root system receives moisture.
After watering, allow the soil to dry out completely before you add more. This cycle mimics the natural environment of the plant and is essential for preventing root rot. Never let your aloe sit in a saucer filled with standing water.
Signs of Overwatering vs Underwatering
Your plant will often communicate its needs through its physical appearance. If you notice mushy, translucent, or yellowing leaves, you are likely providing too much water. This is a common mistake that leads to decay and prevents healthy growth.
Conversely, underwatering causes the leaves to look thin, shriveled, or curled. While aloe is drought-tolerant, extreme neglect will eventually cause the plant to lose its plump, healthy structure. Finding the middle ground is vital for preventing root rot and maintaining leaf integrity.
Checking Soil Moisture Levels
Before you reach for the watering can, always perform a quick physical check. Insert your finger or a wooden skewer about two inches deep into the potting mix. If the soil feels damp, wait a few more days before checking again.
Only add water when the soil feels completely dry to the touch. This simple habit helps you understand how to water aloe vera based on your home’s specific humidity and temperature. Consistent monitoring ensures your plant stays healthy and strong.
Optimizing Sunlight and Temperature Requirements
Sunlight and warmth are the two most critical factors for indoor aloe success. These succulents are naturally adapted to bright, arid environments, meaning they require specific conditions to maintain their structural integrity and vibrant color. Understanding your plant’s unique aloe vera sunlight needs will help you create a thriving indoor oasis.
Finding the Perfect Window Spot
When you are growing aloe indoors, the placement of your container is vital. A south-facing or west-facing window is usually the best choice because these spots provide the most consistent light throughout the day.
Your plant craves bright, indirect light to perform photosynthesis efficiently. If your home lacks natural light, you might consider placing the plant on a sunny windowsill where it can soak up the morning rays without being overwhelmed.
Managing Light Intensity
While these plants love the sun, too much direct exposure can lead to leaf scorching, especially during the peak of summer. You should monitor your plant closely for signs of stress, such as brown or crispy leaf tips.
If the light becomes too intense, simply move the pot a few feet away from the glass or use a sheer curtain to filter the rays. Meeting these specific aloe vera light requirements ensures your plant stays healthy and green all year long.
Ideal Temperature Ranges for Indoor Aloe
Temperature plays a significant role in the metabolic activity of your succulent. Most varieties prefer a comfortable range between 65°F and 80°F, which mimics their natural habitat.
Avoid placing your plant near drafty windows, air conditioning vents, or heating units. Sudden temperature fluctuations can shock the plant and hinder its growth, so keeping a stable environment is key to long-term success.
Fertilization Strategies for Robust Growth
Providing the right nutrients at the right time is the secret to healthy aloe vera growth. While these plants are naturally resilient, they appreciate a little extra support during their most active phases.
When to Feed Your Plant
The best time for fertilizing aloe plants is during the spring and summer months. This period marks the active growing season when the plant is most capable of absorbing nutrients.
Avoid feeding your plant during the winter when it enters a state of dormancy. Providing fertilizer while the plant is resting can lead to salt buildup in the soil and potential root damage.

Selecting the Right Fertilizer Type
When choosing a product, look for a balanced, water-soluble formula designed for succulents. A ratio like 10-10-10, diluted to half-strength, is usually sufficient to promote healthy aloe vera growth without burning the roots.
Organic vs Synthetic Options
Many gardeners prefer using an organic fertilizer for succulents because it improves soil health over time. These options, such as seaweed extract or fish emulsion, provide a gentle release of nutrients that mimics natural conditions.
Synthetic fertilizers offer a more precise and immediate nutrient boost for your plant. However, you must be careful to follow the label instructions closely to avoid over-fertilization. Choosing a high-quality organic fertilizer for succulents remains a popular choice for those who prefer a more sustainable approach to indoor gardening.
Pruning and Harvesting Leaves Safely
Keeping your succulent healthy requires a bit of maintenance, especially when it comes to pruning aloe vera. Regular care ensures your plant remains aesthetically pleasing while preventing issues like rot or overcrowding. By following a few simple steps, you can manage your plant’s size and harvest its beneficial gel with confidence.
Tools Needed for Clean Cuts
To perform effective pruning, you need the right equipment to ensure clean, precise cuts. A sharp, sterilized knife or a pair of garden shears works best for this task. Always wipe your blades with rubbing alcohol before you begin to prevent the spread of bacteria or fungal spores to the plant tissue.
How to Harvest Gel Without Damaging the Plant
When you decide to harvest the inner gel, always select the thickest, most mature leaves located near the base of the plant. Use your sterilized knife to make a clean cut as close to the main stem as possible without nicking the stem itself. This careful approach protects the structural integrity of the succulent and allows the wound to heal quickly.
Promoting New Growth Through Pruning
Strategic pruning aloe vera is a fantastic way to encourage your plant to focus its energy on new development. By removing dead, damaged, or yellowing leaves, you allow the plant to redirect nutrients toward healthy foliage and offsets. Consistent maintenance keeps your aloe looking vibrant and prevents the plant from becoming weighed down by old, unproductive growth.
Identifying and Treating Common Pests
Even the healthiest plants can sometimes attract unwanted visitors. While these succulents are generally hardy, they can occasionally fall victim to common household pests. Performing regular inspections helps you spot these invaders before they cause significant damage to your plant.
Spotting Mealybugs and Scale
Mealybugs often appear as small, white, cottony masses tucked into the crevices of your plant. They feed on the sap and can weaken your succulent over time. You should check the undersides of leaves and the base of the plant frequently.
Scale insects look like tiny, brown, stationary bumps on the stems or leaves. They are easy to overlook because they blend in with the plant’s texture. If you see these bumps, try to gently scrape them off with a soft cloth or cotton swab.
Natural Remedies for Pest Control
Effective aloe vera pest control does not require harsh chemicals that could harm your family or pets. Many gardeners prefer using simple, non-toxic solutions to manage infestations. A gentle wipe-down with a mild soap and water solution often works wonders for minor outbreaks.
You can also use a cotton swab dipped in rubbing alcohol to spot-treat individual pests. This method is highly effective for removing mealybugs without stressing the rest of the plant. Consistency is key when you are managing these small populations.
Using Neem Oil Safely
Neem oil is a popular choice for natural pest management because it disrupts the life cycle of many insects. When applying it, always dilute the oil according to the manufacturer’s instructions to protect the plant’s delicate tissues. Avoid spraying your plant in direct sunlight to prevent leaf burn.
Apply the mixture thoroughly to both sides of the leaves for the best results. This approach to aloe vera pest control ensures your home environment remains safe while keeping your plant healthy. Monitor your succulent closely after treatment to ensure the pests do not return.
Troubleshooting Yellowing or Mushy Leaves
Seeing your vibrant aloe vera turn yellow or mushy can be a stressful experience for any plant owner. These visual changes are often the first warning signs that your succulent is struggling to maintain its health. By performing a bit of aloe vera troubleshooting, you can identify the underlying cause and nurse your plant back to a thriving state.
Diagnosing Root Rot
The most common culprit behind soft, mushy leaves is excess moisture trapped around the root system. When roots sit in water for too long, they begin to decay, which prevents the plant from absorbing necessary nutrients. You can confirm this by gently removing the plant from its pot to inspect the roots for a dark, slimy appearance or a foul odor.

If you discover damaged roots, trim away the affected areas with sterilized shears to stop the spread of decay. Repotting the plant into fresh, well-draining soil is essential for preventing root rot in the future. Always ensure your container has adequate drainage holes to allow excess water to escape freely.
Correcting Environmental Stress
Sometimes, yellowing leaves are not caused by water issues but by environmental factors like improper light or temperature fluctuations. If your plant is exposed to direct, scorching sun for too many hours, the leaves may lose their deep green color and turn pale or yellow. Moving your aloe to a spot with bright, indirect light is often the best strategy for fixing yellow aloe leaves.
Temperature stress can also lead to a decline in plant vigor. Aloe vera prefers stable, moderate temperatures and can suffer if placed too close to drafty windows or heating vents. By adjusting your plant’s location and ensuring it stays within a comfortable range, you will see a noticeable improvement in its overall health and resilience.
Propagating Your Aloe Vera Offsets
Expanding your indoor garden is easy when you learn the art of multiplying your succulents. Propagating aloe vera is a rewarding way to grow your collection or share beautiful plants with friends and family. By focusing on the small offshoots that appear at the base of the parent, you can create a thriving nursery right on your windowsill.
Identifying Mature Pups
Before you begin, you must ensure the “pups” are ready for independence. Look for small plantlets growing near the base of the main stem. These offsets should be at least three to four inches tall and have their own small root systems before you attempt to remove them.
Wait until the pups have developed a few healthy leaves of their own. This maturity ensures they have enough energy to survive the transition. If they are too small, they may struggle to establish themselves in a new container.
Step-by-Step Separation Process
Start by gently removing the entire parent plant from its container to get a clear view of the root system. This makes repotting aloe vera much easier and safer for the delicate roots. Use a clean, sharp knife to carefully cut the connection between the pup and the parent plant.
Ensure that each pup retains a portion of the root system during the cut. Gently brush away excess soil to see where the roots attach. Once separated, allow the cut end of the pup to callous over for a day or two in a dry, shaded area.
Rooting New Plants Successfully
Once the cut has dried, place your new plant into a small pot filled with a well-draining succulent mix. Press the soil firmly around the base to provide stability. Avoid watering the plant immediately, as this gives the roots time to settle into their new environment.
After a few days, provide a light watering to encourage growth. Keep the new plant in bright, indirect light while it establishes its roots. With a little patience, you will soon have a healthy, independent plant ready to thrive.
Seasonal Adjustments for Year-Round Health
Your aloe vera plant changes its needs as the seasons shift throughout the year. Mastering seasonal plant care is the secret to keeping your aloe thriving in every month. By observing these natural cycles, you can ensure your plant stays healthy regardless of the weather outside.
Caring for Aloe During Winter Dormancy
When the days grow shorter and temperatures drop, your plant enters a natural period of dormancy. During this time, growth slows down significantly as the plant conserves its energy. Successfully growing aloe indoors during the winter requires you to pull back on your usual maintenance routine.
You should reduce your watering frequency during these colder months. The soil takes much longer to dry out when light levels are low and the air is cool. Always check the moisture level deep in the pot before adding more water to prevent root issues.
Summer Growth Spurts and Care
As spring turns into summer, your aloe will likely experience a noticeable growth spurt. The increased intensity of sunlight and warmer temperatures signal the plant to produce new leaves. This is the perfect time to provide a bit more attention to your succulent.
You can increase your watering frequency as the soil dries out faster in the summer heat. Consistent seasonal plant care during this active phase helps the plant store enough energy for the coming year. Keep your aloe in a bright spot to support this rapid development and enjoy watching your plant flourish.
Enjoying the Long-Term Benefits of Your Thriving Aloe
Watching your succulent grow into a vibrant centerpiece brings a unique sense of satisfaction to any home gardener. Consistent indoor plant maintenance transforms a simple decorative piece into a resilient companion that offers both beauty and utility.
You now possess the knowledge to nurture your plant through every season. Applying these care habits creates a stable environment where your aloe can flourish for many years. This steady growth rewards your patience with lush leaves and healthy offsets.
Take a moment to appreciate the progress your plant makes under your care. Regular observation remains the best way to ensure your succulent stays healthy. Share your success with other plant lovers or start a new propagation project to expand your collection.
Your commitment to quality indoor plant maintenance ensures that your aloe remains a staple of your living space. Keep observing the light and moisture needs of your plant as it matures. Enjoy the natural charm and practical benefits this hardy succulent brings to your daily life.