How to Make a Beautiful Crochet Bra: Materials, Techniques, and Step-by-Step Guide
A crochet bra is a stylish handmade piece that combines comfort, creativity, and a beautiful textured design. With soft yarn, simple crochet stitches, and adjustable straps, you can create a lovely crochet bra for summer outfits, beach days, festivals, or everyday layering.
What Is a Crochet Bra?
A crochet bra is a handmade top made using yarn and a crochet hook. It usually features two shaped cups, a connecting center section, and straps that hold the garment comfortably in place. Some designs have simple straight cups, while others include a small opening between the cups for a more decorative look.
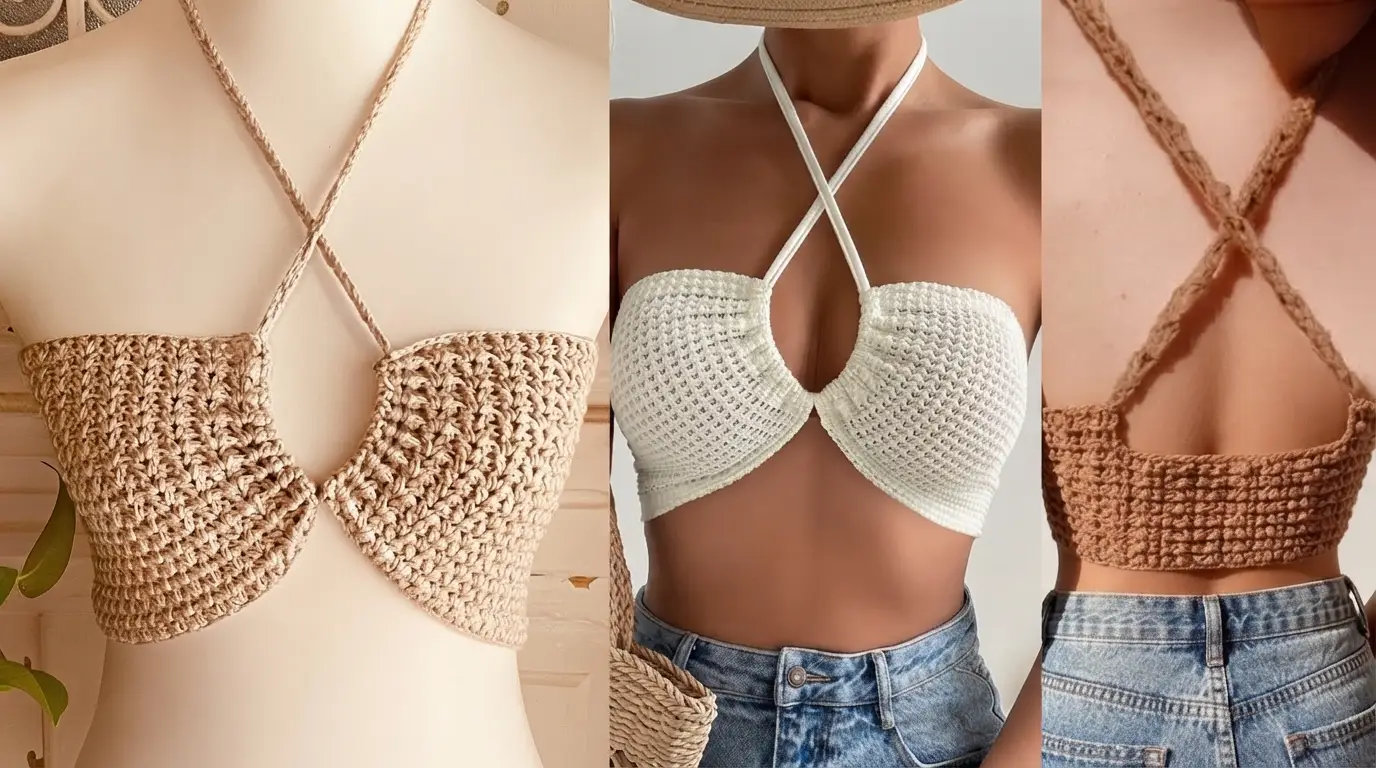
One popular style features textured crochet cups with thin straps that cross over the chest and tie around the neck. Neutral shades such as cream, beige, brown, and white create a soft, natural appearance. These colors are also easy to match with denim shorts, skirts, linen trousers, and summer outfits.
A crochet bra can be made in different sizes and styles. You can create a simple beginner-friendly design or experiment with decorative stitches and different strap arrangements.
Materials Needed to Make a Crochet Bra
Choosing the right materials is an important part of making a comfortable crochet bra. Since this garment sits directly against the skin, soft yarn and suitable crochet tools will help you achieve a better result.
Cotton Yarn: Cotton yarn is a popular choice because it feels comfortable, holds its shape reasonably well, and creates clear stitch patterns. Choose a soft cotton yarn that does not feel rough against your skin. Cotton blends can also work well.
Crochet Hook: A crochet hook between 3 mm and 4.5 mm may work for many lightweight bra designs. However, the correct hook size depends on your yarn thickness and desired fabric. Always check your tension before starting.
Scissors: Keep a small pair of sharp scissors nearby to cut the yarn neatly when finishing the cups and straps.
Yarn Needle: A yarn needle helps you hide loose ends and join separate crochet pieces without leaving untidy knots.
Measuring Tape: Use a measuring tape to check your bust, underbust, and desired strap length. Accurate measurements help you create a better-fitting garment.
Stitch Markers: Stitch markers are useful for identifying the center of your work, marking cup edges, and keeping track of increases.
Optional Bra Padding: If you prefer additional coverage, you can use removable bra pads. Make sure the crochet design includes a suitable pocket or opening to hold them securely.
Choosing the Best Yarn for a Crochet Bra
The yarn you choose can make a big difference in the final appearance and comfort of your crochet bra. Cotton yarn is often a good starting point because it is breathable and creates a defined texture.
For a soft summer style, choose lightweight cotton yarn in cream, ivory, beige, or chocolate brown. These shades create a simple and natural look that pairs beautifully with casual clothing.
Avoid yarn that feels scratchy, stiff, or uncomfortable against your skin. Very stretchy yarn may also make it harder to maintain the shape of the cups. If you want a garment with a little flexibility, a suitable cotton blend can be a good option.
Before beginning the full project, make a small crochet sample. Wash and dry it according to the yarn instructions to see whether the fabric changes size or texture.
Understanding the Crochet Bra Design
Before picking up your crochet hook, take a little time to understand the basic structure of the garment.
Most crochet bras are made with two separate cups. Each cup is shaped by gradually increasing stitches until it reaches the desired width and coverage. The cups are then joined at the center or connected with a small decorative section.
Some designs leave a small opening between the cups, creating a pretty keyhole effect. This detail gives the garment a modern appearance without requiring complicated crochet techniques.
The straps are another important feature. Thin crochet straps can cross over the chest, wrap around the neck, or connect behind the back. Wider straps can provide a different appearance and may feel more comfortable for some people.
The bottom edge can be finished with a simple row of single crochet stitches to create a neat border.
Step-by-Step Guide to Making a Crochet Bra
Step 1: Take Your Measurements
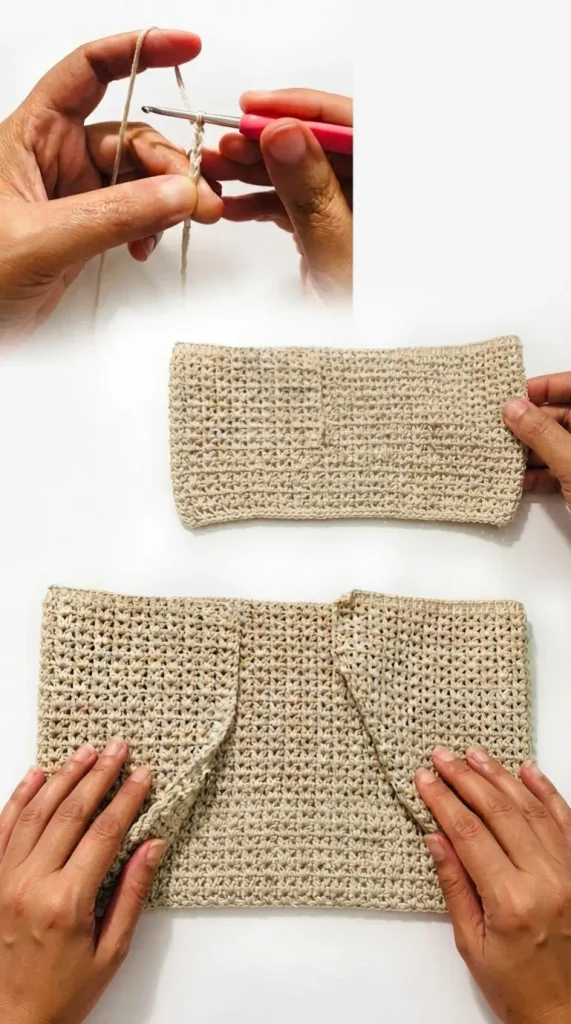
Start by measuring your bust and underbust. These measurements will help you decide how wide the cups should be and how long the bottom band needs to become.
Measure the area where you want the bra cups to sit. Think about how much coverage you prefer before choosing the final cup size.
Next, measure the distance from the top of each cup to the back of your neck if you want a halter-style design. You should also measure the length needed for the back ties.
Do not make the straps too short. It is better to leave a little extra yarn for adjustments because you can always shorten a strap later.
Step 2: Make a Crochet Gauge Sample
Before making the cups, crochet a small square using your chosen yarn and hook.
Try using basic stitches such as chain stitches and single crochet stitches. Measure the finished sample to understand how many stitches fit into a particular width.
If your stitches look too tight, try a slightly larger hook. If the fabric looks too loose and has large gaps, a smaller hook may help.
A gauge sample is especially useful because crochet tension differs from person to person. It helps you create two cups that are similar in size.
Step 3: Create the First Cup
Begin by making a foundation chain according to your chosen pattern. The chain length will depend on the cup size and the design you want to create.
Work your first row using single crochet stitches or another suitable stitch. Continue crocheting rows while gradually increasing stitches along the edges or center, depending on your cup construction.
These increases help create a curved shape rather than a flat rectangular piece.
For a textured appearance, you can use a combination of single crochet and double crochet stitches. A simple stitch pattern is often easier to control when you are making your first crochet bra.
Continue working until the cup reaches your preferred width and coverage. Check its shape regularly instead of relying only on the number of rows.
Step 4: Make the Second Cup
Once the first cup is finished, repeat the same process to make the second one.
Try to keep your stitch count, row count, and tension consistent. Both cups should have similar shapes and measurements so that the finished bra looks balanced.
Place the two cups next to each other to compare their sizes. If one cup is noticeably larger, check your stitch count and make small corrections before joining them.
Taking your time during this step can make the final garment look much neater.
Step 5: Join the Cups Together
After completing both cups, place them next to each other with the inner edges facing one another.
You can connect them using slip stitches, single crochet stitches, or a separate crochet strip. The joining method depends on the style you prefer.
For a decorative design, leave a small opening between the cups instead of joining their inner edges completely. This creates a keyhole-style center that adds an attractive detail.
Make sure the connection is secure. A weak center join may stretch or pull apart when the garment is worn.
Step 6: Add Texture and Decorative Details
Texture can make a simple crochet bra look much more interesting. If you want a soft, handmade appearance, try using a small repeating stitch pattern across the cups.
Shell stitches, cluster stitches, and textured combinations can create attractive surfaces. However, keep the stitch pattern comfortable against the skin.
You can also add a decorative border around the cups using single crochet stitches or a subtle scalloped edge.
For a clean and modern finish, use the same yarn color throughout the garment. Cream, beige, white, and warm brown are beautiful options for a simple summer-inspired design.
Step 7: Crochet the Bottom Band
The bottom band helps connect the cups and provides a place to attach the back straps.
Join your yarn to the lower edge of one cup and work across the bottom. Continue along the second cup if your design uses one continuous band.
Single crochet stitches can create a firm, neat edge. You can also use half-double crochet stitches if you prefer a slightly taller band.
Avoid making the band too loose because it may not hold the garment comfortably. At the same time, it should not feel tight or restrict movement.
For additional flexibility, consider adding a separate elastic band inside a suitable crochet casing. Make sure it is comfortable and securely attached.
Step 8: Make the Halter Straps
Halter straps are an attractive feature of this crochet bra style. They can be made using simple chains or narrow rows of crochet stitches.
Attach the yarn to the top outer corner of each cup. Create a strap long enough to reach comfortably around your neck.
For a crossed-strap appearance, bring each strap across the chest and toward the opposite side before arranging it around the neck. Check the placement carefully to make sure the straps sit comfortably and do not twist.
You can also make two separate neck ties that meet behind the neck.
Keep the straps even on both sides. If they are too thin, they may dig into the skin, so consider making them slightly wider for improved comfort.
Step 9: Add Adjustable Back Ties
Back ties allow you to adjust the fit of your crochet bra.
Attach yarn to both ends of the bottom band and crochet two long ties. You can use simple chain stitches reinforced with slip stitches or work a narrow strip of single crochet.
Leave enough length to tie a comfortable bow at the back.
If you prefer a more secure finish, you can use adjustable closures or small sewing-in fasteners designed for clothing. Make sure any additional hardware is safely attached.
Step 10: Finish and Check Your Crochet Bra
Once the cups, center section, band, and straps are complete, carefully weave in all loose yarn ends using a yarn needle.
Check every connection point, especially where the straps meet the cups and where the bottom band joins the garment.
Try the bra on and check whether the cups provide the coverage you want. Adjust the straps if necessary.
The finished garment should feel comfortable when you move, sit, and raise your arms. If anything feels too tight or loose, make adjustments before considering the project complete.
Popular Crochet Bra Styles to Try
Classic Crochet Bralette: A classic crochet bralette features two simple cups connected by a center section and finished with comfortable shoulder or neck straps. It is a lovely option for beginners who want a straightforward project.
Cross-Strap Crochet Bra: This style features straps that cross over the upper chest, creating an attractive neckline. It looks beautiful with textured cream or beige crochet cups.
Keyhole Crochet Bra: A keyhole design includes a small opening between the cups. It creates a decorative center detail and gives the garment a modern appearance.
Textured Crochet Bra: This design uses stitches such as shells, clusters, or other raised patterns to create a detailed surface. A single neutral color can make the texture stand out.
Minimalist Crochet Bra: A minimalist style uses simple stitches, clean edges, and thin straps. It is suitable for people who prefer a simple handmade look.
Tips and Tricks for a Better Crochet Bra
Always use soft yarn that feels pleasant against your skin. A beautiful stitch pattern will not make a comfortable garment if the yarn is rough or