Rose Propagation Guide Grow Beautiful Roses in Your Garden
There is something truly magical about walking through a garden filled with vibrant, fragrant blooms. Many homeowners dream of creating this lush sanctuary, yet the cost of buying mature plants at a nursery can add up quickly. Fortunately, you can expand your floral collection for free by learning the art of growing new plants from your existing favorites.
This comprehensive rose propagation guide is designed to help beginners feel confident as they start their gardening journey. We will walk you through simple, effective techniques that turn your backyard into a thriving landscape. By mastering these basic skills, you gain the ability to multiply your favorite varieties without spending a fortune.
Whether you are a seasoned hobbyist or a curious newcomer, our friendly approach ensures you achieve professional results with ease. Let us explore how you can successfully manage rose propagation to enjoy a more colorful and bountiful outdoor space this season.
Understanding the Basics of Rose Propagation
Rose propagation is the fascinating process of turning a simple stem into a thriving plant. By mastering this skill, you gain the ability to replicate your favorite blooms without needing to purchase new nursery stock. This journey from a single cutting to a full bush is both educational and deeply satisfying for any home gardener.
Why Propagate Your Own Roses
One of the primary benefits of this practice is the cost-effectiveness it offers. Instead of buying expensive shrubs, you can create dozens of new plants from the roses you already own. This allows you to fill your garden beds with lush, fragrant flowers on a budget.
Furthermore, propagating your own roses helps preserve specific varieties that might be hard to find in local stores. If you have a sentimental heirloom rose or a unique hybrid, cloning it ensures that the plant continues to thrive for years. It is a wonderful way to share the beauty of your garden with friends and family.
The Science Behind Rooting Cuttings
Successful rose propagation relies on understanding how a stem shifts from vegetative growth to root development. When you take a cutting, the plant experiences a physiological trigger that forces it to prioritize survival. The stem stops focusing on leaf production and begins to channel energy into forming a new root system.
This transition requires specific environmental conditions to occur effectively. You must provide the right balance of moisture, light, and warmth to encourage these cells to differentiate into roots. Achieving successful rose propagation is essentially about creating the perfect environment for this natural biological shift to take place.
Patience remains a vital component of this scientific process. While the stem works to establish its new foundation, you must monitor it closely without disturbing the delicate growth. By respecting these biological principles, you will find that growing new life from your existing garden favorites becomes a predictable and rewarding routine.
Essential Tools and Materials for Success
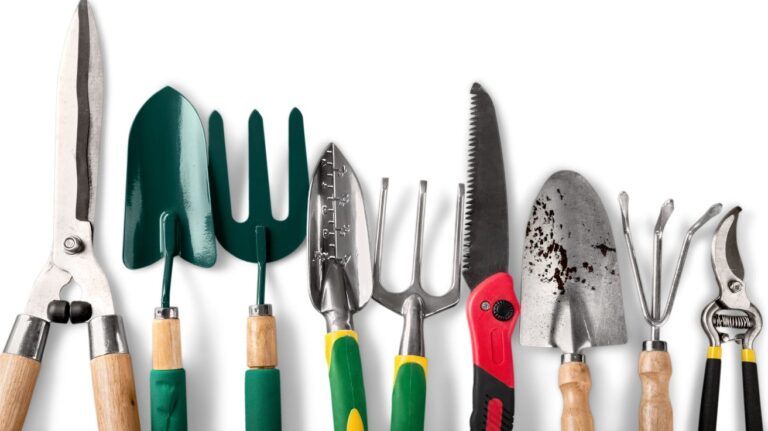
Successful rose propagation begins long before you make your first cut. Having the correct equipment is a cornerstone of gardening success, as it ensures your stems remain healthy and ready to grow. By investing in quality gear, you set the stage for a rewarding experience in your own backyard.
Selecting the Right Pruning Shears
Your choice of pruning shears is vital for maintaining plant health. Always opt for sharp, bypass-style shears to ensure clean cuts that heal quickly. Dull blades can crush delicate stem tissue, which invites disease and hinders your progress.
Cleanliness is equally important when you are looking for tips for rose propagation. Always sterilize your blades with rubbing alcohol between different plants to prevent the spread of pathogens. This simple habit is a key factor in successful rose propagation.
Choosing the Best Rooting Hormone
Rooting hormones are powerful allies that encourage your cuttings to develop roots faster. These products come in powder, gel, or liquid forms, each designed to stimulate growth at the base of the stem. Using a high-quality hormone significantly increases your chances of seeing new life emerge from your cuttings.
When applying these substances, follow the manufacturer’s instructions carefully to avoid over-application. A light, even coating is usually sufficient to trigger the rooting process. This extra step provides the boost your plants need to establish themselves firmly in their new home.
Potting Mixes and Containers
The environment you provide for your cuttings determines their long-term survival. Select a lightweight, well-draining potting mix that retains moisture without becoming waterlogged. A blend of perlite and peat moss is often ideal for encouraging root development.
Your choice of container also plays a major role in your results. Ensure your pots have adequate drainage holes at the bottom to prevent root rot. Using clean, appropriately sized containers will help you master the best tips for rose propagation while keeping your young plants happy and thriving.
Selecting the Perfect Parent Rose
The quality of your future rose bush depends entirely on the stem you choose today. When you learn how to propagate roses, the parent plant acts as the foundation for your success. A vigorous, disease-free parent will pass on its strength to the new cutting, ensuring a robust start for your garden addition.
Identifying Healthy Stems
Start by inspecting your roses for signs of vitality. Look for stems that are firm, green, and free from any visible damage or discoloration. Avoid branches that show signs of pests, such as aphids or spider mites, as these can easily transfer to your new plant.
Structural integrity is just as important as surface health. Choose stems that are straight and have healthy, well-developed leaves. These provide the best energy reserves for root development, which is one of the most essential tips for rose propagation.
Timing Your Cuttings for Optimal Growth
Timing plays a massive role in how well your cuttings take root. The best time to collect material is during the plant’s active growth phase, typically in late spring or early summer. During this period, the plant is full of energy and ready to produce new growth.
Avoid taking cuttings when the plant is dormant or stressed by extreme heat. By aligning your efforts with the natural cycle of the rose, you significantly increase your chances of success. Patience during this selection process ensures you start your project with the strongest possible genetic material.
Mastering Rose Propagation Techniques
Developing your skills in rose propagation from cuttings is a rewarding journey for any gardener.
Preparing the Stem Cuttings
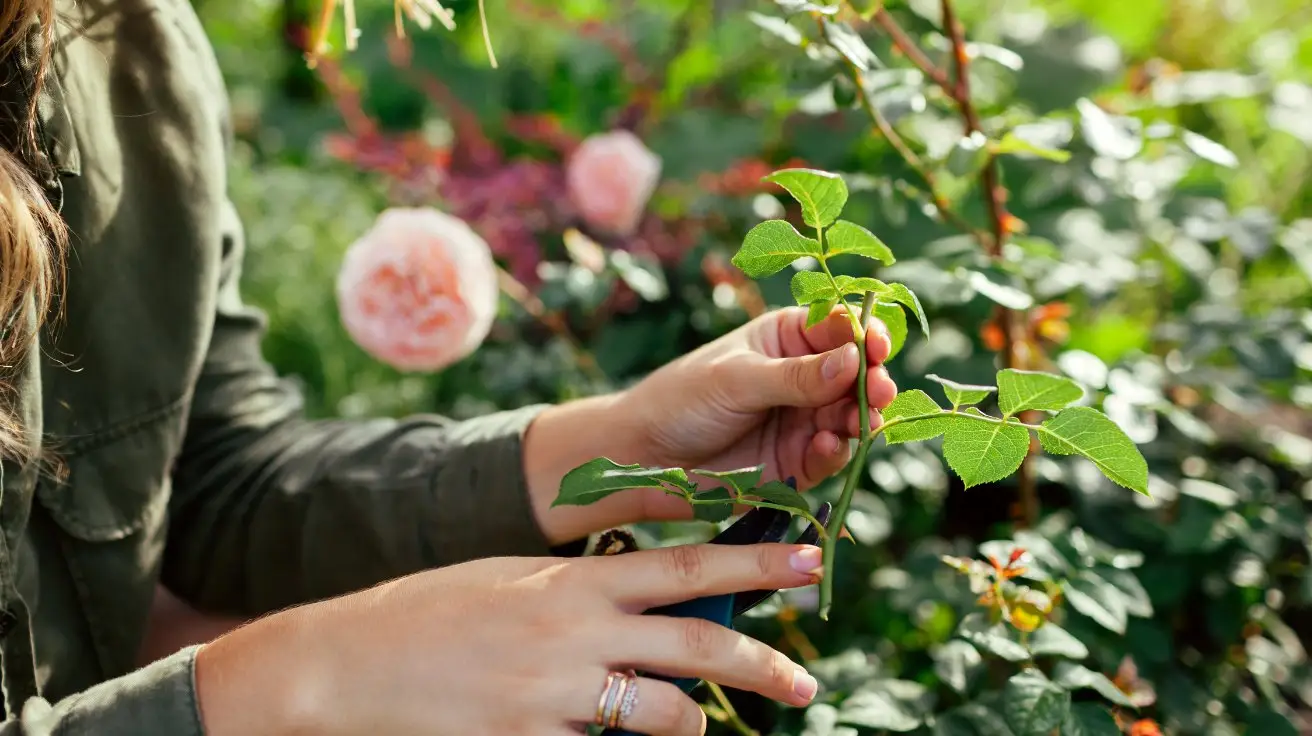
To begin, select a healthy stem and make a clean, angled cut just below a leaf node. This specific angle increases the surface area available for root development. It also helps minimize moisture loss, which is vital for the survival of your rose propagation from cuttings.

Remove any lower leaves to prevent rot while keeping a few leaves at the top for photosynthesis. Ensure your tools are sharp and sterilized to avoid introducing diseases to the stem. A clean cut heals faster and encourages stronger growth.
Applying Rooting Hormone Correctly
Once your stem is ready, it is time to use a rooting hormone to stimulate growth. These rose propagation techniques rely on even application to be truly effective. Dip the cut end of the stem into the hormone, ensuring you cover the area thoroughly.
Be gentle during this process to avoid damaging the delicate tissue of the stem. You only need a light coating to achieve the desired results. Excess hormone can sometimes hinder development, so a thin, even layer is perfect for your new roses.
Step by Step Guide to Planting Cuttings
Planting your prepared cuttings is a vital step in mastering rose propagation techniques. This phase requires careful attention to detail to ensure your new plants have the best start possible.
Preparing the Planting Medium
Success begins with a sterile and well-draining soil mixture. Avoid using garden soil, as it may contain pathogens that cause rot in young stems. Instead, combine equal parts of perlite and peat moss or a high-quality seed-starting mix.
This light, airy blend allows oxygen to reach the base of the cutting while retaining enough moisture. Ensure your containers have drainage holes at the bottom to prevent water from pooling. A clean environment is essential for learning how to propagate roses effectively.
Inserting Cuttings into the Soil
When you are ready to plant, use a pencil or a small dibber to create a hole in the medium. This prevents the rooting hormone from being wiped off as you push the stem into the soil. Insert the cutting about two to three inches deep, ensuring at least one node is buried below the surface.
Firm the soil gently around the base of the stem to eliminate air pockets. This contact is crucial for the cutting to draw up the moisture it needs. If you are planting multiple cuttings in one container, space them out so their leaves do not touch.
Creating a Mini Greenhouse Environment
Young cuttings require high humidity to prevent them from drying out before they develop roots. You can easily create a mini greenhouse by placing a clear plastic bag or a plastic bottle over the container. This simple structure traps moisture and creates a stable microclimate for your plants.
Make sure the plastic does not touch the leaves directly, as this can encourage fungal growth. If you are wondering how to propagate roses in a controlled way, this method is highly effective. Keep the setup in a spot with bright, indirect light to encourage steady growth.
Caring for Your Rose Cuttings
Your newly planted rose cuttings are fragile and need specific care to thrive. Following this rose propagation guide ensures that your stems have the best chance to develop strong, healthy root systems. Consistent attention during these first few weeks will help you avoid common pitfalls.
Managing Light and Temperature
Cuttings require bright, indirect light to photosynthesize without suffering from heat stress. Avoid placing your containers in direct sunlight, as this can quickly scorch the tender stems and dry out the soil. A spot near a north-facing window or a shaded porch is usually ideal for most varieties.

Temperature stability is just as important as light quality. Keep your cuttings in a location where the temperature remains steady, ideally between 65 and 75 degrees Fahrenheit. Drastic fluctuations can shock the plant and stall the rooting process entirely.
Watering and Humidity Requirements
Maintaining the right moisture balance is the most critical part of your rose propagation guide. The soil should feel damp to the touch but never waterlogged, as excess moisture often leads to stem rot. Check the soil daily and provide a light misting if the surface begins to look dry.
High humidity is essential to prevent the cuttings from losing too much water through their leaves. If you are not using a mini greenhouse, consider covering the container with a clear plastic bag to trap moisture. Be sure to remove the cover for a few minutes each day to allow for fresh air circulation and prevent fungal growth.
Propagating Roses Indoors vs Outdoors
Deciding between indoor and outdoor propagation depends largely on your local climate and the current season. Your choice will significantly impact how quickly your cuttings develop roots and thrive. By understanding the specific needs of your rose varieties, you can select the environment that best supports their growth.
When you focus on propagating roses indoors, you gain complete control over the surrounding conditions. This method allows you to maintain steady temperatures and consistent light levels regardless of the weather outside. Many gardeners find this approach ideal during colder months when the garden is dormant.
Benefits of Indoor Propagation
The primary advantage of starting your cuttings inside is the ability to create a stable microclimate. You can easily manage humidity levels by using plastic covers or humidity domes. This protection prevents the stems from drying out before they have a chance to establish a healthy root system.
Furthermore, indoor spaces are free from the unpredictable nature of pests and harsh winds. You can place your containers on a bright windowsill or under artificial grow lights to ensure they receive the perfect amount of energy. This level of precision often leads to higher success rates for beginners.
Managing Outdoor Environmental Factors
Outdoor propagation offers a more natural experience but requires careful attention to environmental variables. You must protect your cuttings from direct, scorching sunlight and strong gusts of wind that can cause dehydration. Choosing a sheltered spot, such as a cold frame or a shaded garden bed, is essential for success.
Temperature fluctuations are another factor to monitor when working outside. If you live in an area with cool nights, you may need to provide extra insulation to keep the soil warm. By observing the natural rhythm of your garden, you can time your efforts to match the ideal growing season for your specific region.
Troubleshooting Common Propagation Issues
Troubleshooting is a vital skill for anyone dedicated to mastering the art of plant propagation. Even with the best intentions, you may encounter unexpected hurdles during the process. Learning to spot these problems early is the key to successful rose propagation from cuttings.
Identifying Signs of Rot
Rot is one of the most frequent challenges gardeners face when starting new plants. It usually appears as a dark, mushy discoloration at the base of the stem. This issue is often caused by excessive moisture or poor drainage in your potting medium.
To prevent this, ensure your container has adequate drainage holes at the bottom. If you notice the stem turning black or soft, remove the affected cutting immediately to protect the others. Keeping the soil damp but not waterlogged is essential for healthy growth.
Dealing with Pests and Fungal Infections
Young stems are vulnerable to various pests like aphids or spider mites that thrive in humid environments. Regularly inspect the undersides of leaves for tiny webs or small insects. If you spot an infestation, treat the area with a gentle insecticidal soap or neem oil.
Fungal infections, such as powdery mildew, can also threaten your young plants. Proper air circulation is your best defense against these unwanted visitors. If you see white, dusty spots on the foliage, increase the airflow around your containers to keep the environment dry and healthy.
Why Cuttings Fail to Root
Sometimes, a cutting simply refuses to develop roots despite your best efforts. This failure often stems from using stems that are too soft or taking them at the wrong time of year. Always select firm, healthy wood to improve your chances of success.
Another common reason for failure is the lack of consistent environmental conditions. By adjusting your approach and monitoring light and temperature, you can improve your success rate with future rose propagation from cuttings. Stay patient, as every attempt provides valuable lessons for your gardening journey.
Transplanting Your New Rose Bushes
Transitioning your young rose bushes from a controlled environment to the open garden requires careful planning. While the process of propagating roses indoors provides a safe start, the outdoor world presents different challenges. Taking the right steps now will ensure your plants thrive in their permanent home.
When to Move Cuttings to the Garden
You should wait until your cuttings show clear signs of active growth before moving them. Look for new leaves and a sturdy stem that resists a gentle tug. If the roots are visible through the drainage holes of your container, the plant is likely ready for the soil.
Avoid moving your roses too early, as young roots are quite fragile. It is best to wait until the danger of frost has passed in your local area. This timing ensures the plant can focus its energy on establishing itself in the ground rather than surviving cold stress.
Hardening Off Your Young Roses
Hardening off is a vital step that helps your roses adjust to direct sunlight and wind. Start by placing your pots in a shaded, sheltered spot for a few hours each day. Gradually increase their exposure to the elements over the course of one to two weeks.
This slow transition prevents shock and leaf burn. By the end of the period, your plants will be strong enough to handle the full sun of your garden. Remember that even if you were successful at propagating roses indoors, the outdoor environment is much more intense.
Soil Preparation for New Transplants
Healthy soil is the foundation for a flourishing rose bush. Before planting, clear the area of weeds and loosen the earth to a depth of at least twelve inches. Mix in organic matter like compost or aged manure to improve nutrient content and drainage.
Roses prefer soil that holds moisture but does not stay waterlogged. If your garden soil is heavy clay, adding perlite or coarse sand can help improve aeration. Proper preparation now will provide the essential support your new roses need for years of beautiful blooms.
Best Practices for Rose Propagation Success
Achieving consistent results in your garden depends on following proven best practices for rose propagation. While the initial setup is important, the long-term health of your new plants relies on your daily commitment to their care. By refining your approach, you can transform your garden into a thriving sanctuary of color and fragrance.
Maintaining Consistent Moisture Levels
Water management is the most critical factor when you are starting new stems. Even a brief period of drought can be fatal to a developing cutting, as it lacks a mature root system to draw moisture from deep within the soil. You must ensure the growing medium remains damp but never waterlogged to encourage healthy root development.
Check your containers daily to see if the surface feels dry to the touch. If the soil begins to dry out, provide a gentle misting or a light watering to restore the balance. This steady supply of hydration is essential for successful rose propagation.
Patience and Observation Techniques
Gardening is a slow process that rewards those who take the time to watch their plants closely. Spend a few minutes each day observing your cuttings for subtle signs of growth, such as tiny new leaves or a change in stem color. These small indicators often signal that your efforts are paying off.
Conversely, keep a sharp eye out for signs of distress, such as wilting or discoloration. Early detection allows you to adjust your care routine before a minor issue becomes a major problem.
Enjoying Your Flourishing Rose Garden
Your garden transforms into a vibrant sanctuary as your new rose bushes begin to bloom. You witness the direct results of your dedication and care with every fragrant petal that unfolds. These flowers serve as a living testament to your skill as a gardener.
You should continue applying the best practices for rose propagation to expand your collection throughout the seasons. Each new plant adds unique color and beauty to your outdoor space. Consistent use of these best practices for rose propagation ensures that your garden remains healthy and productive year after year.
Gardening remains a rewarding journey of discovery and growth. Every successful bloom encourages you to refine your techniques and experiment with new varieties. Share your progress with fellow enthusiasts or document your success to track your development over time.
We hope this guide provides the confidence needed to cultivate a stunning landscape. Your commitment to learning creates a lasting legacy of beauty in your home. Enjoy the peace and satisfaction that comes from nurturing life in your own backyard.