Crochet Flower Pot: Complete Round-by-Round Tulip Pattern
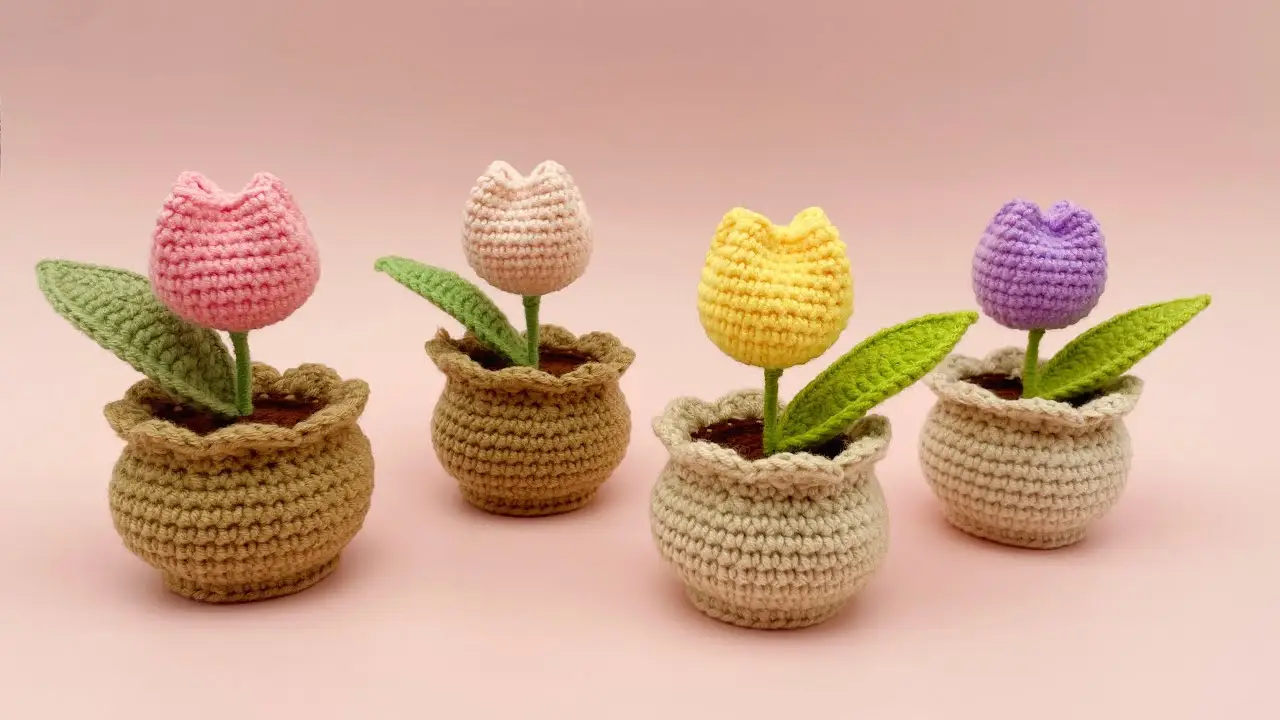
A crochet flower pot is a charming handmade decoration that combines a textured pot, a colorful tulip bud, and a green leaf. This step-by-step pattern explains how to make each part, with round-by-round instructions, stitch counts, materials, and assembly tips.
Materials Needed for a Crochet Flower Pot
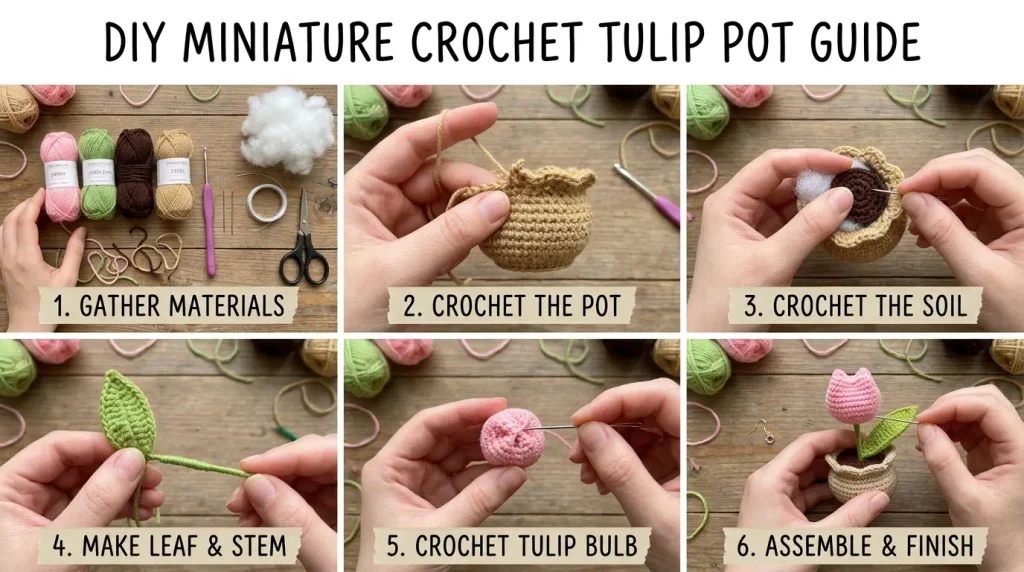
Gather these materials before starting your crochet flower pot.
Yarn: Choose beige, brown, or cream yarn for the pot, brown yarn for the soil, green yarn for the stem and leaf, and pink, yellow, purple, or another color for the tulip bud.
Crochet hooks: Use a 3 mm crochet hook for the pot and soil and a 2 mm crochet hook for the tulip bud and leaf.
Other materials: Prepare a yarn needle, scissors, a stitch marker, cotton stuffing, a small branch or suitable stem wire, approximately 20 cm of wire for the leaf, and craft glue.
Use a yarn needle to hide loose ends and secure the pieces. Cover all wire ends completely, and allow glue to dry before handling the finished flower.
Crochet Abbreviations
The following abbreviations are used throughout the pattern.
- MR: Magic ring
- ch: Chain
- sc: Single crochet
- inc: Increase, meaning two single crochet stitches in the same stitch
- dec: Decrease, meaning two stitches are joined into one
- sl st: Slip stitch
- hdc: Half double crochet
- dc: Double crochet
- tr: Treble crochet
- BLO: Back loop only
- FLO: Front loop only
- st: Stitch
- sts: Stitches
- FO: Fasten off
An increase adds one stitch to the total count. For example, working two single crochet stitches into one stitch changes that stitch into two stitches.
A decrease combines two stitches into one, reducing the total stitch count by one.
Part 1: Crochet the Mini Flower Pot
Use the 3 mm crochet hook and your chosen pot color. The pot is worked in joined rounds, which means each round is closed with a slip stitch before starting the next round.
The chain at the beginning of a round does not count as a stitch.
Round 1: Create the Base
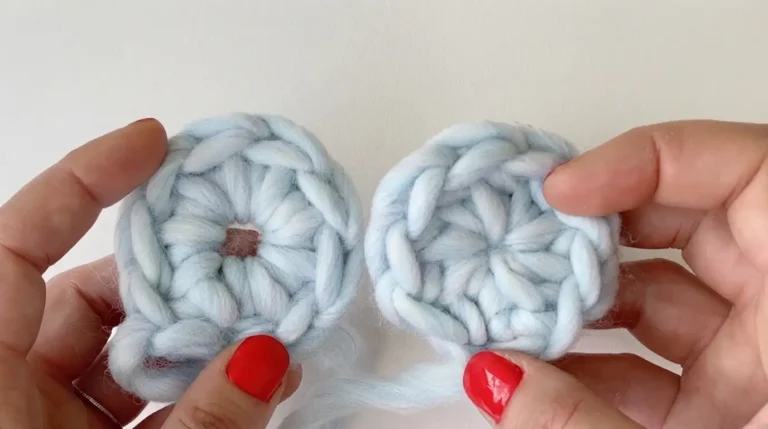
Make a magic ring.
Work 8 sc into the ring.
Pull the yarn tail to close the center.
Stitch count: 8 sts.
Join the round with a sl st in the first sc.
Round 2: Increase the Base
Ch 1.
Work 2 sc into each stitch around.
You will make eight increases, creating a wider circle.
Stitch count: 16 sts.
Join with a sl st in the first sc.
Round 3: Continue Increasing
Ch 1.
Repeat the following sequence around:
Sc in the next st, then inc in the next st.
Repeat the sequence eight times.
Stitch count: 24 sts.
Join with a sl st in the first sc.
Round 4: Widen the Base
Ch 1.
Work 2 sc in the next 2 sts, then inc in the following st.
Repeat the sequence around, following the intended increase pattern.
Stitch count note: The supplied instructions state that the sequence of 2 sc followed by 1 inc is repeated eight times, but this produces 32 stitches from a starting count of 24, not 30. The original stitch count is therefore inconsistent. For an even increase pattern, work the sequence as written and count the stitches at the end.
Join with a sl st in the first sc.
Round 5: Start the Pot Sides
Ch 1 and turn your work.
Work 1 sc into the BLO of every stitch around.
Working into the back loops creates a visible ridge that separates the base from the sides.
The supplied instructions report 32 stitches at the end of this round. Your actual count will depend on the number of stitches in Round 4.
Join with a sl st to close the round.
Round 6: Work Into the Front Loops Left Behind
Ch 1 and turn your work.
Locate the front loops left unworked in Round 4.
Join the yarn to the front-loop section as directed in the original pattern.
Work 3 sc, then inc in the next stitch. Repeat the sequence around, following the original pattern.
Stitch count note: The supplied instructions describe eight repeats of 3 sc followed by 1 inc but do not provide a fully consistent starting stitch count for this round. Check the count before continuing so the pot’s rim and sides remain even.
Join with a sl st.
Rounds 7–12: Build the Pot Walls
For each round, ch 1 and work 1 sc in every stitch around.
Join each round with a sl st in the first sc.
Repeat for Rounds 7, 8, 9, 10, 11, and 12.
Keep your tension consistent throughout these rounds. The sides should rise evenly without becoming too tight or flaring outward.
Stitch count: Keep the same number of stitches as established in the preceding round.
Round 13: Shape the Upper Pot
Ch 1.
Work 3 sc, then make a decrease over the next 2 stitches.
Repeat the sequence around, as described in the supplied instructions.
This decrease round helps shape the upper section of the pot.
Stitch count note: The source describes eight repeats of 3 sc followed by a decrease but does not provide a fully consistent count from the earlier rounds. Check the number of stitches before proceeding.
Join with a sl st.
Round 14: Complete the Pot Wall
Ch 1.
Work 1 sc in every stitch around.
Join with a sl st.
This round provides a neat base for the decorative rim.
Round 15: Make the Scalloped Rim
The final round creates the wavy edge around the top of the pot.
Do not begin with a chain.
Skip the first stitch and work 5 dc into the next stitch.
Skip the following stitch and work a sl st into the next stitch.
Repeat the sequence around:
Skip 1 st, work 5 dc into the next st, skip 1 st, and sl st into the following st.
The five double crochet stitches form a small fan-shaped scallop.
Repeat the sequence eight times, as described in the supplied instructions.
FO and use a yarn needle to hide the remaining yarn tail inside the pot.
Important: The number of stitches available for the eight scallops must match the completed pot circumference. If the count does not divide evenly, check the preceding rounds rather than forcing the last scallop into place.
Part 2: Crochet the Soil
Use the 3 mm crochet hook and your chosen soil color.
The soil is a separate circular piece that fits inside the pot. It has a small opening in the center for inserting the flower stem.
Round 1: Make the Center Opening
Make a magic ring.
Work 8 sc into the ring.
When tightening the ring, leave a small opening for the flower stem.
Stitch count: 8 sts.
Round 2: Increase
Work 2 sc into every stitch around.
Stitch count: 16 sts.
Round 3: Increase Evenly
Repeat the following sequence around:
Sc in the next st, inc in the next st.
Stitch count: 24 sts.
Round 4: Widen the Soil
Repeat the following sequence around:
Sc in the next 2 sts, inc in the following st.
The supplied instructions describe the first four soil rounds as following the pot’s base pattern. However, the pot instructions contain an inconsistent stitch count for Round 4. Check the finished circle against the pot opening before continuing.
Finish the Soil
FO after completing the required rounds.
Weave in the loose yarn ends with a yarn needle.
Place the soil inside the pot and check that it fits beneath the scalloped rim. Keep the center opening accessible so the tulip stem can pass through.
Part 3: Crochet the Tulip Bud
Use the 2 mm crochet hook and your chosen flower color.
Unlike the pot, the tulip bud is worked in continuous rounds. Do not join the end of every round with a slip stitch.
Use a stitch marker to identify the first stitch of each new round.
Round 1: Make the Tulip Center
Make a magic ring.
Work 6 sc into the ring.
Pull the yarn tail to tighten the center.
Stitch count: 6 sts.
Round 2: Increase Every Stitch
Work 2 sc into each stitch around.
Stitch count: 12 sts.
Place your stitch marker in the first stitch of the new round.
Round 3: Increase Every Other Stitch
Repeat the following sequence around:
Sc in the next st, inc in the next st.
Stitch count: 18 sts.
Move the stitch marker to the first stitch of the new round.
Round 4: Widen the Bud
Repeat the following sequence around:
Sc in the next 2 sts, inc in the following st.
Stitch count: 24 sts.
Move the stitch marker.
Round 5: Continue Increasing
Repeat the following sequence around:
Sc in the next 3 sts, inc in the following st.
Stitch count: 30 sts.
The bud should now be wider than it was at the beginning.
Rounds 6–13: Build the Tulip Shape
Work 1 sc in every stitch around for each round.
Keep the stitch count consistent.
Repeat for Rounds 6, 7, 8, 9, 10, 11, 12, and 13.
The bud will gradually develop its rounded, upright shape.
Stuff and Finish the Tulip Bud
FO, leaving a yarn tail approximately 15–20 cm long.
Thread the tail onto a yarn needle.
Add a small amount of cotton stuffing to the bud. Use just enough to help it hold its shape without stretching the stitches.
Use the yarn needle to secure the final round and hide the remaining yarn inside the bud.
Keep the lower opening suitable for inserting the stem.
Part 4: Crochet the Green Leaf
Use the 2 mm crochet hook and green yarn.
The leaf is worked along both sides of a foundation chain to create a long, pointed shape.
Round 1: Make the Foundation
Make a slip knot.
Ch 16.
Begin in the second chain from the hook.
Work the following stitches in the order described in the supplied instructions:
Sc, hdc, 2 dc, and tr stitches through the middle section of the leaf.
Continue with 2 dc and an hdc near the opposite end.
Work 3 sc into the next stitch to help shape the tip.
Turn to work along the opposite side of the foundation chain.
Continue crocheting into the remaining loops on the other side.
The supplied instructions do not provide the complete number and placement of all the treble crochet stitches or the full return-side sequence. Those missing details are needed to give an exact stitch-by-stitch reconstruction of the entire leaf. Follow the original leaf pattern for the remaining stitches rather than adding an unverified count.
Round 2: Add Wire for Support
Prepare a piece of wire approximately 20 cm long.
Join the round with a sl st and ch 1.
Insert the hook into the first stitch. Position the wire alongside the working yarn and crochet over it so that the stitches cover the wire.
Work 15 sc in total, following the original instructions for the leaf’s first section.
Adjust the wire so that the ends are balanced.
Work the required stitch at the top of the leaf, then ch 2. Make a sl st in the second chain from the hook to create the small pointed detail.
Return to the same stitch as directed and make another sc.
Continue with 15 sc along the remaining section of the leaf.
Join with a sl st.
Important: The supplied description does not fully clarify how the stated 15-stitch sections relate to the total stitches in Round 1. Check the fit of the leaf and ensure the wire is enclosed securely before fastening off.
Finish the Leaf
Leave a yarn tail.
Wrap green yarn around the exposed wire at the base of the leaf. Secure it with a knot or by wrapping the yarn firmly around the wire.
Shape the leaf gently with your fingers.
Make sure no sharp wire ends are exposed.
Part 5: Assemble the Crochet Flower Pot
Once the pot, soil, bud, and leaf are ready, assemble the pieces carefully.
Attach the Soil to the Pot
Add a small amount of cotton stuffing inside the pot if necessary to help it hold its shape.
Cut approximately 30–40 cm of yarn matching the pot color.
Thread the yarn onto a needle.
Insert the needle from the inside of the pot to the outside, sewing through the stitches between the upper pot rounds and the decorative rim.
Sew the soil and pot together, keeping the edges aligned.
Hide the yarn tail inside the pot when finished.
Attach the Tulip Bud to the Stem
Prepare a branch or suitable stem piece approximately 8–10 cm long.
Insert it through the center of the tulip bud.
Apply a small amount of suitable craft glue where the bud meets the stem, following the glue manufacturer’s instructions.
Allow the glue to dry before continuing.
Wrap the Stem and Attach the Leaf
Use green yarn to wrap the stem for approximately 2–3 cm below the flower bud.
Position the leaf against the stem at a slight angle.
Secure the leaf, then continue wrapping the stem with green yarn until the underlying material is covered.
Apply a small amount of glue at the end if needed to secure the wrapping.
Trim excess yarn and check that the leaf and flower bud are firmly attached.
Place the Tulip in the Pot
Insert the stem through the center opening in the soil.
Adjust the height and angle until the tulip stands upright.
Check that the leaf extends outward and that the flower bud is visible above the pot.
Make any final adjustments before securing the stem in place.
Tips for a Neat Crochet Flower Pot
Count every round. Use a stitch marker and check the total at the end of each round. This is especially important in the increasing and decreasing sections.
Keep your tension even. Tight, consistent stitches help the pot hold its shape and prevent stuffing from showing through the tulip bud.
Check the fit before assembly. The soil should sit neatly inside the pot, and the stem should pass through the center opening without stretching the stitches.
Use stuffing sparingly. A little cotton is enough to shape the bud and support the pot. Too much stuffing can distort the finished pieces.
Cover the wire completely. Make sure the leaf wire is enclosed in yarn and that no sharp ends are exposed.
Allow glue to dry. Wait until all glued sections are secure before inserting the flower into the pot.
Creative Ways to Use a Crochet Flower Pot
A mini crochet flower pot makes a charming decoration for a desk, bookshelf, bedside table, or small shelf.
Try making several tulips in different colors. Pink, yellow, purple, and cream buds look lovely when arranged together in matching pots.
You can also change the pot color to suit different rooms. Cream and beige create a natural look, while brighter shades add a playful touch.
These handmade flowers make thoughtful gifts for birthdays, Mother’s Day, teacher appreciation, or other special occasions.
Remember that a crochet flower pot is intended as a decorative item. Yarn and stuffing are not suitable for holding wet soil or water like a regular plant pot.
Final Notes on the Pattern
This mini tulip crochet project combines single crochet, increases, decreases, joined rounds, continuous rounds, and decorative double crochet stitches.
The pot, soil, and tulip bud have clear round-by-round instructions in the supplied material, although the pot’s fourth round contains a stitch-count inconsistency. The leaf instructions also omit some stitch placements, so its full stitch-by-stitch pattern cannot be reconstructed reliably from the supplied text alone.
For the best result, check stitch counts as you work, keep the pieces evenly shaped, and make sure the stem and leaf are securely attached. With careful stitching and a little patience, you can create a charming crochet flower pot for your home or as a handmade gift.