Crochet Scarf: A Beautiful and Cozy Ribbed Scarf Pattern for Everyday Wear
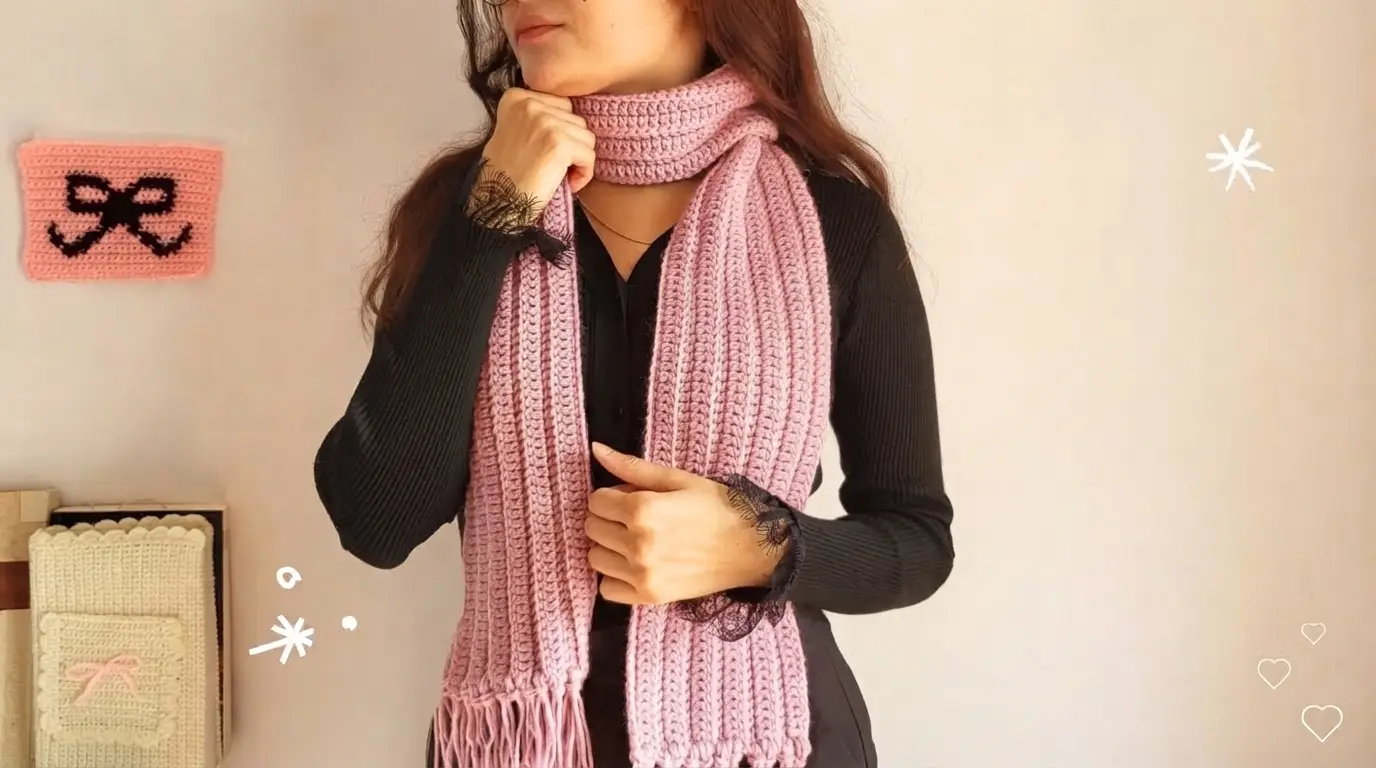
A crochet scarf is a lovely handmade accessory that adds warmth, comfort, and style to any outfit. This soft, ribbed crochet scarf features a beautiful dusty pink color, a long design, and delicate fringe at both ends, making it a perfect project for everyday wear.
Why Make a Crochet Scarf?
A crochet scarf is one of the most enjoyable projects to make, especially if you love creating useful accessories with yarn. It is simple to customize, does not require complicated shaping, and can be made in different colors, lengths, and widths.
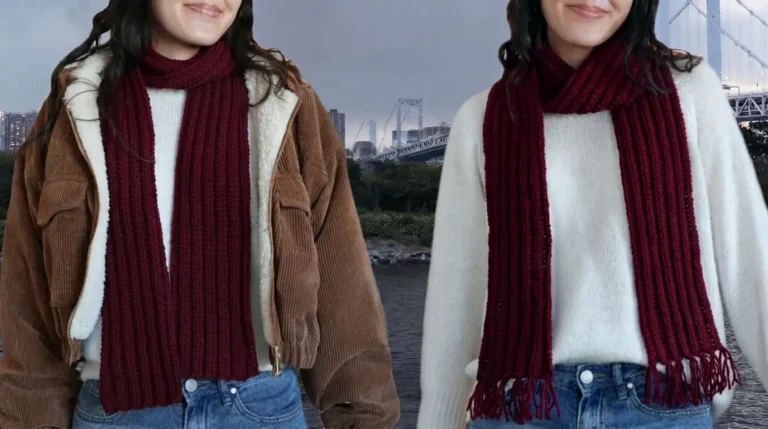
This design has a soft pink shade and a lovely ribbed texture that gives the scarf a neat, slightly raised appearance. The long shape allows you to wrap it around your neck or let both ends hang freely. It looks beautiful with sweaters, jackets, coats, and casual outfits.
The ribbed stitches also make the scarf feel thicker and more comfortable. The fringe at both ends adds a little movement and gives the finished project a pretty handmade touch.
Another great thing about making your own scarf is that you can choose the yarn and size according to your needs. Whether you want a lightweight accessory for cool evenings or a thicker scarf for colder weather, you can easily adjust the pattern.
Materials Needed for a Crochet Scarf
Before starting, prepare all your materials so you can work comfortably without stopping too often.
Yarn: Choose a soft yarn that feels comfortable against your neck. Medium-weight acrylic yarn is a practical choice because it is easy to work with, affordable, and available in many colors. You can also use a soft wool blend or another suitable yarn. A dusty pink shade gives this design a gentle and elegant appearance.
Crochet Hook: Use the hook size recommended on your yarn label. A hook around 5 mm is a good starting point for many medium-weight yarns, but your personal tension may require a different size.
Scissors: Keep a sharp pair of scissors nearby for cutting the yarn and trimming the fringe.
Yarn Needle: A yarn needle is useful for weaving in loose ends and securing the finishing stitches.
Stitch Markers: These are optional, but they can help you keep track of your rows and stitches.
Measuring Tape: Use a measuring tape to check the width and length as you work.
Crochet Stitches and Techniques You Should Know
This crochet scarf uses simple stitches to create a beautiful textured surface. Even if you are still learning crochet, you can make this project by practicing a few basic techniques.
The chain stitch is used to create the foundation of the scarf. It forms the starting row and helps you decide how wide your finished scarf will be.
The single crochet stitch creates a firm and neat fabric. It is useful for making a scarf with a close texture and good structure.
The half double crochet stitch is another useful option. It creates slightly taller stitches and gives the fabric a soft, flexible feel.
For the raised ribbed appearance, working through the back loop only is a helpful technique. Instead of inserting your hook under both top loops of a stitch, insert it through the back loop. Repeating this method creates raised lines across the fabric.
You can also use slip stitches through the back loop for a tighter ribbed texture. However, remember that this produces a denser fabric and may take longer to complete.
How to Make a Crochet Scarf Step by Step
The following instructions describe a simple ribbed scarf that can be adjusted to achieve a similar long, textured appearance. The exact stitch count will depend on your yarn, hook size, and preferred width.
Step 1: Make a Foundation Chain
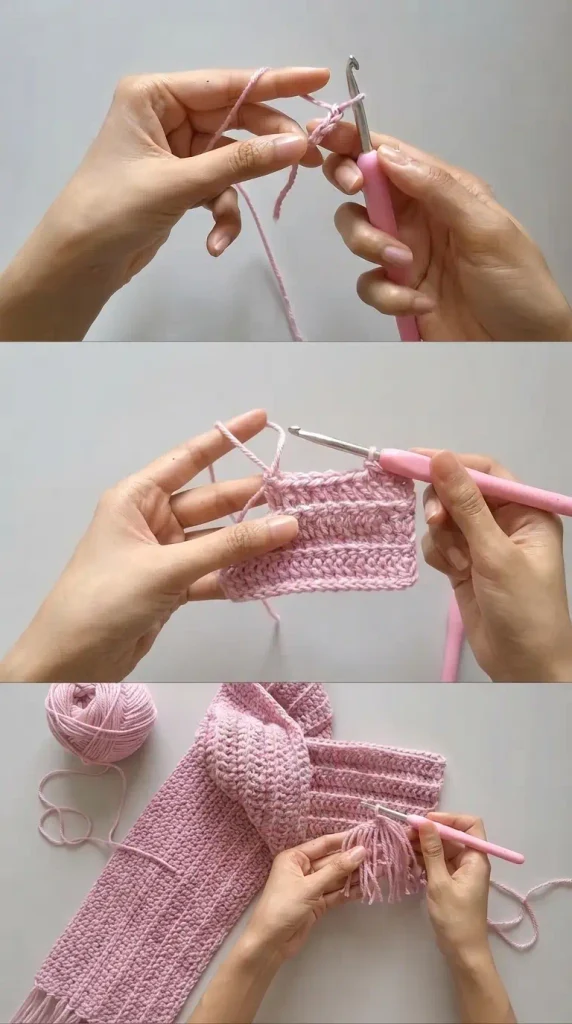
Start by making a slip knot and placing it on your crochet hook. Begin chaining until you reach your desired scarf width.
For a long, narrow scarf, a width of approximately 7 to 10 inches is a comfortable starting point. You can make it wider if you prefer a fuller look around your neck.
Try to keep your chain stitches even. Avoid pulling them too tightly because a tight foundation can make the bottom edge narrower than the rest of the scarf.
Once your foundation chain is complete, check its length with a measuring tape. Add or remove chains if necessary before moving to the next step.
Step 2: Work the First Row
Insert your hook into the appropriate chain stitch and begin working single crochet stitches across the foundation chain.
Keep your stitches at a consistent tension so the fabric does not become too loose or too tight.
When you reach the end of the row, make one turning chain if needed for your chosen stitch pattern. Turn your work to prepare for the next row.
The first row creates the base of your scarf, so take your time and make sure the stitches are neat.
Step 3: Create the Ribbed Texture
Now you can start creating the raised ribbed pattern.
Work your chosen stitch across the row, inserting your hook through the back loop only. Continue this technique until you reach the end of the row.
Turn your work and repeat the same process for the following rows.
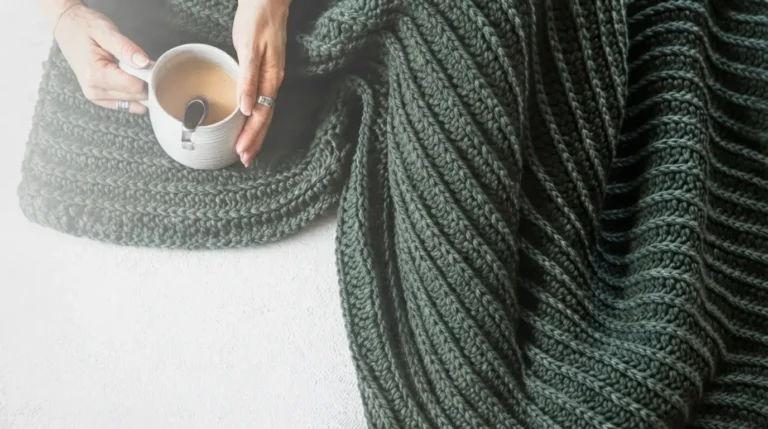
As you continue, you will notice raised lines forming across the fabric. These lines create the lovely ribbed appearance that makes the scarf look thick and textured.
Keep repeating the rows until the scarf reaches your desired length. A length of approximately 65 to 75 inches is a useful starting point for a long scarf that can be wrapped around the neck.
If you prefer a shorter scarf, simply stop earlier. For a longer design with more wrapping options, continue adding rows until you are happy with the size.
Step 4: Check the Width and Length
After completing several rows, place your work on a flat surface and check its measurements.
Make sure the scarf is wide enough to cover your neck comfortably. Also, check that both edges remain straight and that the ribbed texture looks consistent.
If the scarf begins to narrow or widen, check your stitch count. Missing the first or last stitch of a row is a common reason for uneven edges.
Continue crocheting until you reach the desired length. Do not rush this part because keeping the same tension throughout the project will help create a neat finish.
Step 5: Finish the Final Row
Once the scarf reaches your preferred length, complete the final row carefully.
You can add a simple row of single crochet stitches along the short ends to make them look more even. This is optional, but it can give the scarf a cleaner finish.
Fasten off your yarn by cutting it and pulling the yarn tail through the final loop. Gently tighten the loop to secure it.
Use a yarn needle to weave the loose end into the nearby stitches. Make sure it is hidden properly so it does not come loose during regular use.
Step 6: Add Fringe to Both Ends
The fringe is a lovely detail that makes this scarf look more decorative.
Cut several pieces of yarn to your preferred fringe length. For a soft and flowing appearance, pieces around 8 to 10 inches long are a good starting point.
Take a small group of yarn strands and fold them in half. Insert your crochet hook through an edge stitch at the end of the scarf.
Catch the folded middle of the yarn strands with your hook and pull it through the edge to form a loop. Then pull the loose ends through that loop and gently tighten.
Repeat this process along the entire short edge. Add fringe to the opposite end in the same way.
Try to leave similar spaces between the fringe sections. When you finish, trim the ends with scissors so they are approximately the same length.
You can use more yarn strands for thicker fringe or fewer strands for a lighter appearance.
Step 7: Shape and Finish Your Scarf
After adding the fringe, gently stretch the scarf into shape and lay it flat.
If your yarn allows it, lightly steam or block the scarf according to the yarn care instructions. Blocking can help even out the stitches and make the edges look neater.
Avoid using too much heat, especially with acrylic yarn, because high temperatures can damage or melt the fibers.
Check the fringe one more time and trim any uneven pieces. Your ribbed crochet scarf is now ready to wear.
Choosing the Best Yarn Color
Color plays an important role in the overall appearance of a crochet scarf. Soft pink is a beautiful option because it creates a gentle and feminine look without being too bright.
Dusty pink, pastel pink, blush, and rose are lovely choices for this style. These shades look especially nice with black, white, grey, cream, and brown clothing.
If you prefer a more classic appearance, try beige, ivory, or light grey. Darker shades such as burgundy, navy, and forest green are also wonderful for winter accessories.
You can even combine two colors to create stripes. Just remember to change colors at the beginning or end of a row to keep the transitions neat.
Tips and Tricks for a Beautiful Crochet Scarf
Keeping your tension consistent is one of the most important things when making a ribbed scarf. If some rows are tight and others are loose, the finished fabric may look uneven. Try to hold your yarn comfortably and avoid pulling it too hard after every stitch.
Always count your stitches occasionally. This small habit can prevent the scarf from becoming wider or narrower as you work through the rows.
If you are new to crochet, practice the back-loop technique on a small sample before starting the full scarf. This will help you understand where to insert your hook and how the raised texture develops.
Choose a soft yarn rather than a rough or scratchy one. Since the scarf will sit close to your neck and face, comfort is just as important as appearance.
Do not make the fringe too heavy. Adding too many strands can make the ends bulky and pull on the scarf. Keep the fringe balanced so it complements the ribbed fabric.
It is also a good idea to keep your finished scarf away from rough surfaces that may catch the yarn. Proper care will help it maintain its shape and texture for longer.
How to Style Your Crochet Scarf
One of the best things about this scarf is that it can be styled in several ways.
For a simple everyday look, place the middle of the scarf around the back of your neck and let both ends hang down in front. This allows the beautiful ribbed texture to remain visible.
You can also wrap the scarf around your neck once for a cozy appearance. This style works particularly well when wearing a sweater or a simple winter jacket.
For extra warmth, wrap the scarf more closely around your neck and tuck the ends inside your coat. The soft fabric creates a comfortable layer without needing complicated styling.
The dusty pink color pairs beautifully with neutral clothing. Try wearing it with a black sweater, cream cardigan, or grey coat to create a balanced outfit.
How to Care for Your Crochet Scarf
Proper care helps your handmade scarf stay soft and attractive.
Always check the yarn label before washing. Different yarn fibers require different care methods. Many acrylic scarves can be washed gently, while wool and delicate blends may need special treatment.
Use mild detergent and cool or lukewarm water when handwashing if the yarn instructions allow it. Avoid twisting or squeezing the scarf too hard because this can stretch the stitches.
After washing, gently press out excess water with a clean towel. Lay the scarf flat on a dry surface and allow it to air dry completely.
Do not hang a wet crochet scarf because its weight can stretch the fabric and change its shape. Once dry, gently arrange the fringe with your fingers.
Store the scarf folded in a clean, dry place when you are not using it.
Easy Ways to Customize Your Crochet Scarf
You do not have to follow the same measurements or colors every time you make this project. One of the nicest things about crochet is the freedom to create something that matches your personal style.
For a thicker winter scarf, choose a slightly heavier yarn and make the fabric wider. You can also use a larger hook if it is suitable for your yarn and desired stitch texture.
For a lightweight scarf, choose a finer yarn and a suitable smaller hook. This creates a softer accessory that can be worn during cool evenings or mild weather.
You can experiment with different ribbed stitches to change the texture. Back-loop single crochet creates a compact fabric, while back-loop half double crochet gives a slightly taller and softer appearance.
Adding a small decorative bow, a crochet flower, or a simple handmade tag can also make the scarf feel more personal. Keep the decoration lightweight so it does not interfere with the way the scarf sits around your neck.