Propagating Herbs Successfully with Easy Step-by-Step Tips
Welcome to the rewarding world of gardening where you can grow your own fresh greens right at home. Many people believe that expanding a garden requires constant trips to the nursery, but that is simply not true. You can easily clone your favorite plants to ensure a continuous supply for your kitchen.
Mastering the art of Propagating Herbs is a simple process that saves you money while building your confidence. By following these straightforward steps, even novice gardeners can achieve professional results in their own backyards or windowsills. You do not need expensive equipment or years of experience to see your collection thrive.
We designed this guide to be friendly and accessible for everyone. Whether you are a seasoned green thumb or just starting your journey, you will find everything you need to succeed. Get ready to transform your space and enjoy the satisfaction of growing your own food starting today.
The Benefits of Growing Your Own Herb Garden
Cultivating your own plants offers a unique blend of practical benefits and personal satisfaction. Whether you are looking for creative herb garden ideas for your windowsill or a larger outdoor space, the process is incredibly rewarding. By taking control of your own food source, you gain access to high-quality ingredients that elevate every meal you prepare.
Cost-Effectiveness of Home Propagation
One of the primary advantages of indoor herb gardening is the significant reduction in grocery bills. Instead of purchasing expensive plastic clamshells of herbs that often wilt within days, you can propagate your own plants from cuttings. This approach is a cornerstone of sustainable gardening, as it eliminates the need for single-use plastic packaging and reduces your overall carbon footprint.
Flavor Profiles and Culinary Advantages
Freshly harvested herbs provide a depth of flavor that dried store-bought alternatives simply cannot match. When you snip leaves directly from your plant, you capture essential oils at their peak potency. This vibrancy transforms simple dishes into gourmet experiences, allowing you to experiment with unique varieties that are rarely available in standard supermarkets.
| Feature | Store-Bought Herbs | Home-Grown Herbs |
|---|---|---|
| Flavor Intensity | Low (often muted) | High (vibrant) |
| Cost | High per unit | Low (propagation based) |
| Waste | High (plastic packaging) | Minimal (compostable) |
| Availability | Limited selection | Year-round access |
The Therapeutic Joy of Gardening
Beyond the kitchen, tending to your plants serves as a peaceful escape from the stresses of daily life. The rhythmic act of watering, pruning, and nurturing your greenery promotes mindfulness and lowers anxiety levels. Many gardeners find that spending just a few minutes each day with their plants provides a necessary mental reset, making it a truly holistic hobby.
Essential Tools and Supplies for Success
Equipping yourself with the proper tools is the foundation of a thriving indoor garden. When you focus on the right gear, you simplify the process of how to grow herbs in your own kitchen. Quality supplies ensure that your cuttings have the best chance to develop strong, healthy roots.
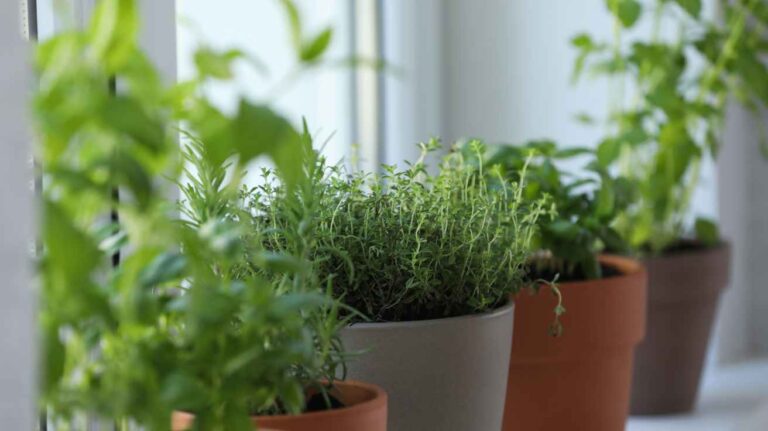
Selecting the Right Containers and Trays
The container you choose plays a vital role in the health of your plants. For successful indoor herb gardening, always select pots that feature drainage holes at the bottom. This simple feature prevents water from pooling, which is the primary cause of root rot in young cuttings.
If you are growing herbs at home, consider using nursery trays or small plastic pots initially. These containers are lightweight and easy to move as you adjust light exposure. You can place them on a waterproof tray to protect your surfaces from excess moisture.
| Container Type | Drainage Quality | Best Use Case |
|---|---|---|
| Terracotta Pots | Excellent (Porous) | Woody herbs like rosemary |
| Plastic Trays | Moderate (Requires holes) | Starting multiple cuttings |
| Ceramic Pots | Low (Needs drainage) | Decorative indoor displays |
Choosing Quality Potting Mixes
Your choice of soil medium is just as important as the container itself. Delicate new roots require a light, airy environment to expand without resistance. Avoid using heavy garden soil, as it often compacts and suffocates young root systems.
Instead, look for a high-quality seed-starting mix or a blend containing perlite and vermiculite. These ingredients improve aeration and moisture retention, which are critical when learning how to grow herbs from cuttings. A well-draining mix ensures that your plants stay hydrated without becoming waterlogged.
Necessary Pruning and Cutting Tools
Precision is key when taking cuttings for your collection. You should invest in a pair of sharp, bypass pruners or high-quality floral snips. Dull blades can crush the stems, which makes it difficult for the plant to absorb water and nutrients.
Clean tools are essential for maintaining a healthy environment while growing herbs at home. Always sanitize your blades with rubbing alcohol before and after each use to prevent the spread of disease. With the right equipment, you can make clean, healthy snips that encourage vigorous growth in your new plants.
Understanding the Basics of Propagating Herbs
Propagating herbs is a rewarding skill that becomes much easier when you grasp the basic biological principles. Gardening for beginners often feels intimidating, but the process of cloning plants is rooted in simple science. By focusing on how stems respond to their environment, you can ensure consistent results in your home garden.
Identifying Softwood versus Hardwood Cuttings
To achieve propagation success, you must first distinguish between softwood and hardwood stems. Softwood cuttings come from the new, flexible growth found at the tips of branches during the spring. These stems contain high levels of moisture and are biologically primed for rapid root development.
In contrast, hardwood cuttings are taken from mature, woody stems later in the season. These cuttings are tougher and require more time to develop roots compared to their softer counterparts. Understanding this difference helps you choose the right material for your specific herb variety.
| Cutting Type | Best Season | Flexibility | Rooting Speed |
|---|---|---|---|
| Softwood | Spring/Early Summer | Very Flexible | Fast |
| Semi-Hardwood | Late Summer | Moderate | Medium |
| Hardwood | Late Autumn/Winter | Rigid/Woody | Slow |
The Role of Light and Temperature
Light and temperature act as essential catalysts for new plant growth. Cuttings need bright, indirect light to trigger photosynthesis without drying out the delicate tissues. If the light is too intense, the stem may burn before it has a chance to establish a root system.
Temperature also plays a vital role in metabolic activity. Most herbs prefer a warm environment, typically between 65 and 75 degrees Fahrenheit, to encourage cellular division. Keeping your propagation station in a stable, warm spot will significantly improve your overall results.
Why Humidity Matters for Root Development
Maintaining high humidity is a critical factor in preventing moisture loss while the plant establishes its roots. Because a cutting lacks a root system, it cannot easily replace water lost through its leaves. High humidity levels create a protective barrier that keeps the foliage hydrated during this vulnerable transition period.
You can easily maintain this environment by using a clear plastic cover or a humidity dome. This simple step ensures that your cuttings stay turgid and healthy until they are ready for soil. Consistent moisture management is the final piece of the puzzle for long-term propagation success.
Preparing Your Mother Plants for Cuttings
Before you take a single cutting, you must ensure your mother plant is in peak condition. Learning how to grow herbs effectively requires a keen eye for detail when choosing your source material. By focusing on the health of the parent plant, you significantly increase your chances of successful root development.

Selecting Healthy and Disease-Free Stems
Always choose stems that look vibrant and show no signs of yellowing or wilting. Avoid branches that have visible pests, such as aphids or spider mites, as these can easily transfer to your new starts. A strong, disease-free stem is the foundation of vigorous growth.
Look for new, soft growth rather than old, woody stems for the best results. These younger sections contain the active hormones needed to trigger root production quickly. This simple step is essential for anyone interested in fresh herb propagation.
Best Time of Day to Take Cuttings
The timing of your harvest plays a major role in the survival of your cuttings. You should aim to take your samples early in the morning, just after the sun rises. At this time, the plant is fully hydrated and turgid, which helps the cutting withstand the stress of being removed.
Avoid taking cuttings during the heat of the afternoon when the plant is likely to be slightly dehydrated. Proper hydration ensures that the cells are ready to focus energy on growing roots instead of recovering from water loss.
Sanitizing Your Equipment to Prevent Infection
Clean tools are non-negotiable when you are growing herbs at home. Pathogens can easily hide on dirty shears and infect the fresh wound of your cutting. Always wipe your blades with rubbing alcohol or a mild bleach solution before moving between different plants.
| Plant Condition | Visual Indicator | Action Required |
|---|---|---|
| Healthy | Bright green, firm stems | Safe for propagation |
| Stressed | Wilting or drooping leaves | Water and wait 24 hours |
| Diseased | Spots, mold, or pests | Discard or treat immediately |
Taking these small precautions ensures that your gardening efforts remain productive and rewarding. A clean start is the best way to guarantee that your new herbs will thrive in their new containers.
Water Propagation Techniques for Beginners
Rooting herb cuttings in water is a simple and rewarding technique for any home gardener. This approach is widely considered one of the best options for gardening for beginners because it allows you to observe the root development process in real-time. By placing stems in a clear container, you can easily monitor progress and ensure your new plants are thriving.
Step-by-Step Guide to Water Rooting
To begin, select a healthy stem from your mother plant and make a clean cut just below a leaf node. Remove the lower leaves so that no foliage sits below the water line, as submerged leaves can decay and foul the water. Place your cutting into a clean glass jar filled with room-temperature water.
Position your jar in a spot that receives bright, indirect sunlight. Avoid direct sun, which can overheat the water and encourage algae growth. Within a few weeks, you should notice white, healthy roots emerging from the submerged nodes.
Managing Water Quality and Changing Frequency
Maintaining clean water is essential for successful herb propagation methods. Stagnant water can harbor bacteria that may damage your delicate new roots. Aim to change the water in your jar at least once every five to seven days to keep oxygen levels high.
If you notice the water becoming cloudy or murky, change it immediately. Always use fresh, room-temperature water to avoid shocking the developing root system. Consistent care during this phase ensures your cuttings remain healthy and vigorous.
When to Transplant Water-Rooted Herbs to Soil
Knowing when to move your plants is a critical skill for any gardener. Once the roots reach about two inches in length, they are typically ready for their transition to soil. Waiting too long can result in roots that are too adapted to water, making the move to a potting medium more difficult.
When you are ready to transplant, choose a high-quality potting mix that drains well. Gently place the rooted cutting into the soil and water it thoroughly to help the roots settle. With proper care, your new herb will continue to grow strong in its permanent home.
Soil Propagation Methods for Stronger Roots
Many gardeners prefer soil propagation because it helps develop robust root systems early on. While water methods are convenient, soil provides the structural support and nutrients that young plants crave. This approach is often the secret to long-term plant health and vigor.
Preparing the Potting Medium for Cuttings
The foundation of your success lies in the quality of your soil mix. You need a balance that retains enough moisture for hydration while allowing excess water to drain away quickly. A heavy garden soil will likely suffocate your delicate stems, so opt for a light, airy blend instead.
Most experts recommend mixing equal parts of peat moss or coconut coir with perlite or coarse sand. This combination ensures that oxygen reaches the base of your cuttings, which is vital for healthy growth. Proper drainage prevents the stems from rotting before they have a chance to establish roots.

| Amendment | Primary Benefit | Drainage Impact |
| Perlite | Aeration | High |
| Coconut Coir | Moisture Retention | Moderate |
| Coarse Sand | Structural Support | High |
Using Rooting Hormones for Faster Results
If you want to speed up the process, consider using a rooting hormone. These products contain natural or synthetic auxins that signal the plant to focus its energy on root development. When you are rooting herb cuttings, a small amount of powder or gel can significantly improve your overall results.
Simply dip the cut end of your stem into the hormone before placing it into the soil. Be sure to tap off any excess powder to avoid burning the delicate tissue. This simple step often makes the difference between a slow-growing cutting and a thriving new plant.
Creating a Mini Greenhouse Environment
Humidity is a critical factor for propagation success, especially before the roots have formed. You can easily create a mini greenhouse using common household items like clear plastic bags or recycled soda bottles. These covers trap moisture around the leaves, reducing the stress on the cutting.
Place your container inside a clear plastic bag and seal it loosely to allow for some airflow. Keep the setup in a bright location, but avoid direct sunlight, which can cause the interior to overheat. By maintaining this humid microclimate, you provide the perfect conditions for your herbs to take hold and grow.
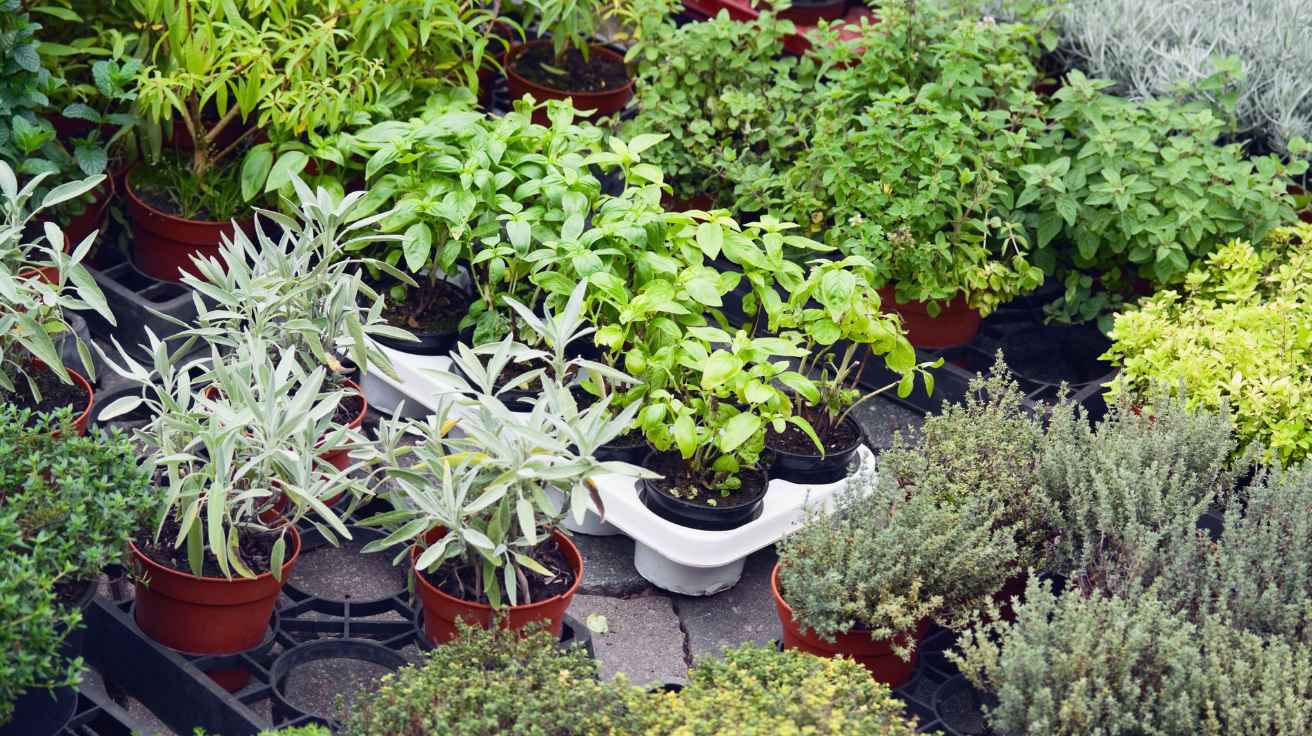
Specific Techniques for Popular Culinary Herbs
You can easily expand your garden by tailoring your approach to the specific needs of your favorite culinary herbs. While many plants share basic requirements, understanding the nuances of each variety ensures a higher success rate. These are some of the best herbs to propagate for a thriving indoor or outdoor collection.
Propagating Woody Herbs Like Rosemary and Thyme
Woody herbs like rosemary and thyme require a bit more patience during the rooting phase. Instead of using soft new growth, look for stems that are just beginning to turn woody at the base. These semi-hardwood cuttings are much more likely to develop a strong root system.
Strip the lower leaves from your cutting and place it in a well-draining potting mix. Keep the environment stable and avoid overwatering, as these plants prefer slightly drier conditions while they establish themselves. Consistency is the key to success with these hardy perennials.
Soft-Stemmed Herb Propagation for Basil and Mint
If you want rapid results, focus on soft-stemmed varieties like basil and mint. These plants are excellent for fresh herb propagation because they root quickly in both water and soil. Simply snip a healthy stem just below a leaf node and place it in a clean glass of water.
You will often see roots appearing within just a few days. Once the roots are about an inch long, you can move them into a pot with nutrient-rich soil. These herbs are incredibly forgiving, making them perfect for beginners.
Tips for Success with Sage and Oregano
Sage and oregano fall somewhere in the middle, requiring a balance of moisture and light. When taking cuttings, ensure you select stems that are vibrant and free of any wilting. Following these culinary herb tips will help you maintain a steady supply of fresh ingredients for your favorite recipes.
| Herb Type | Rooting Speed | Preferred Medium |
|---|---|---|
| Basil | Fast | Water or Soil |
| Rosemary | Slow | Soil |
| Mint | Very Fast | Water |
| Oregano | Moderate | Soil |
Always keep your workspace clean to prevent any potential infections during the process. By monitoring your cuttings daily, you can quickly address any issues before they impact the health of your new plants. With a little practice, you will have a continuous harvest year-round.
Troubleshooting Common Propagation Challenges
Even the most dedicated gardeners occasionally face hurdles when trying to grow new plants from cuttings. While you might be using the best herb propagation methods, environmental factors can sometimes lead to unexpected setbacks. Learning to spot these issues early is the hallmark of a skilled gardener.
Dealing with Rot and Fungal Issues
Rot is often caused by excess moisture or poor air circulation around the stem. If you notice the base of your cutting turning mushy or dark, remove it from the container immediately to protect your other plants. Always ensure your tools are clean to prevent the spread of pathogens.
Fungal growth, often appearing as fuzzy white mold, thrives in stagnant, humid air. You can manage this by gently wiping the leaves and ensuring your setup has adequate ventilation. A comprehensive herb care guide suggests keeping the foliage dry to discourage these unwanted visitors.
Why Cuttings Wilt and How to Prevent It
Wilting usually happens when a cutting loses water faster than it can absorb it through the stem. This loss of turgor pressure is common before roots have fully developed. To fix this, place a clear plastic bag over your container to create a humid microclimate that reduces water loss.
Keep your cuttings out of direct, harsh sunlight while they are in this delicate stage. Indirect light provides enough energy for growth without causing the plant to overheat. Consistent moisture levels in your medium will help the cutting stay hydrated until it establishes a strong root system.
Addressing Slow Root Growth
If your cuttings are healthy but simply refusing to grow roots, they may need a slight boost. Some of the best herbs to propagate, such as rosemary, naturally take longer to root than others like mint. Patience is key, but you can also try using a rooting hormone to speed up the process.
Check that your temperature is warm enough, as many herbs prefer a cozy environment to trigger root development. If the room is too cold, the plant’s metabolism slows down significantly. Providing bottom heat with a seedling mat can often make a noticeable difference in your success rate.
Transplanting and Acclimating Your New Plants
Once your herb cuttings establish a strong root system, they are ready for their next big move. Following proper herb transplanting tips ensures that your young plants thrive in their new environment. This transition marks the shift from a delicate cutting to a robust, independent herb.
Signs That Your Cuttings Are Ready for Potting
You should inspect the root development before moving your plants to soil. Ideally, roots should be at least one to two inches long and show a dense, healthy network. If the roots appear thin or sparse, wait a few more days to allow them to strengthen.
Another indicator is the appearance of new, vibrant leaf growth on the stem. When you see fresh foliage, it confirms that the plant has successfully transitioned to a self-sustaining state. This is a reliable sign that your plant is ready for a permanent home.
Gradual Hardening Off for Outdoor Transition
Moving plants directly from a protected indoor space to the outdoors can cause significant stress. You must introduce them to the elements slowly over the course of a week. Start by placing your pots in a shaded, sheltered area for a few hours each day.
Gradually increase their exposure to direct sunlight and wind as the days progress. This process helps the stems toughen and prevents the leaves from scorching. A consistent herb care guide emphasizes that patience during this phase prevents wilting and stunted growth.
Providing Proper Care After Transplanting
After moving your herbs into their new pots, keep the soil consistently moist but not waterlogged. Avoid adding heavy fertilizers immediately, as the roots need time to settle into the new medium. Place the pots in a location that mimics the light conditions they enjoyed during propagation.
Monitor your plants closely for any signs of drooping or discoloration during the first week. If the plants look stressed, provide extra shade until they recover. Following this simple herb care guide will help your new herbs establish strong roots and flourish throughout the growing season.
Seasonal Considerations for Herb Propagation
Adapting your propagation schedule to the changing seasons ensures your herbs stay healthy year-round. By aligning your efforts with the natural rhythms of nature, you can discover creative herb garden ideas that flourish regardless of the weather. Understanding these cycles allows you to work with your plants rather than against them.
Spring and Summer Growth Cycles
The warmer months provide the ideal environment for rapid root development. During this time, plants are in their active growth phase, making it the perfect window to take cuttings. You will notice that stems are more flexible and contain higher levels of natural growth hormones.
Take advantage of the increased daylight hours to boost your success rates. Longer days provide the energy needed for new roots to establish quickly in soil or water. This is the most productive time to expand your collection.
Managing Propagation During Winter Months
Winter requires a shift in strategy as growth naturally slows down. While you can still propagate, you must provide extra warmth and supplemental light to mimic the growing season. Keep your cuttings in a stable, draft-free area to prevent shock.
Be patient during these colder months, as root development will take significantly longer than in summer. Avoid overwatering, as the plants are not drinking as much moisture while they are semi-dormant. Following these specific herb transplanting tips will help your cuttings survive until spring.
Adjusting Care Based on Local Climate Zones
Your local climate zone dictates the specific timing for your gardening tasks. Gardeners in warmer regions may enjoy a longer propagation window, while those in cooler climates must rely on indoor setups. Always check your local frost dates before moving any new plants outdoors.
Adjust your humidity and temperature controls to match your specific environment. If you live in a dry climate, you may need to use humidity domes more frequently to keep your cuttings hydrated. Proper planning ensures that your efforts lead to a lush and productive garden.
| Season | Growth Activity | Propagation Success |
|---|---|---|
| Spring | High | Excellent |
| Summer | High | Very Good |
| Autumn | Moderate | Fair |
| Winter | Low | Requires Indoor Care |
Applying these seasonal strategies will refine your approach to home gardening. Whether you are starting fresh or expanding an existing patch, these herb transplanting tips provide the foundation for success. Keep exploring new herb garden ideas to keep your space vibrant throughout the entire year.
Enjoying the Fruits of Your Gardening Labor
Your journey into the world of plants brings a unique sense of accomplishment to your kitchen. Propagating herbs transforms a simple windowsill into a vibrant source of fresh ingredients. You now possess the skills to maintain a lush, productive space that rewards your patience with every harvest.
Sustainable gardening creates a lasting bond between your home and the natural world. By choosing to grow your own plants, you reduce waste and eliminate the need for store-bought plastic packaging. This mindful approach ensures your garden remains a healthy sanctuary for years to come.
Apply these culinary herb tips to elevate your daily cooking routines. Fresh basil, rosemary, and thyme add depth and brightness to every dish you create. Share your bounty with friends or experiment with new recipes using your homegrown supply.
Your garden is a living testament to your dedication and care. Keep observing your plants as they grow and adapt to the changing seasons. Enjoy the vibrant flavors and the peace that comes from nurturing your own green space.