The Ultimate Guide to Crafting a Custom Crochet Formal Dress
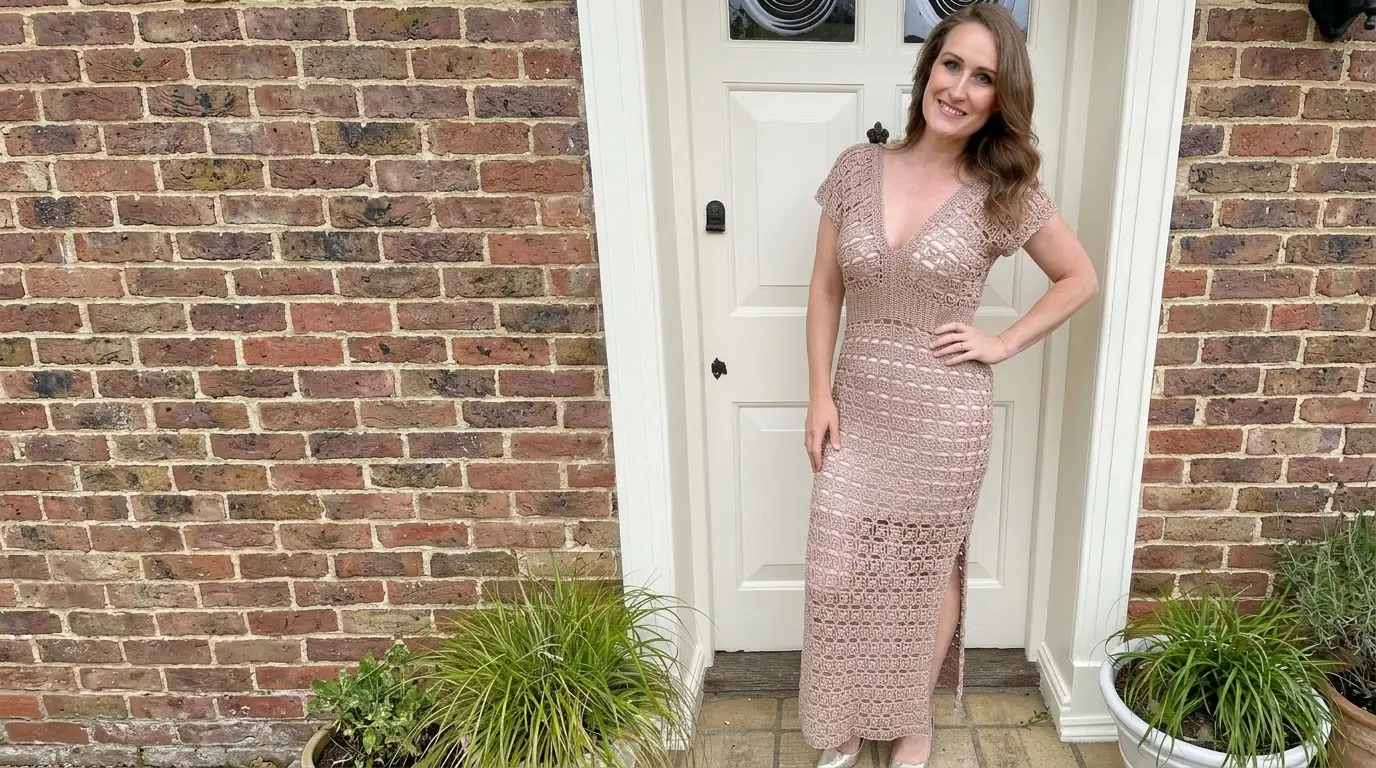
This elegant crochet formal dress features a flattering V-neckline, cap sleeves, a fitted ribbed waistline, and a graceful floor-length skirt with a dramatic side slit. Its airy openwork design makes it a versatile statement piece suited for formal events, summer parties, or elevated resort wear.
Essential Materials and Tools
Choosing the right materials ensures your garment drapes beautifully and feels comfortable against your skin throughout the day or evening.
- Yarn: Sport weight yarn (Category 2). A soft blend of cotton and acrylic (such as a 136 yards / 50 grams ball) provides the ideal combination of breathability, soft texture, and structural stability. Natural fiber shades like parchment, seafoam, or soft neutrals accentuate the delicate lace detailing.
- Crochet Hook: A 4.0 mm (US Size G/6) crochet hook, or whichever size allows you to match the pattern gauge accurately.
- Notions: A pair of sharp yarn scissors, locking stitch markers to mark construction placement, and a tapestry needle for weaving in loose ends and sewing seams.
Overview of Construction
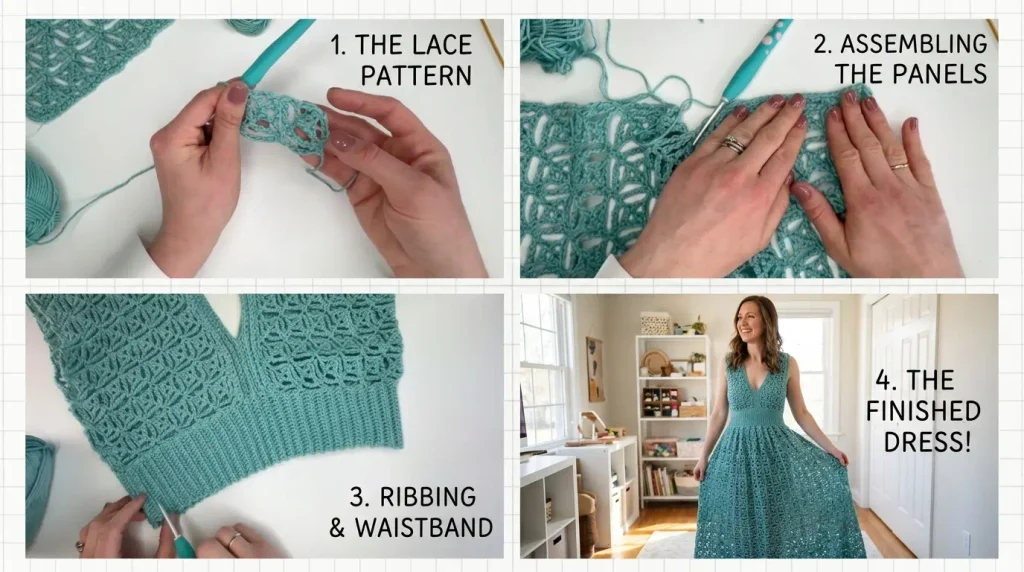
Unlike traditional garments constructed in simple top-down or bottom-up rounds, this design uses an intuitive modular approach built from flat panels.
- Upper Bodice Panels: You begin by stitching two identical, flat lace rectangular panels that will form the front and back of the upper bodice and shoulders.
- Neckline Edging: A clean ribbed edge is worked directly along one long side of each rectangle.
- Waistband Banding: The two upper panels are joined using a “join-as-you-go” ribbed waist section worked back and forth in vertical rows, cinching the silhouette slightly under the bust or at the waist.
- Skirt Panels: Working downward from the bottom of the waist ribbing, you construct flat front and back skirt panels using the established lace stitch.
- Seaming: Finally, minimal side seams are sewn beneath the arms and down the skirt length to complete the garment.
Step-by-Step Stitch Guide: The Lace Wedge Pattern
The foundation of this dress relies on an elegant geometric lace wedge stitch. The pattern is built on a foundation chain multiple of 6 + 2 chains.
Foundation and Row 1
- Chain your desired length (multiple of 6 + 2).
- Work a single crochet (sc) in the second chain from your hook.
- First Wedge: Chain 6. In the second chain from the hook, work 1 sc. Chain 1, skip 1 chain, work 1 double crochet (dc) in the next chain. Chain 1, skip 1 chain. Into the final chain before your starting sc, work a double treble crochet (dtr)—yarning over three times before pulling through loops two at a time.
- Skip 5 chains along your foundation chain, then anchor the wedge with 1 sc into the next chain.
- Repeat the chain-6 wedge process across the row, ending with 1 sc in the last foundation chain. Turn.
Row 2
- Chain 5 (counts as turning space/dtr height).
- Work 1 sc into the top sc of the first wedge from the previous row.
- Mirror the wedge design along the side chain space: 1 sc in the first chain, chain 1, skip 1, 1 dc in the next chain, chain 1, skip 1, and 1 dtr in the final chain. Ensure your dc and dtr line up directly above the corresponding stitches from the row below.
- Work 1 sc into the top of the next wedge and repeat across.
- Row End: On the final wedge of the row, work 1 sc, chain 1, skip 1, 1 dc, chain 1, skip 1, then begin a double treble two together (dtr2tog) across the next chain and the final stitch of the row to secure a clean outer edge. Turn.
Rows 3 and 4 (Pattern Repeat)
- Row 3: Chain 1, 1 sc in the first stitch. Chain 6, work the wedge steps (1 sc, ch 1, 1 dc, ch 1, 1 dtr down the chain), skip 5 stitches across the previous row’s lace peak, 1 sc into the top dtr. Repeat from * across, ending with 1 sc in the final chain space. Turn.
- Row 4: Chain 5, 1 sc in top of first wedge. Work the mirrored wedge stitches, 1 sc in top of next wedge. Repeat across, finishing the last wedge with a dtr2tog across the last two stitches to maintain straight side edges. Turn.
Repeat Rows 3 and 4 until your upper bodice panels reach your desired length from shoulder to waist. Always end on an even-numbered row repeat before adding edging.
Upper Bodice Assembly and Waist Banding
Once your two lace rectangles are completed, work a neat finishing edge before connecting them into a wearable top.
Neckline Ribbing
Rotate your panel to work along one long edge. Work 6 single crochets per wedge section along the side of the rows to create a smooth, even base. Turn, chain 1, and work rows of single crochet in the back loop only (BLO) for 5 rows (or your preferred width). Repeat on the second panel.
Block both flat panels to their finished measurements at this stage using pins and steam or a wet block. Blocking flat panels before assembly is significantly easier than blocking a fully joined garment.
Join-As-You-Go Waist Ribbing
- Lay your two upper panels end to end. Attach yarn at the lower outer corner of the first panel.
- Chain out 13 stitches (or desired waistband width). Work 1 sc in the back bump of the second chain from hook and in each chain across.
- To attach to the lace panel edge: slip stitch into the next stitch on the lace edge, skip 1 stitch along the edge, and slip stitch into the following stitch.
- Turn, work 1 sc in the BLO of each ribbing stitch across. Turn, chain 1, work 1 sc in BLO across back toward the edge.
- Slip stitch into the lace panel edge (slip stitch, skip 1, slip stitch) and continue working back and forth across the base of the first panel.
- Continue this join-as-you-go ribbing directly onto the second upper panel. Fold the rectangles in half at the shoulders and repeat the joining process across the back edges, forming a continuous underbust band.
- Join the beginning and end of the waistband using a simple slip-stitch seam on the inside of the garment.
Seaming the Sleeves and Neckline
With the upper structure formed, you can customize the fit around your bust and shoulders.
- Underarm Seams: Try the folded upper section on. Use stitch markers to decide how deep you want your armholes. Using a tapestry needle and yarn, seam the lower wedge stitches together on each side under the arms using mattress stitch or whip stitch. Ensure both sides match in stitch count.
- Neckline Customization: The front and back naturally form V-necklines. Place slip stitches or hand-sew along the inner front edges to close the V-neck to a depth you feel comfortable with. You can leave the back V-neck open or seam it partially as well.
Constructing the Skirt
The skirt is added by working directly from the lower edge of the ribbed waistband downwards in two flat sections: a front panel and a back panel.
- Front Panel: Attach yarn at one side seam of the waistband. Chain 1 and work 1 sc. Chain 6, complete a lace wedge stitch, skip 3 row edges along the bottom of the ribbing, and work 1 sc into the side of the next row. Repeat across half of the waistband circumference to form the front.
- Continue working in established Rows 3 and 4 of the lace wedge stitch until the skirt panel reaches your desired length (mini, midi, or full maxi). Fasten off.
- Back Panel: Attach yarn to the same side stitch where the front panel ended. Work the identical wedge repeat across the remaining half of the waistband to build the back skirt panel to the same length.
- Side Seams and Slit: Block both skirt panels flat. Turn the dress inside out and use a tapestry needle to seam the matching front and back wedge stitches along the sides. Stop seaming at your upper thigh or knee level to leave a stylish side slit that ensures ease of movement.
Professional Practical Advice
Blocking your work at each intermediate step ensures crisp lace definition and straight edges throughout assembly. Cotton-blend yarns tend to stretch slightly downwards when hung, so always try on the garment during construction to check total length.
When working the double treble stitches in the lace pattern, maintain consistent yarn tension so that the open arches remain uniform across every row.
If your hip measurement is larger than your bust measurement, you can easily add width to the skirt panels by placing your foundation wedge stitches closer together (skipping fewer row edges) along the waistband, creating a subtle A-line flare.
To make the dress fully opaque for formal occasions, pair it with a light, neutral-colored stretch bodycon slip or nude undergarments that complement your chosen yarn shade.