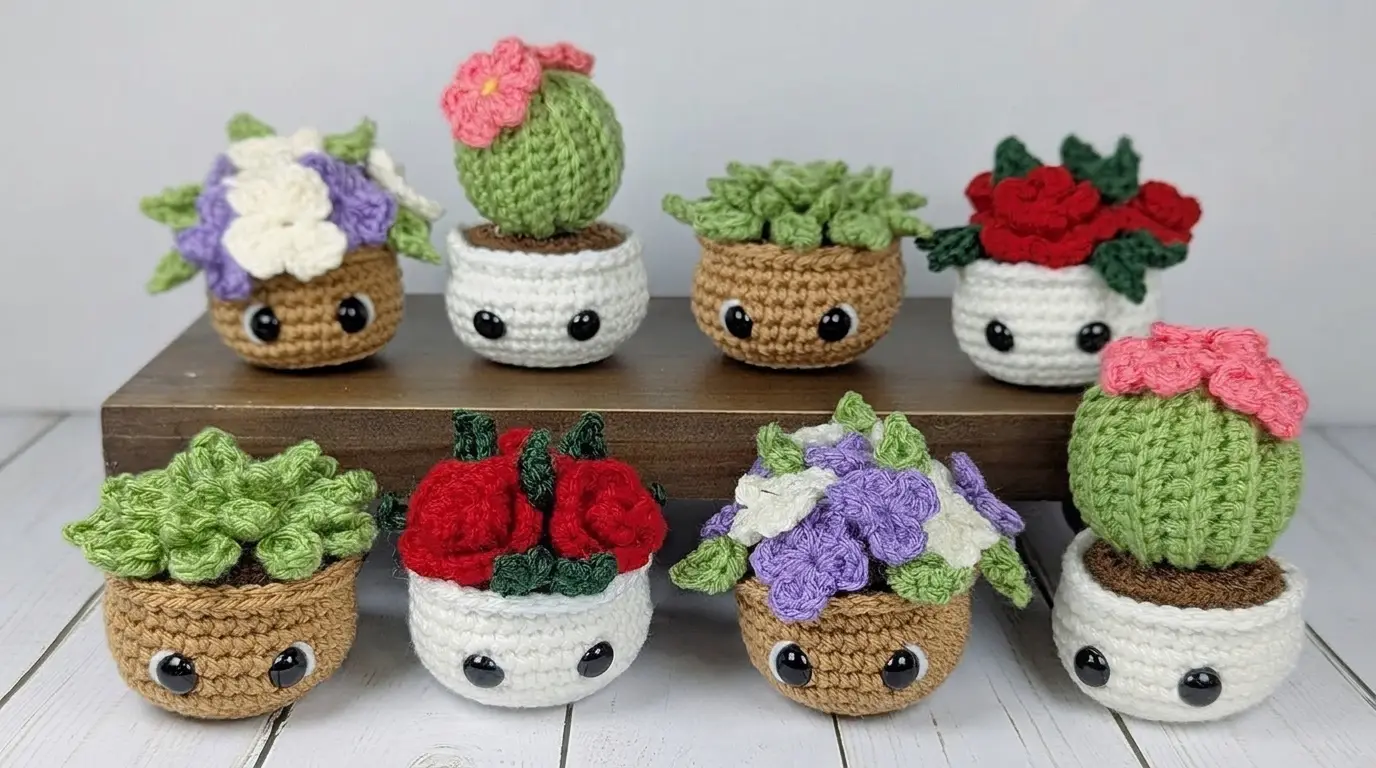
Crafting Charming Crochet Potted Plants
Bring everlasting greenery into your home with these adorable, maintenance-free crochet plants featuring friendly faces and vibrant botanical designs.
Essential Materials and Tools
Creating these cute crocheted plant pots requires a few basic supplies that are easy to find. You will need a 3.5 mm (E) crochet hook along with yarn in your choice of colors for the pot, soil, leaves, and flowers. Keep a pair of scissors, a yarn needle, a stitch marker, and some fiberfill stuffing close by to shape your pieces.
To give your little pots personality, grab a pair of safety eyes. For assembly, you can use tacky glue or hot glue along with sewing pins to hold everything in place, or simply leave long tails on your yarn pieces to sew them together by hand.
Crocheting the Base Pot
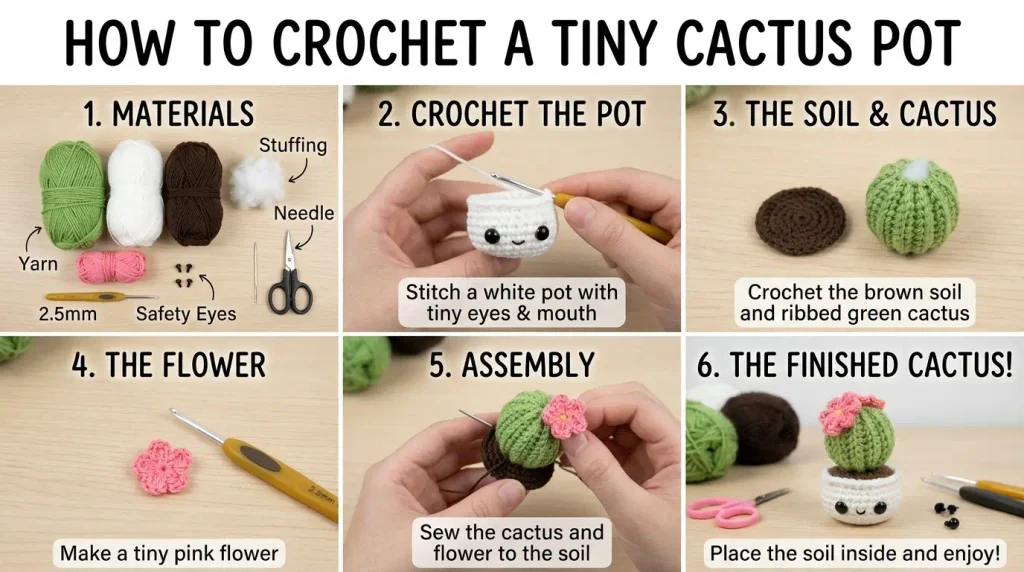
The foundation of every project starts by working in the round. Begin with a magic ring and place eight single crochets inside, pulling the tail tight to close the center.
For round two, increase by placing two single crochets into every stitch to reach sixteen stitches. Continue shaping the flat base by alternating single crochets and increases in rounds three and four until you have thirty-two total stitches.
To start the walls of the pot, work your next round in the back loops only with no increases, creating a distinct bottom ridge. Continue single crocheting normally under both loops for rounds six through ten. For the final round, crochet in the front loops only to leave a clean edge for attaching the soil later. Finish off with an invisible join for a neat, professional look.
Shaping the Soil and Adding Facial Features
The soil piece starts with the exact same four-round circle pattern used for the bottom of the pot. If you are making a succulent, cactus, or rose arrangement, you can finish off here. For the lilac design, add two extra plain rounds of single crochet so the piece mounds over nicely.
Insert your safety eyes between rows seven and eight of the pot, leaving about three visible stitches between them. You can add a cute highlight by stitching a small line of white yarn alongside each eye.
Once your facial features are secure, place the soil piece over the top opening of the pot, matching it up with the unused loops. Sew about halfway around before stuffing the interior firmly with fiberfill, then finish stitching it completely closed.
Creating Leaves, Flowers, and Cacti
Different plants require different botanical accents to bring them to life.
- Leaves: Start with a chain of four, work a slip stitch and single crochet down the chain, and place four half double crochets into the last chain before working back down the opposite side.
- Flowers: Form a magic ring, then create multiple petals by chaining three, working two double crochets, chaining three again, and slip stitching back into the center ring.
- Cacti: Crochet a long rectangular panel of single crochets using the back-loop-only technique to create ribbed texture, then seam the edges together, stuff it with fiberfill, and cinch both ends closed to form a round ball shape.
- Roses: Create a long foundation chain, work alternating single crochets and chain spaces, then build small and large petal arches before rolling the strip tightly into a spiral rose shape.
Assembly and Final Touches
Assembling your finished creation is where the magic truly happens. Arrange your handmade leaves, blooming flowers, or rounded cacti on top of the stuffed soil.
If you prefer gluing, use a small dab of tacky glue or hot glue, holding the pieces in place with sewing pins until the adhesive sets. Alternatively, thread your long yarn tails onto a needle and securely stitch each botanical element directly onto the soil surface.
Helpful Tips and Tricks
Always use a stitch marker at the start of your rounds to keep track of your stitch counts and prevent your pot shapes from warping.
When stuffing your pots and cacti with fiberfill, add small amounts gradually rather than stuffing it all at once to ensure an even, smooth, and lump-free shape.
If you choose the gluing method for assembly, let your pieces dry completely overnight before handling or displaying your new handmade creations.