Crochet Muffler: A Cozy and Stylish Ribbed Scarf Pattern
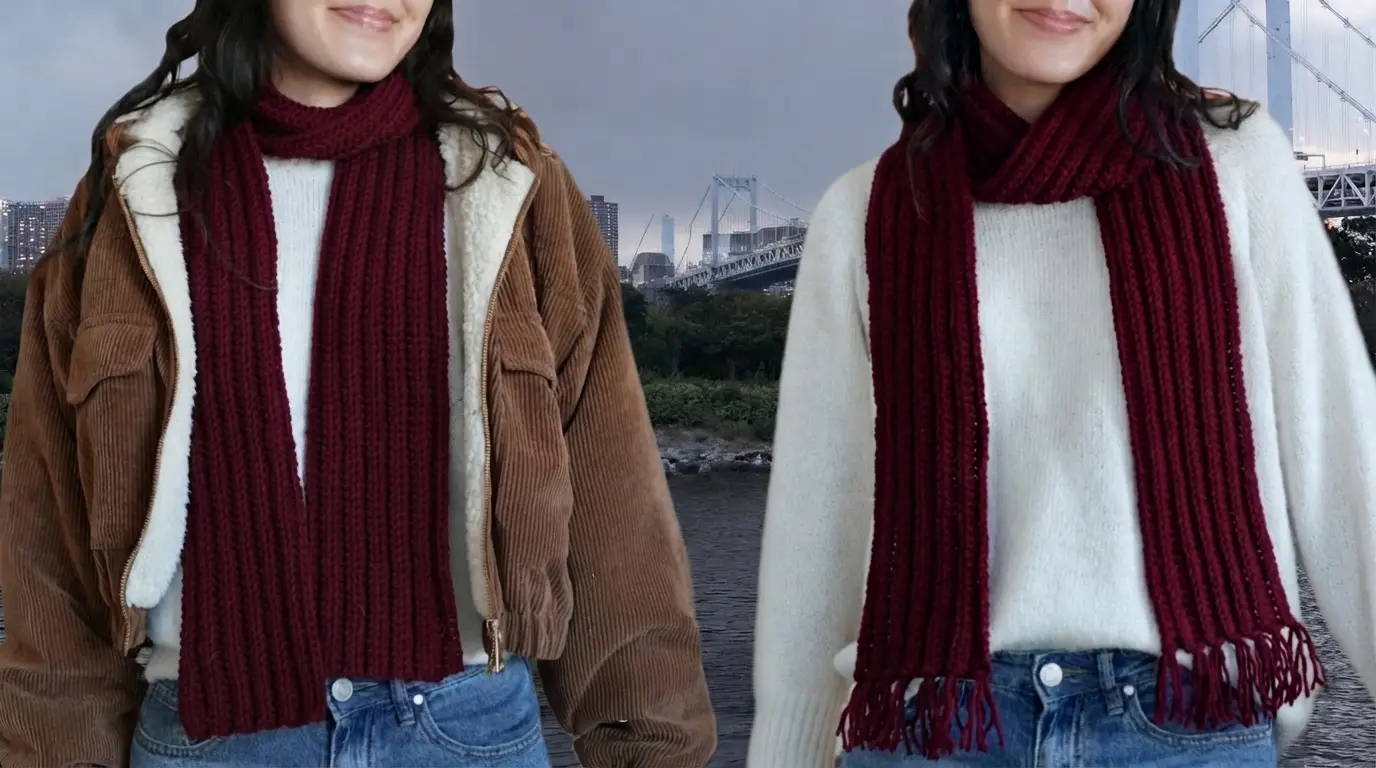
A crochet muffler is a lovely winter accessory that keeps your neck warm while adding a beautiful touch to your outfit. This ribbed burgundy muffler features a soft texture, long shape, and playful fringe ends, making it a stylish project for everyday wear.
What Makes This Crochet Muffler Special?
A handmade crochet muffler is both useful and fashionable. It is a simple accessory that can make even a basic winter outfit look more interesting. The deep burgundy color gives this muffler a warm, rich appearance that works beautifully with neutral-colored sweaters, jackets, coats, and jeans.
One of the nicest details of this design is its ribbed texture. The long raised lines create a lovely pattern that makes the muffler look thick and cozy. It also has a narrow, comfortable shape that can be wrapped around the neck or left hanging down at the front.
The fringe at both ends adds a little movement and gives the finished muffler a classic winter look. You can wear it with casual clothes or dress it up with a smart winter coat.
This project is suitable for beginners who already know a few basic crochet stitches. Once you understand how to make the ribbed rows, the main part is easy to repeat.
Materials Needed for a Crochet Muffler
Before starting, collect all the materials you need. Having everything ready will make the project easier and help you work without unnecessary breaks.
Yarn: Choose a soft, warm yarn in a rich burgundy or wine-red shade. Worsted-weight yarn is a good choice for a medium-thick muffler. Acrylic yarn is affordable, easy to find, and simple to care for. Wool or a wool blend can provide extra warmth, while a soft acrylic blend is comfortable for everyday use.
Crochet hook: A 5 mm crochet hook is a useful starting point for worsted-weight yarn. However, always check the yarn label and make a small test piece to see whether the fabric feels comfortable.
Scissors: You will need sharp scissors to cut the yarn when finishing the muffler and preparing the fringe.
Yarn needle: A yarn needle helps you hide loose ends neatly inside the stitches.
Stitch marker: This is optional, but it can help you mark the beginning of a row or keep track of your stitches.
Measuring tape: Use a measuring tape to check the length and width as you work.
Choosing the Right Yarn and Color
The yarn you choose can make a big difference in the final look and feel of your crochet muffler. Since this accessory sits around your neck, it is important to select something soft that does not feel scratchy against your skin.
A medium-weight yarn is a good option because it creates a warm fabric without making the muffler too heavy. If you want a lighter accessory, you can choose a thinner yarn and adjust your hook size.
Burgundy is a beautiful color for this style because it looks rich and elegant. It also pairs well with white, cream, gray, black, brown, and denim. You can use the same color for the fringe to create a neat and matching finish.
Before beginning, check that all your yarn comes from the same dye lot if you are buying several skeins. This helps prevent small differences in color from showing in the finished project.
Crochet Stitches and Techniques You Should Know
This muffler uses a simple ribbed crochet technique. The main stitch suggested for this project is the half double crochet worked through the back loop only.
If you are new to crochet, practice the following stitches before starting.
Chain stitch (CH): This is the foundation of the project. Make a slip knot on your hook, yarn over, and pull the yarn through the loop. Repeat until you have the required number of chains.
Half double crochet (HDC): Yarn over, insert your hook into the stitch, yarn over again, and pull through. You will have three loops on your hook. Yarn over once more and pull through all three loops.
Back loop only (BLO): Every crochet stitch has two top loops. The front loop is the one closest to you, while the back loop is farther away. For this technique, insert your hook only under the back loop.
Working half double crochet stitches through the back loop creates raised lines and a stretchy ribbed texture. Repeating this technique throughout the project gives the muffler its attractive vertical ridges.
You should also know how to make a slip knot, turn your work, and fasten off your yarn.
Step-by-Step Guide to Making a Crochet Muffler
Follow these simple steps to create your own ribbed crochet muffler. The measurements below are suggestions, so you can adjust them according to your preferred style.
Step 1: Make a Slip Knot
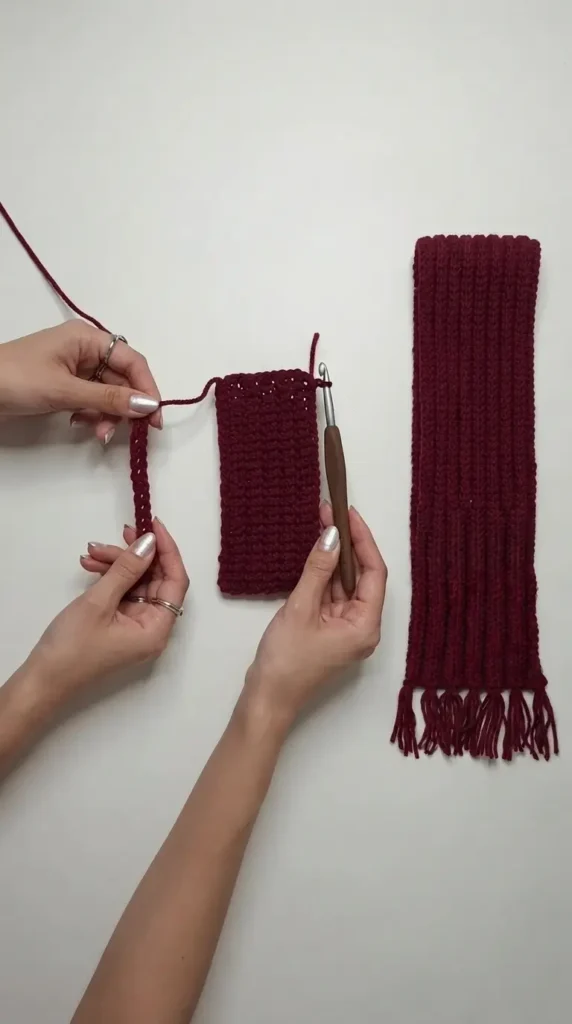
Start by making a slip knot with your burgundy yarn. Place the loop on your crochet hook and gently tighten it. Make sure the loop can still move smoothly along the hook.
Do not pull the knot too tightly because you need enough space to work your first chain stitches.
Step 2: Create the Foundation Chain
For a long muffler, make a foundation chain of approximately 170 to 190 stitches. This is a suggested starting range for an adult-sized accessory, not a fixed measurement.
The number of chains will determine the length of your muffler because you will be working along the length of the scarf rather than starting with its width.
If you want a shorter muffler, use fewer chains. For a longer design that can wrap around your neck more than once, add extra chains.
Keep your chain stitches relaxed and even. A very tight foundation chain can make one end of the muffler narrower than the other.
Step 3: Work the First Row
After completing the foundation chain, yarn over and begin working half double crochet stitches into the chain.
Skip the first two chains from your hook and work one half double crochet into the next chain. Continue making one half double crochet in each remaining chain.
Keep your stitches consistent as you move along the foundation chain. When you reach the end, chain two and turn your work.
The chain-two turning chain is used to bring your yarn to the correct height for the next row. It does not need to count as a stitch in this suggested pattern.
Step 4: Create the Ribbed Texture
Now you can start creating the beautiful ribbed pattern.
Work one half double crochet into the back loop only of every stitch across the row. Remember to insert your hook under the back loop rather than both loops.
When you reach the end, chain two and turn your work again.
Continue working half double crochet stitches through the back loop only in every row. As you repeat this process, raised lines will begin to appear along the length of the muffler.
This is the main technique that gives the accessory its soft, ribbed appearance. Try to keep the same tension throughout the project so that the texture looks even.
Step 5: Continue Until You Reach the Desired Width
Repeat the ribbed rows until your muffler reaches your preferred width.
A width of around 7 to 9 inches is a useful starting point for a cozy adult muffler. You can make it narrower for a lightweight look or wider if you prefer more coverage around your neck.
Check the width regularly with your measuring tape. Remember that crochet ribbing naturally stretches, so avoid making the fabric too tight.
The number of rows you need will depend on your yarn, hook size, and personal tension. Focus on the finished measurement rather than following a fixed row count.
Step 6: Finish the Main Body
Once the muffler reaches the desired width, complete your final row and cut the yarn, leaving a small tail.
Pull the yarn through the last loop to secure it. Use a yarn needle to weave the loose end into the nearby stitches.
Check both sides of the muffler to make sure there are no loose loops or unfinished areas. The edges should look neat, and the ribbed texture should run evenly from one end to the other.
Step 7: Add Fringe to the Ends
The fringe is an important detail of this design. It gives the muffler a classic winter style and makes the ends look more decorative.
Cut several pieces of burgundy yarn to your preferred fringe length. Around 8 to 10 inches is a useful starting length because the yarn will be folded in half when attached.
Take two or three strands together, depending on how full you want the fringe to look. Fold them in half to create a loop.
Insert your crochet hook through an opening along the short edge of the muffler. Catch the folded loop and pull it through slightly. Then bring the loose ends through the loop and pull gently to secure the fringe.
Repeat this process along the entire short edge, leaving a small and even space between each group of strands.
Add fringe to the opposite end in the same way. Try to keep the spacing and number of strands similar on both sides.
Step 8: Trim and Shape the Fringe
After attaching all the fringe, lay the muffler flat on a clean surface.
Use scissors to trim the fringe so that the strands have a similar length. You can use a measuring tape to help keep the ends even.
Avoid cutting too close to the knots. The fringe should remain securely attached while hanging naturally from the edges.
Give the muffler a gentle shake to separate the strands and let them fall into place.
Step 9: Check the Finished Muffler
Before wearing your new accessory, inspect the entire piece.
Check that the ribbed rows look even, the edges are neat, and the fringe is firmly attached. Weave in any remaining yarn ends and gently shape the muffler.
If the yarn label allows it, you can lightly block the finished piece according to the yarn care instructions. Avoid using high heat because some synthetic yarns can be damaged by it.
Your handmade ribbed crochet muffler is now ready to wear!
Tips for Making a Beautiful Crochet Muffler
Keeping your tension consistent is one of the most important things when making this project. If some rows are tighter than others, the muffler may look uneven. Try to hold the yarn comfortably and avoid pulling it too hard after each stitch.
Pay attention to the back loops when working the ribbed rows. Accidentally inserting your hook under both loops can change the texture and make some parts look different.
It is also helpful to measure your work after every few rows. This allows you to notice changes in width before the muffler becomes too large or too small.
If you are a beginner, practice the half double crochet back-loop technique on a small sample before starting the full project. Once you become comfortable with the movement, the repeated rows will feel much easier.
When adding fringe, keep the strands in similar groups. Too much fringe can make the ends heavy, while very little fringe may not give the full decorative effect you want.
How to Style Your Crochet Muffler
A burgundy crochet muffler is easy to style with many different outfits. Its rich color looks especially beautiful with a cream or white sweater. You can leave both ends hanging down at the front for a simple and relaxed appearance.
For colder days, wrap the muffler around your neck once and let the fringed ends fall over your jacket. This gives you extra warmth while showing off the ribbed texture.
You can also wear it with a brown jacket, blue jeans, and simple boots for a casual winter outfit. The deep red shade adds a nice touch of color without making the outfit look too busy.
If you prefer a neat look, tuck one end under the other and adjust the fabric gently around your neck. Make sure it feels comfortable and is not wrapped too tightly.
How to Care for Your Handmade Crochet Muffler
Taking proper care of your handmade muffler will help it stay soft and beautiful for a long time.
Always check the yarn label before washing. Different yarn fibers have different care needs. Acrylic yarn can often be washed gently, while some wool yarns require special care.
Use cool or lukewarm water and a mild detergent when handwashing is recommended. Avoid twisting or squeezing the muffler because this can stretch the stitches and change its shape.
After washing, gently press out excess water using a clean towel. Lay the muffler flat on a dry surface and allow it to air dry completely.
Store it in a clean, dry place when you are not using it. Avoid hanging it for long periods because the weight of the yarn may stretch the fabric.
Easy Ways to Customize Your Crochet Muffler
One of the best things about making your own muffler is that you can change the design to suit your taste.
You can use cream, charcoal gray, forest green, navy blue, or dusty pink instead of burgundy. Each color creates a different look while keeping the same simple ribbed pattern.
You can also make the muffler wider or longer depending on how you like to wear it. A narrow version is lightweight and easy to style, while a wider one gives more coverage on cold days.
For a different finish, try shorter fringe or use a slightly thicker group of yarn strands. You can even leave the fringe off completely if you prefer a clean, simple edge.
If you want to make a matching winter set, use the same yarn to crochet a simple beanie or a pair of fingerless gloves.
Common Mistakes to Avoid
One common mistake is making the foundation chain too tight. This can cause the starting edge to pull inward and make the finished muffler look uneven. Keep your foundation stitches relaxed and comfortable.
Another mistake is missing stitches at the end of a row. Since the project involves many repeated rows, it is easy to overlook the last stitch. Count your stitches occasionally to make sure the width remains consistent.
Using the wrong hook size can also affect the result. A very small hook may create stiff fabric, while a very large hook can make the stitches too loose. Test your yarn with a small sample before beginning.
Finally, avoid attaching the fringe too close together or too far apart. Even spacing helps both ends look balanced and gives the muffler a neat finish.