How To Grow Moss: Easy Steps for a Lush Green Garden
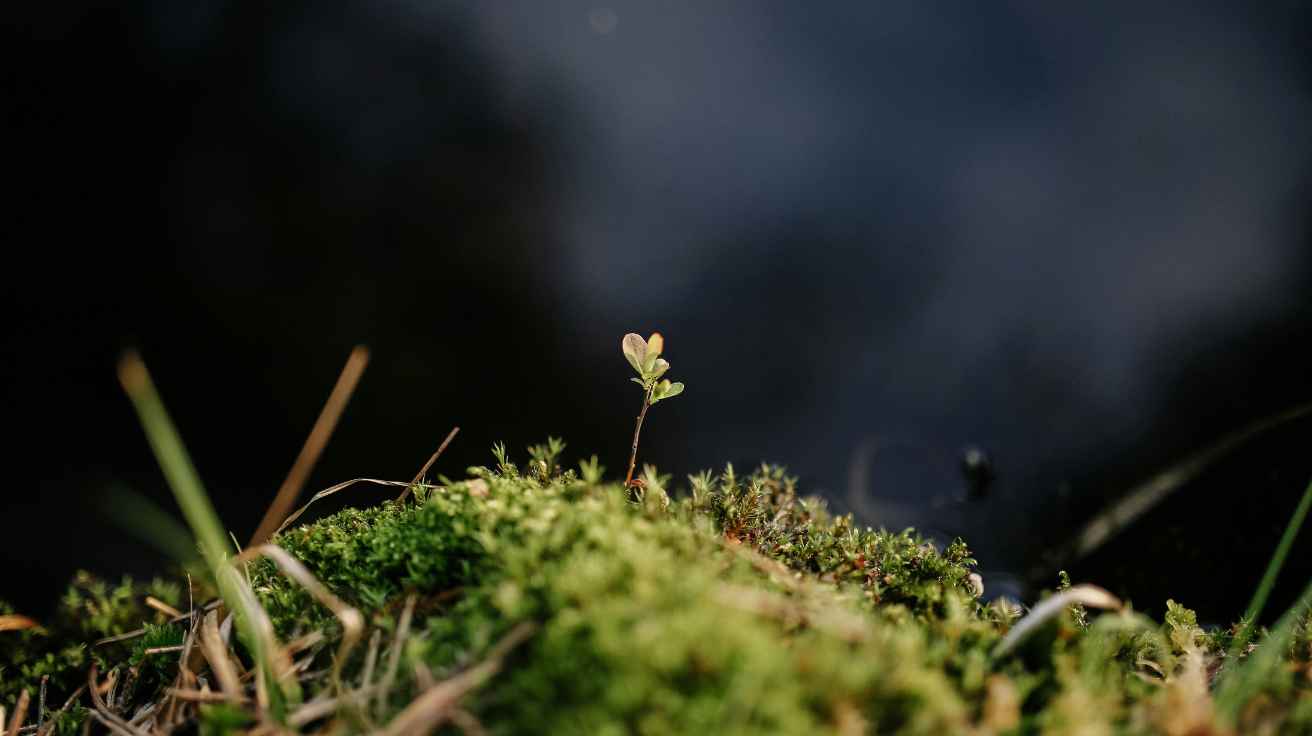
Creating a soft, velvet-like carpet in your backyard is a dream for many gardeners. Moss serves as a beautiful, low-growing ground cover that thrives in shady spots where grass often struggles. It brings a natural, serene aesthetic to any landscape, turning bare patches into vibrant, emerald retreats.
Unlike traditional plants, these tiny organisms absorb water directly through their leaves rather than relying on complex root systems. Because of this unique biology, success depends heavily on proper surface preparation, consistent humidity, and regular moisture. Understanding these specific needs is the secret to a thriving patch.
Learning how to grow moss is a rewarding project that transforms your outdoor space. Our comprehensive ten-step guide will walk you through every phase of the process. We cover everything from selecting the right species and preparing your site to planting, watering, and maintaining your new garden. Follow these simple instructions to enjoy a lush, green sanctuary all year long.
How To Grow Moss in the Right Garden Conditions
Creating a thriving moss garden begins with understanding the unique environmental needs of these ancient plants. Learning how to grow moss outdoors requires a shift in perspective, as these organisms prefer different environments than typical flowers or shrubs. By focusing on the right balance of light and hydration, you can transform bare patches into a lush, green landscape.
Choose a Shady or Partially Shaded Growing Site
Most landscape moss performs best in shade or filtered sunlight rather than hot, exposed locations. You should evaluate your yard to find spots that receive gentle morning light while avoiding the harsh intensity of the afternoon sun. Consistent moisture is the key to success, so look for areas that naturally retain humidity throughout the day.
Match Moss to Your USDA Hardiness Zone and Local Climate
The best conditions for moss often depend on your specific regional climate and USDA Hardiness Zone. While many varieties are quite hardy, some species prefer the cool, damp air of northern regions, while others tolerate the heat of the South. Researching native species in your area will help you select plants that are already adapted to your local rainfall patterns and temperature fluctuations.
Identify Areas Where Grass and Other Ground Covers Struggle
If you have parts of your yard where grass repeatedly thins beneath trees, you have found the perfect spot for a moss garden. These compacted, shaded slopes are often difficult for traditional shade-loving plants to colonize, but they provide an ideal foundation for moss. Embracing these challenging zones allows you to turn a maintenance headache into a beautiful, low-care feature of your garden.
Step 1: Select Moss Species for Your Landscape
Building a lush moss garden begins with picking the right varieties for your soil and climate. Taking the time to research different options ensures that your new greenery will thrive in its new home. By matching the plant to your environment, you create a sustainable and beautiful landscape.
Choose Native Moss When Possible
It is always a smart idea to choose native moss for your garden. These plants are already adapted to your local rainfall, temperature, and soil conditions. Using local varieties helps support the natural balance of your backyard ecosystem.
Compare Sheet Moss, Cushion Moss, Haircap Moss, and Fern Moss
When you look at different moss species, consider their unique textures and growth habits. Sheet moss creates a flat, carpet-like appearance that works well on soil or rocks. If you want a more textured look, cushion moss grows in tight, rounded mounds that add depth to your garden.
Haircap moss grows upright and resembles tiny pine trees, making it a great choice for taller ground cover. Fern moss features a delicate, feathery structure that spreads quickly across moist, shaded areas. Each of these types offers a distinct aesthetic for your outdoor space.
Decide Between Live Moss, Moss Plugs, and Moss Slurry
You have several options for how to install your new plants. Live sheets provide immediate, full coverage for larger areas. If you are working on a budget or want to fill in gaps, moss plugs are an excellent choice for spacing out your planting.
For those tricky spots like rock crevices or uneven surfaces, a moss slurry is often the best solution. This mixture allows you to paint the moss onto irregular textures where traditional planting methods might fail. You can choose the method that best fits your specific design goals.
Where to Source Moss Responsibly
Always purchase your plants from reputable nurseries that specialize in bryophytes. These growers ensure that their products are healthy and free from invasive pests. Buying from a nursery guarantees that you are getting high-quality material for your project.
Why Wild Collection Can Damage Natural Habitats
Removing moss from the wild can cause significant harm to local environments. Taking moss from forests or stream banks disturbs the soil surface and can lead to erosion. It also removes a vital part of the habitat that many small insects and organisms rely on for survival.
Step 2: Test and Prepare the Growing Surface
Creating the perfect foundation is the most important step for a thriving moss garden. You need a clean, firm surface to ensure the moss makes good contact and begins to grow. Taking the time to clear the area properly prevents future competition from unwanted plants.
Remove Weeds, Grass, Leaves, and Loose Debris
Start by clearing away all existing vegetation, including grass, weeds, and fallen leaves. Moss cannot compete with aggressive weeds, so you must remove them down to the root. Once the area is clear, gently rake the surface to remove any loose debris or small rocks that might prevent the moss from touching the soil.
Test Soil Moisture, Drainage, and Acidity
When you prepare soil for moss, focus primarily on moisture retention and drainage rather than specific chemical levels. While many people worry about soil acidity for moss, most varieties are quite adaptable to a wide range of conditions. Ensure the ground stays damp but does not hold standing water, as moss prefers a moist environment without being waterlogged.
Adjust Soil With Organic Matter or Horticultural Sand
If your soil is too sandy and dries out quickly, mix in some organic matter like compost to help it hold water. Conversely, if your soil is heavy clay, adding horticultural sand can improve drainage and texture. This simple adjustment creates a stable, inviting bed for your new moss to take root.
Preparing Soil for Moss Between Garden Beds
Clear the space between your garden beds by removing all mulch and weeds. Lightly dampen the soil to make it firm and level before you begin planting. This creates a smooth transition that allows the moss to spread naturally into the surrounding landscape.
Preparing Rocks, Bricks, Logs, and Concrete
Hard surfaces require a different approach to ensure the moss stays in place. Scrub rocks, bricks, or concrete with a stiff brush to remove dirt, moss, or lichen that might be loose. For logs or stumps, ensure the wood is firm and not rotting away, as a stable surface is essential for long-term growth.
Step 3: Create the Shade and Moisture Moss Needs
To help your moss thrive, you must focus on creating a microclimate that mimics its natural forest home. This involves balancing light levels while ensuring the soil stays damp but not waterlogged. Understanding these specific environmental factors is the key to long-term success.
Use Trees, Shade Cloth, or Taller Plants to Filter Sunlight
Moss generally prefers dappled light rather than deep, total darkness. You can achieve this by planting taller perennials or shrubs that cast soft shadows over your moss patch. If your garden lacks natural canopy cover, installing a light shade cloth is an effective way to filter intense rays.
Protect Moss From Hot Afternoon Exposure
The harsh afternoon sun is the primary enemy of a healthy moss garden. Intense heat can quickly scorch delicate fronds and evaporate essential surface water. Position your moss in areas that receive morning light but remain shielded during the hottest parts of the day.
Improve Humidity Without Creating Standing Water
Proper moss moisture requirements involve maintaining a humid environment without allowing water to pool. While moss loves dampness, stagnant water can lead to rot and decay. Ensure your site has excellent drainage so that excess moisture can move away from the moss surface.
Managing Moss Under Deciduous Trees
Growing moss under deciduous trees presents a unique seasonal challenge. During the summer, the dense canopy provides perfect shade, but the ground may become exposed once the leaves fall in autumn. You might need to supplement with temporary shade structures during the winter months to keep the area protected.
Preventing Drying From Wind and Nearby Structures
Wind can strip moisture from your moss patch faster than the sun, especially near walls or fences. These structures often create wind tunnels that dry out the soil surface. Consider adding a small windbreak or using a light misting system to maintain the necessary humidity levels for your moss.
Step 4: Plant Moss Plugs or Lay Moss Sheets
Planting moss is a rewarding process that turns bare patches into vibrant, living landscapes. When you decide to plant moss, the goal is to ensure the plant makes immediate contact with the surface to begin its growth cycle. This connection allows the moss to draw moisture and nutrients effectively from the ground.
Moisten the Site and Moss Before Planting
Before you begin, thoroughly dampen both the planting site and the moss itself. Hydrated moss is much more pliable and less likely to tear during handling. A moist surface also helps the moss establish a stronger bond with the soil or stone immediately upon placement.
Press Moss Firmly Against Soil or Hard Surfaces
Once you have positioned your moss, press it down firmly with your hands or a flat tool. This firm contact is essential because it eliminates air pockets that could cause the moss to dry out. By ensuring the underside of the moss touches the substrate, you encourage faster attachment and healthier growth.
Secure Moss on Slopes With Biodegradable Pins
If you are working on a slope, gravity can make it difficult for the moss to stay in place. Use biodegradable landscape pins to hold the sheets or plugs securely against the soil. These pins will eventually break down naturally as the moss roots into the ground and takes hold on its own.
Spacing Moss Pieces for Faster Coverage
You do not need to cover every inch of your garden at once when you plant moss. Placing plugs a few inches apart allows the moss to spread naturally over time. This method saves money while still providing a lush, finished look within a single growing season.
Planting Moss Around Stepping-Stone Paths
Moss is an excellent choice for filling the gaps between stepping stones. Simply tuck small pieces into the crevices and press them down to ensure they are level with the stone. This placement protects the moss from foot traffic while creating a beautiful, soft border for your garden paths.
Step 5: Make and Apply a Moss Slurry
Creating a moss slurry is a fantastic way to fill in those tricky, uneven spots in your garden. This technique allows you to spread moss across surfaces where traditional planting methods might fail. By turning your moss into a liquid-like mixture, you can encourage growth in areas that are otherwise difficult to cover.
Blend Live Moss With Water for Soil Application
To begin, gather clean, healthy moss and place it into a blender with a generous amount of water. Pulse the mixture until it reaches a smooth, spreadable consistency. This process breaks the moss into tiny fragments that will eventually grow into new colonies once they settle on your soil.

Use Buttermilk or Yogurt Carefully as a Binding Ingredient
Some gardeners choose to add a small amount of plain yogurt or buttermilk to their mixture to act as a binder. These dairy products can help the moss adhere better to vertical surfaces or rocks. However, use these ingredients sparingly to avoid unpleasant odors or attracting unwanted pests to your garden.
Excessive dairy can also encourage the growth of unwanted mold or bacteria. If you notice a strong smell or signs of decay, reduce the amount of dairy in your next batch. Often, water alone is sufficient to help the moss establish itself successfully.
Brush Slurry Into Rock Crevices, Logs, and Bare Soil
Once your mixture is ready, use an old paintbrush to apply it directly onto your target surfaces. Work the liquid deep into rock crevices, over the surface of logs, or across patches of bare soil. Ensure the surface is damp before application to help the moss take hold more quickly.
Keep the Mixture Thick Enough to Stay in Place
Consistency is key when applying your moss slurry. If the mixture is too thin, it will run off the surface before the moss has a chance to attach. Aim for a texture similar to a thick milkshake so it stays exactly where you paint it.
Clean Tools After Preparing the Slurry
Always wash your blender and brushes thoroughly immediately after you finish the job. Dried moss and dairy residue can be very difficult to remove once they harden. Keeping your tools clean ensures they remain in good condition for your next gardening project.
Step 6: Water Moss During the Establishment Period
Establishing a consistent moisture routine is vital for your moss to take root effectively. Understanding specific moss moisture requirements helps you create the perfect environment for growth without overwhelming the delicate plants.
Mist Moss Regularly During the First Several Weeks
During the initial weeks, your moss needs frequent, gentle hydration to settle into the soil. Use a fine mist setting on your hose or a spray bottle to dampen the surface thoroughly.
Avoid using a high-pressure stream of water, as this can easily dislodge loose pieces or wash away your hard work. Gentle misting keeps the foliage hydrated while the rhizoids begin to anchor into the substrate.
Water When the Surface Begins to Dry
There is no need for a rigid daily schedule, as drying times vary based on your local weather and shade levels. Instead, check the surface of your moss patch regularly to see if it feels dry to the touch.
If the moss appears light in color or feels crisp, it is time to provide more water. Monitoring the surface texture ensures you meet the necessary moss moisture requirements without overwatering.
Use Rainwater or Low-Mineral Water When Available
Moss is sensitive to the chemicals often found in treated tap water, such as chlorine or high mineral content. Whenever possible, collect rainwater in a barrel to use for your garden.
If rainwater is not an option, distilled or filtered water is a great alternative. These cleaner water sources prevent mineral buildup that can sometimes discolor or stress your moss.
Adjust Watering During Hot, Dry Weather
High temperatures and low humidity will cause your moss to dry out much faster than usual. During these periods, you may need to mist your garden multiple times throughout the day to keep it healthy.
Pay close attention to areas with more sun exposure, as these spots will lose moisture rapidly. Consistent care during heat waves is essential for maintaining your moss moisture requirements.
Recognize the Difference Between Moisture and Saturation
While moss loves humidity, it does not like to sit in standing water or waterlogged soil. Your goal is to keep the moss feeling damp and refreshed, not submerged in a swampy mess.
Proper drainage is just as important as watering. If you notice water pooling on the surface, reduce your watering frequency to allow the soil to breathe.
Step 7: Protect Newly Planted Moss From Disturbance
Newly installed moss is quite fragile and needs a period of undisturbed growth to thrive. Because it lacks a deep root system, it must establish a firm physical connection with the soil or hardscape surface. Any movement during this time can prevent the moss garden from taking hold effectively.
Keep Foot Traffic Away Until Moss Attaches
You should restrict access to the area while the moss settles into its new home. Even light footsteps can shift the moss or create air pockets that dry out the underside. Keep pets and children away from the site until the moss feels firmly anchored to the ground.
Shield Moss From Raking, Blowing Leaves, and Heavy Mulch
Avoid using heavy rakes or leaf blowers near your developing patch. These tools can easily tear the moss or lift it away from the surface. Furthermore, avoid applying heavy mulch, as it may smother the moss and prevent it from receiving the light and moisture it requires.
Prevent Pets and Garden Equipment From Pulling Up Moss
Garden equipment like lawn mowers or hoses can cause significant damage if dragged across the area. Ensure that your maintenance routine avoids these delicate zones entirely. Consistent care during these first few weeks will pay off as your moss garden matures.
Mark Moss Areas With Low Garden Edging
Installing low garden edging helps define the boundaries of your planting. This visual cue reminds everyone to step carefully around the area. Choose materials that blend naturally with your landscape design.
Use Temporary Barriers Without Blocking Airflow
If you need extra protection, consider using small, temporary stakes or decorative wire fencing. These barriers keep traffic out while allowing plenty of air to circulate. Proper airflow is vital for preventing mold and keeping your moss healthy.
Step 8: Maintain a Healthy Moss Garden Through the Seasons
Seasonal maintenance is the secret to a thriving, lush moss landscape. By staying proactive with your moss care, you ensure that your garden remains a vibrant green sanctuary year-round. Consistent observation allows you to address minor issues before they become significant problems.
Remove Fallen Leaves Gently in Autumn
Autumn brings a blanket of leaves that can smother your delicate moss. Use a soft leaf blower on a low setting or a gentle rake to clear debris without disturbing the moss surface. Keeping the area clean prevents rot and allows the moss to breathe during the cooler months.

Refresh Moisture During Summer Heat
Summer heat can be challenging for moisture-loving plants. During dry spells, provide supplemental water to keep the moss hydrated and lush. Proper moss care during these hot months prevents the plants from turning brown or going dormant prematurely.
Inspect Moss for Bare Spots After Winter
Winter weather often causes shifting or minor damage to established patches. Once the spring thaw arrives, take time to inspect your garden for any bare spots. You can easily patch these areas by pressing new moss fragments firmly into the soil to encourage regrowth.
Fertilizer Practices That Prevent Moss Damage
Moss generally does not require traditional lawn fertilizers to thrive. In fact, adding nutrient-rich products often encourages unwanted weeds or algae that compete with your moss. It is best to avoid these chemicals entirely to maintain a healthy, balanced environment.
Keeping Moss Green Without Overwatering
Maintaining a deep green color relies on consistent moisture rather than heavy saturation. Overwatering can lead to poor drainage and surface issues that harm the health of your garden. Always check the soil moisture levels before adding more water to ensure the perfect balance for your moss.
Step 9: Grow Moss on Soil, Stone, Wood, and Containers
Moss is a remarkably versatile plant that adapts to many different textures in your landscape. While many gardeners start by learning how to grow moss on soil, this resilient plant can also thrive on stone, wood, and even in small containers. As long as the surface remains damp and undisturbed, you can create a lush, green carpet across your entire outdoor space.
Encourage Moss Between Pavers and Along Pathways
Filling the gaps between stone pavers with moss creates a soft, natural look for your garden walkways. To succeed, ensure the gaps are deep enough to hold moisture and provide a protected home for the moss. Keep the surface stable by pressing the moss firmly into the crevices so it stays level with the surrounding stones.
Cover Garden Rocks and Retaining Walls
You can easily grow moss on rocks to add an aged, woodland aesthetic to your garden features. Simply clean the stone surface and apply a thin layer of moss slurry or small patches of live moss. Keep these areas consistently misted, especially during the first few weeks, to help the moss bond with the porous stone surface.
Establish Moss on Logs, Tree Roots, and Shaded Stumps
Decaying wood provides an excellent, nutrient-rich base for many moss species. Place moss directly onto damp logs or tree roots, securing it with twine if necessary until it takes hold. These organic surfaces hold water well, making them ideal spots for moss to spread naturally over time.
Growing Moss in Containers and Terrariums
Containers allow you to enjoy a miniature moss garden on a patio or indoors. Use a shallow pot with good drainage and a high-quality, acidic potting mix to keep the environment stable. Maintain high humidity by covering the container with glass or misting it daily to ensure your moss stays vibrant and healthy.
Step 10: Solve Common Moss-Growing Problems
Even the most dedicated gardeners occasionally face challenges when cultivating a lush carpet of moss. While these plants are generally low-maintenance, you may encounter specific moss problems that require a quick intervention. Understanding the root cause is the first step toward restoring your garden’s health.
Revive Moss That Has Turned Brown or Brittle
If you notice brown moss, it is often a sign of dehydration or excessive sun exposure. Check if the soil has dried out completely or if the area is receiving too much direct afternoon light. Sometimes, moss simply enters a dormant state during extreme weather, so ensure it receives consistent moisture before assuming it has died.
Stop Weeds From Overtaking a Moss Patch
Weeds can quickly compete with moss for nutrients and space. The best way to manage them is to pull them by hand as soon as they appear. Be careful to remove the entire root system to prevent them from growing back and disturbing your moss colony.
Address Mold, Algae, Erosion, and Poor Drainage
Mold and algae often thrive in areas with stagnant water or poor airflow. You can improve these conditions by gently clearing debris and ensuring the site has proper drainage. If erosion is washing your moss away, consider adding small stones or logs to stabilize the soil surface.
What to Do When Moss Will Not Attach
If your moss refuses to anchor to the surface, the contact between the plant and the ground is likely insufficient. Ensure the soil is firm and slightly moist before pressing the moss down again. You might also need to clear away loose dust or debris that prevents the rhizoids from gripping the substrate.
When to Replant Instead of Trying to Repair
Sometimes, repeated failures indicate that the specific location is simply not suitable for the species you chose. If you have tried adjusting the moisture and light levels without success, it is time to consider a different spot. Replanting with a more resilient variety can often turn a struggling patch into a thriving green landscape.
Enjoy a Lush Moss Garden With Simple Ongoing Care
Creating a vibrant landscape requires patience and a watchful eye. Your new moss garden will thrive when you provide the right species, a clean surface, and consistent moisture.
Success relies on filtered shade and protection from heavy foot traffic. These elements work together to build a resilient, lush green garden that improves over time.
Nature moves at its own pace during the establishment phase. You might notice small changes as the seasons shift and sunlight patterns evolve across your yard.
Keep a close watch on your moss garden throughout the year. Gentle maintenance prevents weeds from taking hold and keeps the surface healthy.
Address dry spots or debris buildup quickly to maintain your lush green garden. Small, regular efforts ensure your ground cover remains a soft, inviting feature of your outdoor space.