How to Make a Stunning Crochet Prom Dress
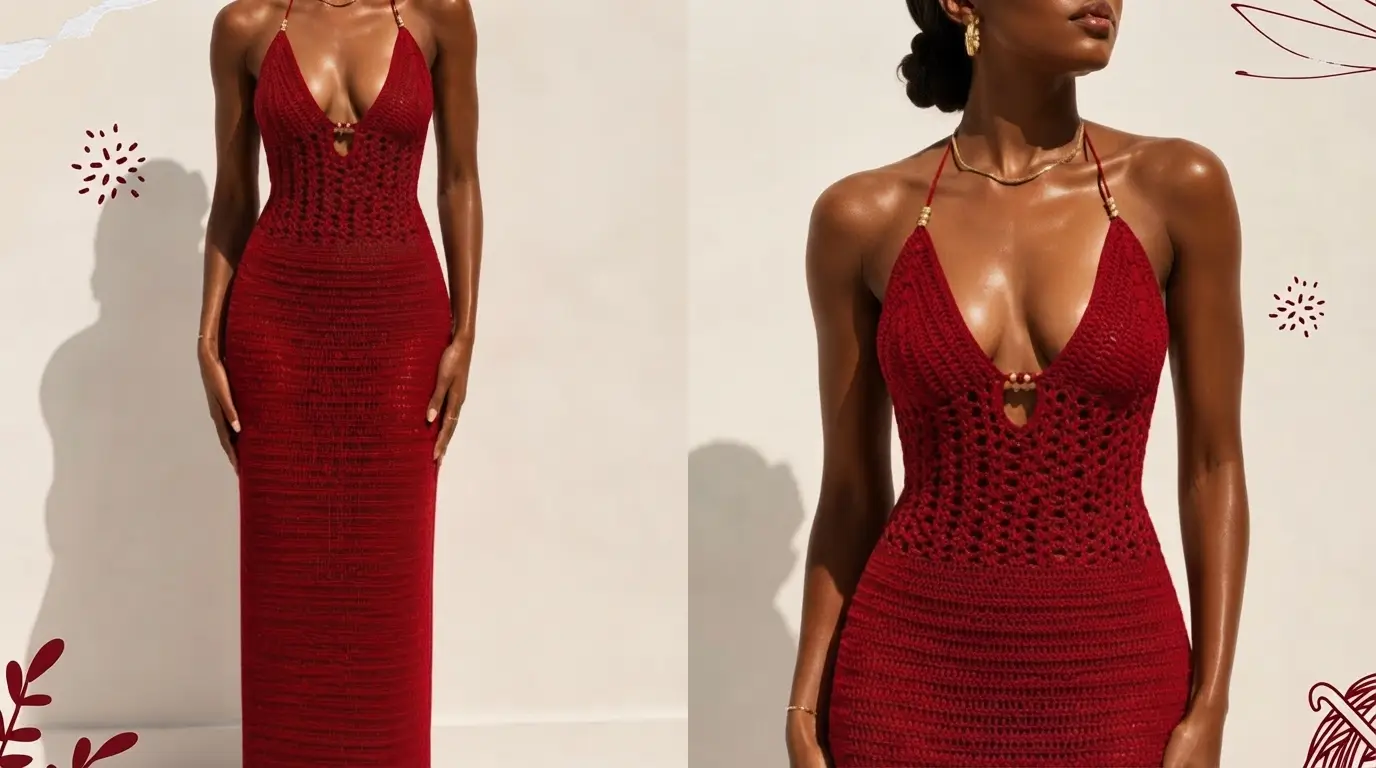
Crafting your own crochet prom dress allows you to create a completely custom, show-stopping gown. This floor-length dress features a deep V-neckline with beaded accents, an airy open-work waist section, and a sleek, fitted skirt that creates an elegant formal look.
Materials You Need
To start making this formal dress, choosing the right supplies is essential. Lightweight yarn works best for this project so the long skirt stays light and does not drag down. Double up lightweight strands to get the right thickness without adding extra weight.
You will need a 3.0 mm crochet hook to keep the stitches tight and secure. Keep a measuring tape nearby because custom measurements make or break the fit of a formal dress. Gather stitch markers to keep track of key points, a darning needle for finishing work, and scissors. You will also need decorative accent beads to add that special formal touch to the center bust line and halter straps.
Crafting the Fitted Bust Cups
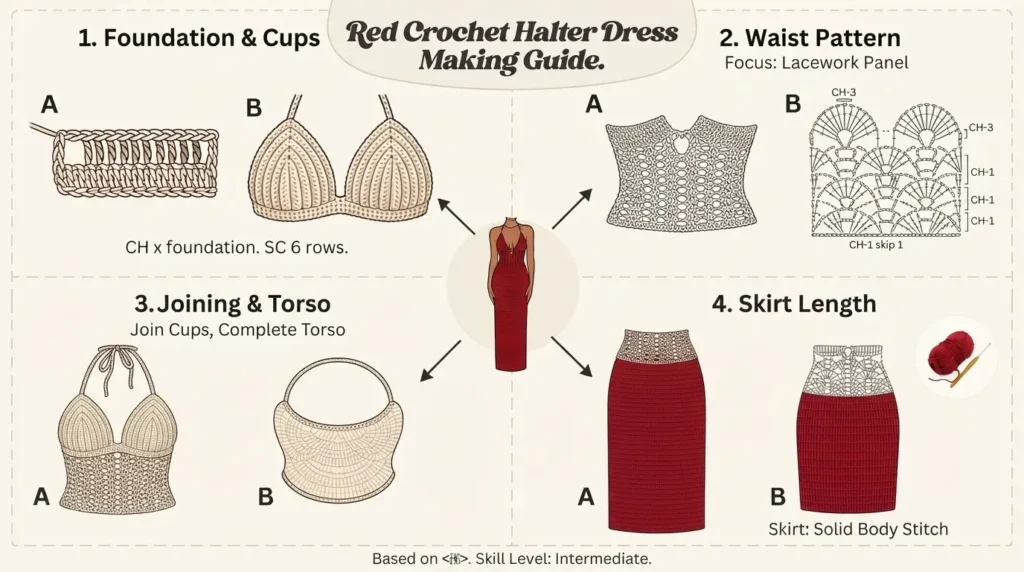
The top of the gown starts with two custom-fitted bralette cups. Take your underbust measurement using a measuring tape and divide it by four. Make a starting chain that equals the length from your nipple down to your underbust.
Work double crochet stitches along the chain. When you reach the top end stitch, place five double crochets in the exact same space to create a smooth turn for the cup point. Place stitch markers in the middle stitch of that five-stitch turn so you do not lose your spot. Work double crochets back down the other side of the chain so both sides stay completely balanced.
For the following rows, turn your work and double crochet up the sides. In the middle point of each top turn, work two double crochets, chain two, and two double crochets all into the same space. Repeat this pattern until the bottom base of your cup reaches your target measurement.
Joining Cups with Decorative Beading
To create the unique front keyhole detail, join the two cups using decorative beads. Complete a final row of half double crochet across your first cup to keep the top edge smooth without adding too much extra height.
Before finishing the join, cut your yarn strand with extra length and string your decorative beads onto the working loop using your crochet hook. Slide the beads close to the center gap, then chain three across to secure them into place. Join this beaded chain directly to the matching edge of the second cup with a half double crochet. This secures both cups together while adding a striking jewel detail right at the center chest.
Working the Midriff Shell Pattern
The midsection of the dress transitions into a breezy, textured shell pattern that highlights the waist. Calculate the remaining distance needed around your back for the lacing ties. Subtract this space from your overall waist size to figure out how many side extension chains you need.
Chain in multiples of four plus seven extra stitches to foundation the pattern correctly. The shell pattern uses two double crochets, chain one, and two double crochets worked into the same chain space. Skip three stitches between each shell group, placing a chain one in between so your work stays flat and neat.
When passing beneath the front bust area, let the stitches drape naturally to create a delicate front plunge. As you work back and forth in rows, place each new shell directly inside the chain-one space of the shell from the row below. This creates a soft, lacelike mesh look around your waistline.
Constructing the Long Skirt
Once the midriff section reaches your desired waist length, transition into the long skirt. The skirt uses dense double crochet stitches to offer full coverage while maintaining a form-fitting silhouette down to the floor.
Work in continuous or joined rounds depending on how seamless you want the back join to look. Maintain consistent stitch counts across every round so the dress hugs the hips before falling straight down to the ankles. Continue adding rounds until the dress reaches your exact floor length.
Fitting and Assembly Tips
Always check your tension while working with lightweight yarn. Because yarn naturally stretches under its own weight, try on the piece repeatedly against your body as you build the skirt length. If your yarn feels slightly too stretchy, work your midriff section half an inch smaller than your exact measurements so the dress stays snug when worn.
When threading beads onto your yarn, make sure your hook size fits through the center hole of the bead easily. If you struggle to thread two strands at once, fold a small piece of thin wire over the yarn to act as a temporary needle guide.
To keep your edges neat, weave in your yarn ends as you work instead of leaving them all for the end. When connecting new yarn balls, use strong knotting techniques or invisible joins so your seams do not loosen under tension while you move or dance.
Final Touches and Styling
Finish the top of the dress by attaching long, sturdy crochet chains to the cup points to create halter neck ties. You can thread additional matching beads onto these top straps for extra sparkle.
For the back closure, construct a long corset cord by chaining a sturdy strand of yarn. Thread this cord through the side edges of the back opening in a crisscross pattern. This corset-style back allows you to pull the top perfectly snug to your body. Pair this handmade dress with simple jewelry to let your handiwork shine.